Is It Safe to Hike Alone?

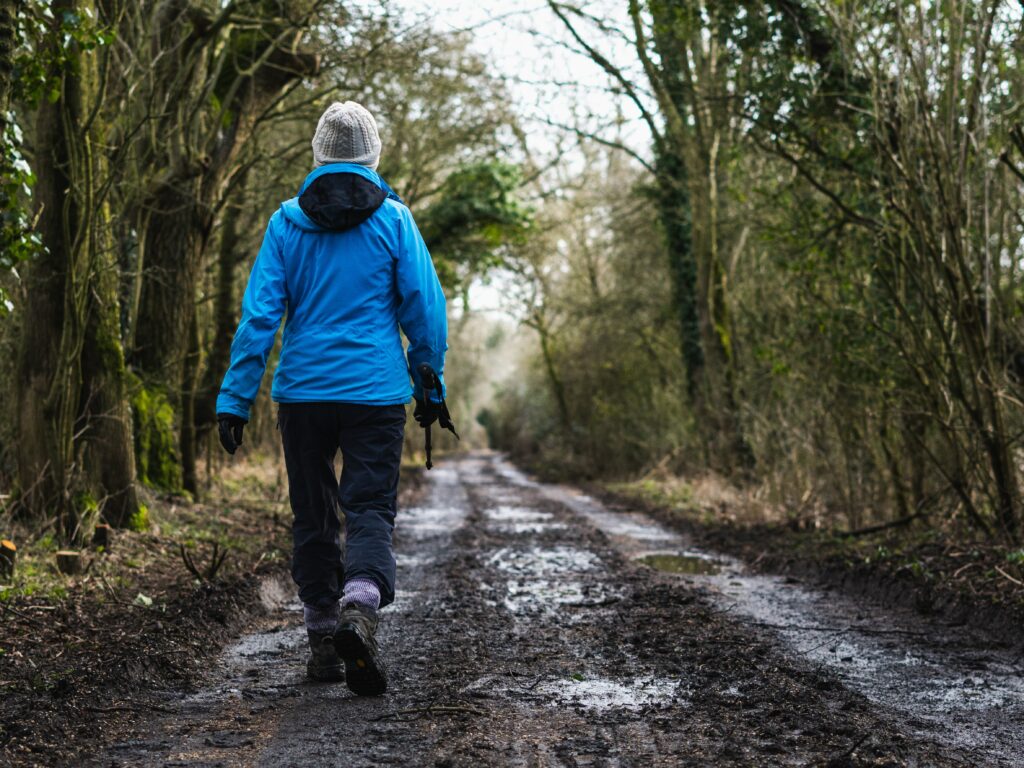
We’ve all been there – maybe you’re new in town or have found yourself with an empty weekend and have no one to explore with, or perhaps your schedule just can’t line up with your friends’. But regardless of the reason, this may beg the question, is it safe to hike alone? The answer is yes! Being solo certainly does not need to end your adventure before it begins.

If you are someone with an unusual work schedule, who travels often, or are looking to get outside on your own schedule, hiking alone can be a freeing experience if you do it safely.

Like most new endeavors, hiking alone can seem intimidating; however, with the proper preparation and knowledge, hiking solo is safe and empowering. To help you mitigate and control the potential safety risks, see the below tips to keep you safe while getting started on your solo journey!

Photo by Julien Flutto on Unsplash

1: Start Small

While hiking alone is often depicted through the stories of lengthy endeavors or epic circumstances, hiking alone can be what you make it! Your first hike (and any hikes after that) does not have to be far, extreme, or to unknown places. 

To get used to hiking alone, picking a trail close to home, one you’ve been on before, or one you have walked with a friend first can be helpful. You may also want to consider going on a guided hike in a new area to get a feel for the terrain and to learn a few things from your experienced guide.

Once you’re comfortable, consider hiking on a new to you, well-established,  and populated trail. Some popular trails have maps at intersections (but always bring your own!), and there is often comfort in seeing others around. From here, the possibilities to increase your adventure and push your comfort zone are endless.

2: Know Your Trail

One of the most important aspects of hiking alone is researching your route. The depth of this research may vary depending on the types and lengths of trails you choose. No matter the trail, be sure to note the general direction you will be traveling, the length of the route, possible exits, turnaround options, the type of terrain you’ll encounter, and important features or landmarks such as rivers, intersecting trails, and more. 

Part of knowing your trail is also knowing what you may encounter. This may include wildlife, flora and fauna, exposure, closures, and more. When it comes to wildlife, be sure to inform yourself about the various animals and how to respond if you encounter them. For example, hiking in areas with Grizzy Bears usually means you will need to carry bear spray and know how to use it. Some areas may also have seasonal closures due to conditions, wildlife breeding/nesting patterns, or areas to avoid to due to damage or erosion. No matter the reason, check online, at state park offices, or wherever is needed to get the information you need to prepare for what’s ahead.

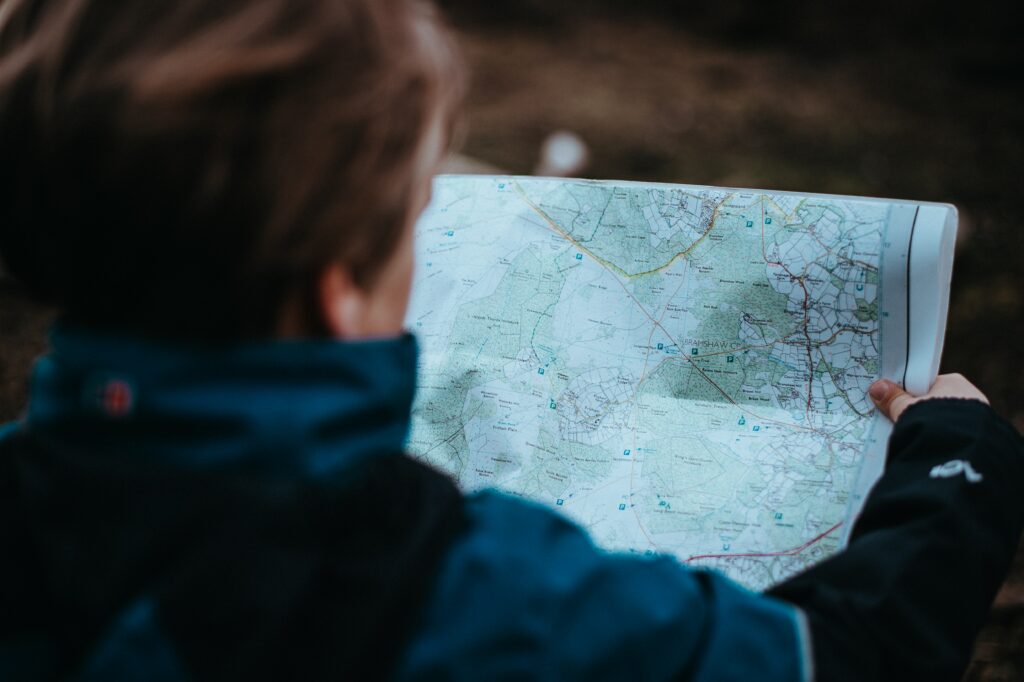
3: Carry a Navigation Tool

Some trails have maps for users at the trailhead entrance; some have occasional maps throughout the trail system. However, many trails have no markers or directions for where you are or where the trail goes. Consider using a paper map with a compass, a GPS device, or other technology to navigate as needed. 


There are many tools available online and via phone applications to help with navigation. Some common resources include Gaia GPS, All Trails, or Hiking Project. If you like gadgets, many smartwatches now offer GPS maps and safety features that allow you to retrace your steps to your starting location. Other options (especially for hikers who venture into more remote territory) worth exploring are handheld GPS devices, satellite phones, and other safety gadgets such as the ones offered by Garmin.

Photo by Annie Spratt on Unsplash

4: Tell Someone Where You’re Going

Sometimes in life, things don’t go as planned, no matter how much you prepare. Therefore, it is imperative that you tell a close, trusted, and available friend or family member about your plan. Be sure to tell them which trail you will be on, the intended direction and length of travel, as well as the approximate time you should return home and contact them. 

The goal, of course, is that this is a backup and never needed. It may seem simple; however, this easy step in planning may just be the one thing that saves your life or gets you the help you need if the unexpected happens.

5: Carry The 10 Essentials

The 10 essentials are made up of various emergency and first aid items. They include navigation items (discussed above), sun protection, insulation and clothing layers, illumination, first aid supplies, fire-starting equipment, repair kit and tools, food/nutrition, hydration, and emergency shelter. 

These are items that, if you need them, you do not want to be caught without them! These items make all the difference when it comes to the safety of hiking alone. Hiking has potential risks, but many of these risks can be mitigated and prepared for with the above items. The degree to which you carry some of these items may vary based on a number of factors specific to your hike, so again, do your research.

6: Know The Weather 

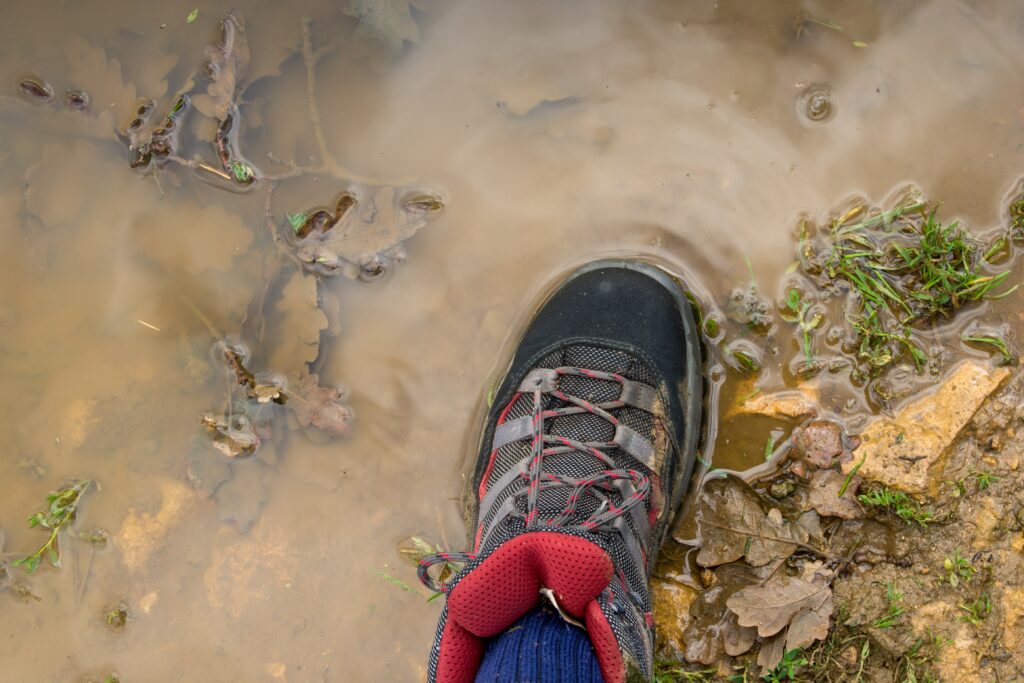
When you are outside, mother nature is in control. Be sure to look up the weather patterns for the area you are hiking. Of course, be sure to look at the weather forecast for the day you plan to hike, but also consider the weather patterns of the previous days to get a better picture of the trail conditions. For example, a week’s worth of rain before your trip may mean muddy conditions and partially flooded trails.

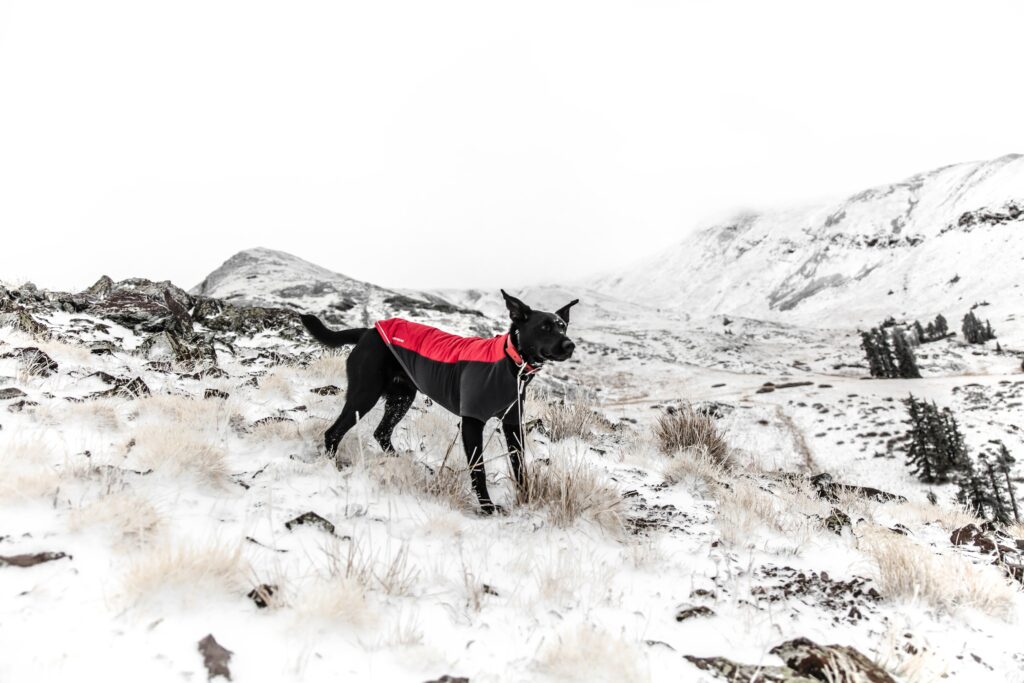
Additionally, mountains can have unique weather patterns such as afternoon storms in the summer, snow, changes in cloud cover, or wind. Therefore, the weather can vary dramatically at different elevations, and it may be challenging to get an accurate forecast. For example, if you are going up to hike at elevation, the forecast and weather patterns may be different up high than from a town or city below. If you plan to hike in the winter or at elevation where there can be winter conditions, be sure to check out Broadmoor’s tips for safely hiking in the winter

Photo by Davide Sacchet on Unsplash

7: Know Your Limits 

 Everyone has different abilities. This spectrum of capabilities can vary from outdoor knowledge, fitness, weather, or time limits. You may want to ask yourself: what am I hoping to get out of this hike? Have I done a comparable hike before? Is this within my knowledge or fitness abilities? Is this within my risk tolerance (distance, technical difficulty, conditions, exposure/ hights)?

A fun aspect of hiking for many people is pushing your own limits. But remember, doing this a little bit at a time is okay. Don’t overwhelm yourself or put yourself at risk by getting too far out of your limits. Trust what feels right to you both before and during your hike, and make sure to listen to your body. Make hiking alone an activity you can return to, love, and enjoy. 

So, is it safe to hike alone? Yes. And by keeping the tips above in mind, hiking alone can be a safe activity and may just open up a whole new world of possibilities.

Are Trekking Poles Worth It?

Are trekking poles worth it? As a hiking guide, I’m asked this question hundreds of times every single season I’m in the backcountry. It could be guests asking me before a trip if they should have hiking poles or strangers I meet on the trail who see that I’m a guide and want my opinion on the matter. But no matter the circumstances of the question or who is asking it, there is rarely a straightforward yes or no answer. There are several distinct pros and cons worth discussing to help you decide if trekking poles are worth it.

Therefore, let’s take a moment to go over these pros and cons to see where hiking poles shine on the trail and where they might be a hindrance, and I’ll finish with my own recommendation on the issue. Then, you should have all the information you need to decide if a new pair of hiking poles will make an appearance on your next hike, be it a guided hike in Colorado Springs or on your own.

Trekking Pole Benefits

Increased Stability

Trekking poles dramatically increase your overall stability on the trail. Uneven terrain, fatigue, and sneaky tree roots can all play a role in compromising your stability and cause you to lose your balance or even take a tumble while hiking. Trekking poles, however, can dramatically improve your overall stability by increasing the number of contact points you have on the ground from two – just your feet – to four. You can also use those two additional contact points to test water/snow depth, untrustworthy-looking rocks, or mud you might encounter on the trail. In fact, trekking poles are one of our “must-have” recommendations on our list of tips for hiking in muddy terrain.

By doubling your contact with the ground, hiking poles make it much easier to avoid losing your balance, and to recover more quickly if you do.

Support

In addition to upping your stability on the trail, trekking poles also offer the crucial benefit of providing support for your knees and hips. When used properly, they can transfer some of the burden of hiking to your arms and shoulders – allowing you to hike harder and farther without letting achy knees hold you back.

The benefit is especially pronounced when going downhill. The jarring impact of hiking down a steep trail – especially with a fully loaded backpack – can trash your knees in no time. But distributing part of that load to your arms can make a world of difference in your hiking experience. Let’s take a closer look at how your arms can suddenly play a larger role in your hiking.

Photo by Nilotpal Kalita on Unsplash

Let Your Arms Do Some Work

Your legs are working endlessly as you hike, but having your trekking polls in hand allows you to push down on the ground with your arms to propel yourself forward or upward (or lessen the impact of going downward). Therefore, you’re suddenly able to use your arm muscles to improve your forward movement and shepherd in the support we discussed earlier by taking some pressure off your knees and hips.

While your arms can absorb and mitigate that shock of going downhill – thus saving your knees – they can also fully join the hiking effort when going uphill. In this case, using trekking poles and your arms to push down on the ground will help you get a small but noticeable amount of power pushing you upward. Over the long run, during a strenuous or prolonged climb, this assistance can play a prominent role in your hiking endurance. You’ll also get an arm workout during what is predominantly a leg-only activity.

Trekking Pole Downsides

Now that we’ve covered the benefits, we must balance that information by including a few drawbacks that influence the question: are trekking poles worth it?

Additional Weight and Bulk

A common downside to trekking poles is that they add more bulk and yet another piece of gear to your hiking equipment. Hiking is already a gear-heavy enterprise, and adding even more to the mix can be hard to justify. Specifically, trekking poles need to be stashed in or on your pack when you’re not using them. In this scenario, they’re simply more weight you’re toting around and taking up valuable space in your pack.

Next, wielding trekking poles effectively has a learning curve, and they may feel like a handful when you first start using them. Let’s take a look at this drawback next.

They Can Be a Handful

For many hikers, the thought of no longer having your hands free and available for drinking, bracing on rocks, or adjusting your pack is borderline repulsive. Suddenly acclimating to having your hands engaged during your entire activity can feel strange and alien – and many people avoid using trekking poles for this reason.

This downside becomes especially pronounced on narrow or overgrown trails.

Increased Snag Risk

Using poles for balance and support on the trail may work like a charm on open terrain, but it can become a different story in overgrown areas. Thick shrubbery, bushes, and narrow trails are all a recipe for snagged trekking poles, which can quickly turn them into a hindrance. Very rocky terrain also holds the same dangers. Here, gaps between boulders or smaller rocks are the perfect trekking pole traps.

In all these cases, a snagged trekking pole can be anything from a minor annoyance to a more severe obstacle that upsets your balance.

As with many of our trekking pole downsides, this issue can be mitigated with experience and practice. But once again, that learning curve comes into play, and many hikers decide that trekking poles are not worth this effort.

My Recommendation

After years of working as a hiking and backpacking guide and seeing the full range of hikers, from trekking pole lovers to ardent refusers, I’ve developed the opinion that just about everyone can benefit from a hiking pole or two in most situations.

For the longest time, I was also highly skeptical of trekking poles even when I was carrying ridiculous pack loads as a guide. But a season in the famously rugged White Mountains of New Hampshire shattered that prejudice, and I now fully appreciate that the benefits of trekking poles far outweigh the downsides for the vast majority of circumstances. I now tell my guests, and about everyone who asks, that you can’t go wrong with at least one trekking pole.

A single pole bridges the divide between pros and cons where you still benefit from increased stability and support while mitigating the downsides by still having one hand free and not trying to learn how to wield two new hiking instruments at the same time. Once you’re comfortable with just one trekking pole, perhaps that’s the perfect balance for you or perhaps you’ll take the next step and use a pair. My recommendation here grows dramatically if you tend to suffer from sore knees or poor balance with hiking – you’ll be amazed by the added support! So, for many folks on the fence about trekking poles – just try one.

That said, there are certain situations where trekking poles may not be worth it. Bushwacking – hiking in dense vegetation off-trail – is a perfect example where hiking poles have the potential the get snagged and become a hindrance. Or if you’re a super lightweight hiker and can’t justify adding additional weight to your gear list.

Final Thoughts

So in the end, think about where you’re hiking and if trekking poles have a chance of making that hike easier. If the answer is yes, then I wholeheartedly recommend that you take the plunge and give them a try. If you’re hesitant, then just try a single pole to test the waters and find out if trekking poles are worth it to you. All you need to do now is find a trail, and our favorite hikes near Colorado Springs are a great place to start.

Happy hiking!

Tips for Hiking on Muddy Terrain

Spring hiking in Colorado Springs, or just about anywhere in Colorado, is synonymous with mud hiking. Many of us ask the question, can you hike in the mud? The answer is a resounding yes, but there are a lot of particular tips for hiking in the mud that comes in handy to help any user get the most out of their time on the trail. 

Just because the trails are muddy doesn’t mean you have to stay at home and settle into couch life. Getting out is entirely possible! Learning how to manage mud season takes some adjustment time, but it gives you a whole new world of places to hike in the springtime. Mud season isn’t going to stop showing up, so it’s time to adapt. 

Photo by Caspar Rae on Unsplash

Pick the right trail

The best move for hiking in the mud is to do a hefty amount of research and preparation. Some trails will stay wamps throughout mud season, and others may be in better condition than others. If you pick the right trail, you may not even encounter much mud on the hike. 

To pick the right trail, head online and look into certain trail conditions. Some trails will be better positioned to drain quicker or dry out faster from the sun. South-facing trails, for example, get a huge amount of sun and will be much more likely to provide a solid, less muddy, trail surface. 

The internet is another great resource for discovering trail conditions in the spring. Many hikers head out and report back to different social media groups, where they will describe what the trail looks like throughout the season. You’ll likely find others have gone out and checked before you have even considered going out, so use the information they’ve provided to save yourself some time. 

Head out early

As the temperatures rise, ice turns to mud. If you can, getting out on the trails earlier in the morning means that the mud is likely to be a bit more firm and stable to hike on. Further on in the day, you’ll find yourself trekking through deeper and softer mud. 

Heading out early also gives you a jump on the crowds of people that are all trying to get outside after a long winter. Trails tend to deteriorate throughout the day as use increases. If you get out early, you’ll find the trail in the most pristine condition that it will be on that day.

Choose to get muddy

One of the best, but hardest to follow, tips for hiking in mud is to “make the trail deeper, not wider.” This concept generally means hiking straight through the mud rather than trying to walk around it off of the trail. While this is best for the trail, it’s hard to commit to getting yourself covered in mud that can often come up and over your boots. 

Taking care of trails often means not putting yourself first. In mud season, it means accepting the mud and owning it. You’re most likely going to get muddy anyway, so commit and get really muddy. Bring some plastic bags that you can throw your boots into when you’re finished with the hike, and the car upholstery will be grateful. 

Since getting muddy is just about the only option on the menu, it’s good to learn how to clean hiking boots well. Hiking in mud season means cleaning boots more often; otherwise, the mud will work its way deep into the boots and potentially ruin them. It’s a simple process but takes a bit of time to do once the hike is over. 

Protect your feet

Cleaning your boots is one way of protecting your feet in the long term. It’s equally important to prepare for the hike, as it is to prepare for cleaning up after the hike. 

Mud is likely going to make its way to your feet. Even the most waterproof boots can struggle up against some seriously thick mud, so you need to be prepared for the likelihood of getting wet feet. In mud season, it’s necessary to bring along a couple of extra pairs of socks to throw on throughout the hike or at the end and an extra pair of clean shoes to drive home in.

If the trail is completely obliterated and covered in soupy mud, bringing boot liners is a good option for protection. Boot liners are simply plastic bags that go between your boots and socks as a completely waterproof barrier. They aren’t comfortable, but they’re effective. 

Wet feet can be more than uncomfortable; they can be dangerous and painful if they stay wet long enough. Go prepared and knowledgeable about what to do when your feet get wet on the trail or at least have a quick exit to the car. 

Bring the right gear

On top of simple plastic bags, a couple of other pieces of gear will help make hiking in the mud more accessible. 

For starters, gaiters are a great addition to hiking in the mud and are perfect for spring hiking in Colorado Springs, as you may encounter some snow along the way. Gaiters are like sleeves for your ankles that strap over your boots and fasten around your calf. They function to keep anything from getting inside your boots, even when you get above the top of the boot. 

Gaiters will help you to keep anything from getting inside your boots, but they won’t help you when the mud makes you slide around like walking on ice. This is where a solid set of trekking poles comes in handy. 

Bringing trekking poles will give you a better sense of balance in the mud. You can take great care without them, but the moment your feet slip, you’ll look like a frosted chocolate cake rather than a happy hiker. Trekking poles add more contact points with the ground and improve your balance. 

Hiking with your Dog in the Winter

Leaving your dog at home isn’t a real option for most of us. You may tell others that your dog doesn’t do well away from you, but the truth is always that you don’t do well away from the pup. Regardless of the reasoning, hiking with your dog in the winter is an enjoyable experience for everyone involved. 

Winter hiking can be strenuous for seasoned hikers all around the world. Some are more accustomed to it, while others are better adjusted for tropical climates. The fact holds true when we start talking about your furry best friend as well. Certain dogs love the snow, while some won’t even leave the house and brave the cold. 

This quick guide serves to help first-time snow pups become lovers of the cold rather than learn to fear it. Soon enough, your dog will be crying to get outside when the flakes start falling. 

Paw protection

Before all else, your dog is going to feel the cold in its paws. Even with years of rough roads to toughen up their pads, the snow can be detrimental to a dog’s winter hiking experience. 

Many dogs that aren’t accustomed to winter will get snow trapped in between their toes, causing them to stop and try to remove it quite often. It’s a difficult thing to work with and is much better to prevent before having to pick snow out of their paws every ten minutes. 

One of the best ways to protect paws is to try on booties. A lot of different companies make booties, but they all fit differently. Remember that your dog’s front and back paws might be different sizes, so some booties only come in pairs.

There are other options for the dogs who rip the booties off immediately or have the kind of paws that booties fall straight off. In the North, the most popular solution amongst sled dogs is a salve called Musher’s Secret. Although it isn’t much of a secret anymore, it’s the perfect layer that protects snow from building up and damaging paws. 

Bundle them up

Malamutes and Huskies are well-equipped with a thick fur coats to keep them toasty all winter long. Even your Golden Retriever or Australian Shepherd might have enough hair to get them through more mild winters. If you’ve fallen for a short-haired pup, it might not be long before you see them shivering and trying to cozy up next to you. 

Many dogs love to be swaddled in a warm winter jacket that adds another layer of protection from the elements and helps trap the heat they produce while running around. In winter, hiking with your dog isn’t about making a big fashion statement, but it may require adding to your dog’s wardrobe.

Higher caloric intake

When people start asking, “is it safe to hike in winter?” they inevitably find an article that talks about eating. Food is the body’s main fuel source to produce heat, and the same goes for your dog. 

So, before you head out onto the trail, give your pup a few extra handfuls or scoops of their kibble. It can make a huge difference in helping to keep them warm and energized for a longer hike.

Even when your dog is fit and ready to go on long summer hikes, the winter is much more demanding when it comes to energy spent. Bring along a lot of high-fat treats (think “salmon jerky”) that will give a boost of energy to help your pup warm up. 

Train them properly

Another added danger on the trail in the winter is skiers and snowboarders. In the summer, your dog may avoid mountain bikers on the trail, but many dogs see skiers as a person to play a game with. Train them to stay away from skiers and other people moving quickly through the snow. 

Skis use a sharp metal edge on both sides to help dig into the ice. In the wrong circumstances, that metal edge can easily hurt any person or dog, especially at high speeds. 

It’s best to keep your dog on a leash, even if they are used to having free range. The transition to winter hiking with your dog can be a big one, and they need to learn the new environment before being left to roam freely. 

Have a backup

Bringing a dog along can sometimes be like bringing a small child. When they decide that they don’t want to hike anymore, you won’t be hiking anymore. So, you need to come prepared with a backup plan. 

One day your pup can be ready to take on any level of snow, and the next, they will be shivering at the sight of it. If you have another hike planned that might be drier or slightly warmer, head in that direction. Recognize that you need to be flexible and make smart decisions for your dogs because they won’t always do the same. 

Modify your first aid kit

One of the biggest parts of hiking safety is having first aid training and the supplies you’ll need. First off, a first aid kit is a must for any hiking, regardless of the season. When you add your dog into the mix, you “need to modify it to become a human and dog first aid kit. In the winter, hiking with a dog means learning proper hiking safety and first aid. 

A lot of doggy first aid is the same as human first aid. You’ll want to add extra gauze pads, athletic tape, cotton balls, gloves, and the rest of the normal gear. More dog-centered first aid would mean packing some of the following:

  • Hydrogen peroxide – Useful for inducing vomiting if they found anything they shouldn’t have gotten into.
  • Towel – Wet dogs are dangerous in the winter. They can freeze quickly, and it’s best to get them as dry as possible, fast. 
  • Soft muzzle – Any mouth injuries may be inflamed by eating snow, which they will likely try and do. This can also help reduce the licking of other wounds. 
  • Rubber booties – To protect any wounds that happen on their feet, have some rubber booties to cover them up. 

We all prefer not to even think about our dog getting injured, but the truth is that it’s possible. It’s best to come prepared and ready to treat anything as the vet is a bit more out of reach when you are in the mountains. 

Visibility

Visibility means two separate things here. First off, a whiteout snowstorm and blinding sunlight bouncing off the snow can be dangerous for your dog’s eyes. Second, short days mean longer nights, and you want to find your dog if they ever get loose in the dark. 

If you’ve hiked in the snow, you know how bright the white landscape around you makes everything. It can be difficult to see, which is why mountaineers wear those silly goggles with peripheral protection. 

Fortunately, you can get a pair of goggles for your dog for both function and fashion that makes them look ready to hit the ski slopes. Goggles will help to protect them from the dangerous UV rays that can quickly damage their eyes as well as the cold snow pelting through the air. They’ll look cool and be able to keep their vision.

Long, dark nights and winter go hand in hand. Maybe you don’t live somewhere like Alaska, where there’s barely any sun to be seen in winter, but the chance is still higher that you will get stuck out in the dark. 

Any time you go out with the potential of finding yourself in the dark, it’s best to have something like a light-up collar for your dog. This way, if they get loose, you can track them through the woods by the bobbing neon green light. It will simply help to ease your mind and know where they’re at throughout the entire hike. 

How to Dress For a Winter Hike

When the sun is shining, the birds are chirping, and the breeze cools your skin, it’s easy to get outside. Hiking in the winter can be a completely different game. The cold, snow, and often the wind can all come together and make it difficult to motivate yourself to shut Netflix down and head out on the trail. If you are a beginner, be sure to check out guided winter hikes and get a feel for what it’s like before heading out alone!

Your biggest key to success in those cold dark months is learning to wear hiking in the winter. A wardrobe that keeps you warm and dry can be a complete game-changer. It turns a cold and miserable day into a pleasant tromp through the wilderness with breathtaking, snow-capped vistas every way you look. Winter hiking is personally one of my favorite things to do, incredibly as the trails clear of their typical summer crowds and the world seems a bit quieter altogether. 

Dressed in the proper attire, you will end up barely noticing the cold, and soon it can be just you out there trekking through the snow back to your cabin with a warm mug of hot chocolate waiting. 

Photo by Elijah Hail on Unsplash

Layer up

Layering for winter hiking is an absolute must if you want to do it right. Layering allows for temperature regulation that you don’t get from wearing your heaviest coat with a t-shirt underneath. The goal is to add and remove layers as you like. When you stop, it can be easy to want to sit and cool down, but immediately throwing a layer will help trap all the heat your body is producing. 

It helps to think about your body as a furnace. The more you move, the more heat it will produce. When you take layers off, it’s like opening up all the windows. When you’re moving, it’s okay because the furnace is still pumping at its top-notch. Once you stop, the furnace stops, and the heat starts to disappear through those open windows. If you shut them too late (adding a layer after cooling down), your furnace is still shut off until you start hiking again, and it will be tough to warm back up. 

In all honesty, dressing for winter hiking isn’t that different from prepping for some other seasons. It can be similar to what to wear hiking in the Fall, just with a few more mid-layers and remembering to take extra precautions all around.

Get the right shoes on

When the winter comes around, tire shops rejoice because everyone is prepping and putting brand new winter tires on their car. Hiking in the winter should be no different than driving. You need the right shoes for the job. Snow and ice interact with the bottom of your feet much differently than dry dirt or mud. I strongly recommend against going out on a trail with your summer sneakers or even summer hiking boots. They simply don’t have the proper insulation or traction.

One way to add traction is through additional traction devices designed to dig into the snow and ice rather than interact with the surface. YakTrax and other versions of microspikes act like a lighter version of crampons used for mountain climbing. There are great traction devices for hiking, trail running, or running in the city. 

Not only is traction a completely different game, but your feet are also prone to getting much colder, much faster, in the winter. The ground is essentially a heat vacuum, sucking all of the warmth through the soles of your shoes away from your feet. Winter boots have a thick insulating layer in the sole that helps to reduce this heat loss. They also are better insulated all around, ensuring that the heat your feet make stays in the boot. 

Protect your extremities 

Boots are one way to help your feet stay happy and healthy during winter hiking. Feet, toes, and fingers are often at the highest risk of developing frostbite due to the poor levels of circulation and presence of fat in them. That means we have to take extra steps to protect all of our extremities. 

To protect your feet, wear wool socks, or at the very least, wear synthetic socks. Thick wool socks help provide a huge amount of insulation, even if your feet get a little bit wet. Make sure that the thick socks don’t make your boots too tight, as that can quickly lead to a cutoff in circulation and a faster route to frostbite.

Pack at least two extra pairs of socks, and change them halfway through the hike to make sure your feet are dry. In the winter, dry means warm.

Fleece or wool mittens with an outer waterproof layer are the best moves for the hands. I also bring an extra pair of mittens if the interior layer gets wet while I’m out there. 

Included on the list of extremities will be your ears and nose. These spots are also highly susceptible to frostbite or at least frostnip. They can be easily forgotten when dressing, but you’ll feel them get cold quickly on the trail. You can wear a neck gaiter with a fleece layer that covers your nose and cheeks with a hat or headband to take care of your ears. An easy cover-all is a balaclava, but I like to wear these in the extreme cold and add a layer for more ears over that. 

Everything else we’ve all forgotten

Other items to check off your list before hiking would be:

Sunglasses and sunscreen: The sun can be brutal in winter, especially when the snow reflects it. 

Gaiters help keep snow out of your boots and, therefore, keep your feet dry. 

Batteries die much faster in the winter as the cold will drain them. Bring spares and keep the ones you have close to your body. 

Headlamp: Daylight is sparse in the winter, and it will sneak up on you if you aren’t ready for it. Always have a headlamp, so you don’t get stuck in the dark. 

Our Favorite Hikes Near Colorado Springs

The landscape of Colorado is calling for everyone to come hiking. The stunning mountains, waterfalls, and red rocks make for a unique experience, no matter your skill level. Undoubtedly, one of the best ways to start your exploration of Colorado is by checking out the hikes near Colorado Springs. 

Nestled in the foothills of the mountains, Colorado Springs gives quick and easy access to some of the most diverse trails in the state. Remember that some hikes in the area may require a permit. For ease of use, we selected trails that match those in beauty, but there are no permits required for hikes.

Best hikes near Colorado Springs

Muscoco

Location: Mount Cutler/Mt. Muscoco Trailhead

Elevation Gain: 1,292 feet

Round Trip Mileage: 4.0 miles

Difficulty: Moderate

Views of the mountains sweep out to your right, and Colorado Springs lays the backdrop to your left as you head up to the summit of Mount Muscoco. This moderate trail is located just southwest of Colorado Springs in the North Cheyenne Cañon Park. It’s a quick drive out to a hike that is well worth the final climb. 

The Mount Muscoco trail is well-known for the wildflowers that it boasts in the springtime, making it a great trail to do as the snow starts to melt. 

The Mount Cutler trail takes you to the trail that you are truly looking for. About a mile down the Mount Cutler trail is the Mount Muscoco trail. This trail will take you straight to the summit, but beware, the final climb is where all of the difficulty lies in this trail. 

For this hike, in particular, quality hiking boots are highly recommended. The final climb is rocky, and sneakers aren’t suitable to give your feet the support they will need. 

The Crags Trail

Location: Near Divide, CO

Elevation Gain: 820 feet

Round Trip Mileage: 4.8 miles

Difficulty: Easy to Moderate

We suggest checking out the Crags Trail for a great introduction to the area. Not only does it display some of the best landscapes of the area, but it also won’t push you too hard and make you not want to hike again. The trail is long enough to make it a workout and is relatively flat, with a total elevation gain of about 820 feet. 

The Crags Trail gives you a view of some of the most unique geological features in all of Colorado. Granite slabs erupt from the ground in large numbers, forming massive cliff sides and sheer-faced walls. The trail also takes you through some huge aspen forests that allow you to see another part of Colorado’s brilliant landscape. Head out on this trail in the fall and be prepared to have your world blanketed in gold by these magnificent trees. 

Another reason why this trail is perfect for beginners is the ease of use. It’s well-marked, as trail number 664, and well-maintained. The forest service has recently constructed new parking, so you don’t need to rush there at 6 in the morning to get a spot. 

If you’re a beginner wanting to start exploring these areas, ensure that you are prepared. Read up on Colorado hiking safety and know before you go. 

Garden of the Gods – The Palmer, Buckskin-Charley, Niobrara, and Bretag Trail Loop

Location: Garden of the Gods Park

Elevation Gain: 449 feet

Round Trip Mileage: 4.0 miles

Difficulty: Easy

When avid hikers think about Colorado Springs, one of the first places that come to mind is Garden of the Gods. This National Natural Landmark is well-known for the sandstone towers that color the sky with their vibrant reds. Come here once, and you’ll be itching to come back and try the climbing, horseback riding, or mountain biking that the park has to offer. 

This trail, in particular, is a phenomenal introduction to the park. It combines four popular trails to make an easy four-mile loop, providing a taste of everything in the park. The route starts on the Palmer Trail and takes twists and turns through the most well-known towers in the park. 

Columbine Trail

Location: North Cheyenne Cañon Park

Elevation Gain: 1,607 feet

Round Trip Mileage: 7.6 miles

Difficulty: Moderate to Difficult

Now, here’s another trail to add to your list of Fall hiking in Colorado Springs. North Cheyenne Cañon is surrounded by mountains (some of which have also made this list) and provides an array of different views and landscapes to please everyone that tags along. 

The Columbine Trail has three different options for where to start. One of the best places to start, in our opinion, is the Starsmore Discovery Center. This center has a wealth of knowledge about the local flora and fauna, making it a great start or end to your hike. 

No matter what you are looking for, you can find it on the Columbine Trail. There are babbling brooks, warbling birds, and huge mountain vistas. While the trail is on the longer side, the elevation gains are evenly spread out, so you will barely notice it. 

Buckhorn

Location: North Cheyenne Cañon Park

Elevation Gain: 859 feet

Round Trip Mileage: 3.9 miles

Difficulty: Moderate

Another hike in North Cheyenne Cañon Park makes the list, showing off what this one place truly has to offer. If you’re trying to figure out where to hike in Colorado Springs, this park is a great place to start. 

Mount Buckhorn Peak is a quick hike up to a beautiful 8,380-foot summit that gives you a full 360-degree view of the world around you. The hike itself takes you through a forested setting that is a must-see in the fall. Once you are at the top, you can turn this trail into a quick out-and-back or continue down Buckhorn trail and return to where you started. 

The summit itself is somewhere you could spend an entire day. Once you are up there, you can scramble around on the huge number of boulders trying to find the highest one. This is an excellent hike if you want to take time to explore. 

How to Layer for Fall Hiking in Colorado

If you are a big hiker or nature enthusiast, you know that fall is arguably the best season for hiking. The energizing nip of crisp air on your face, the colorful foliage as nature buckles down for winter – personally, it’s my favorite time of year. If you are hoping to enjoy fall hiking here in Colorado, you certainly need to know how to layer for hiking. These tips on proper layering techniques will help ensure you are prepared for the weather you might encounter on a fall hike in the beautiful Rocky Mountains.

The Principles of Layering for Colorado’s Fall Weather

The first thing to know is that the term ‘layering’ doesn’t mean just wearing more and more clothes. In order to brave the elements and stay comfortable and safe, you need to wear the proper clothes in the proper order. First, the base layer serves to keep you dry when you sweat. Next, the middle layer is insulating to help retain body heat in Colorado’s colder weather. Finally, the outer layer protects against the harsher conditions you may experience on a fall hike.

We’ll start at the base layer and work our way out, so you understand what fabrics are best for each layer. We’ll also learn how to layer for the specifics of fall weather in Colorado and the hikes you are planning. As you likely know, fall in Colorado can range from warm to very cold. The weather can change quickly, and conditions can worsen with no warning. Especially if you are hiking to a higher elevation, say summiting one of the state’s many fourteeners, you will find temperatures and precipitation requiring a much different outfit than what you had on in the parking lot. It’s important to dress and pack well, as you will learn.

Image by David Mark from Pixabay

The Wicking Base Layer 

You can think of the base layer as the clothing that touches your skin. This is more than just a t-shirt and shorts or a long-sleeved shirt and long underwear. Remember that the base layer also includes underwear (boxers, briefs, bras, and more) and socks.

The main goal of the base layer is to wick away moisture and keep your skin dry. As you know, sweat cools you down, stealing your body heat much faster than a cold breeze. In the hot summer, you may not mind a cotton shirt absorbing and holding your sweat. In the fall and winter, though, cotton is at the top of the “Absolutely Not” list. Seriously, it’s one of the most important hiking safety tips of all time.

Photo by Stephen Leonardi on Unsplash

The Best Base Layer Materials

The best synthetic fabrics for base layers are polyester and nylon. You likely have these in your closet as your running or exercise clothes. You can go by personal preference, as long as it is ‘moisture-wicking,’ ‘dry-fit,’ or the like. Again, make sure your bras and boxers meet these criteria, too. A great natural fabric, especially for socks, is wool, as it wicks moisture and provides great heat retention. Wool is good for clothing, too, if you are in colder temperatures or hiking Colorado’s many mountains. It will keep you warm without being too heavy, but it also is more expensive than synthetic fabrics.

There are a few different options in terms of the weights of base layers, and you can decide based on the time of year and anticipated weather. No matter what you choose, your base layer should always be moisture-wicking. This layer should also fit snugly against your skin. You don’t want gaps between your skin and the material as it won’t be able to wick sweat away as effectively. A tight but comfortable base layer will keep your skin dry, which in turn will keep you warm and prevent skin irritation, like chafing and blisters.

Base Layering Tips for Colorado’s Fall Weather

Base layers are organized by weight; lightweight or ultra-lightweight for hotter weather and midweight or heavyweight for the colder months. This might mean shorts and a t-shirt in early fall when Colorado temperatures are in the 50s or 60s, and long johns and long-sleeved shirts in late fall when it’ll be in the 30s and 40s on average. Because the weather can change quickly here, especially in the mountains, I prefer to keep my base layer light and carry a heavier middle layer in my day pack.

Remember, the goal of this layer is moisture-wicking, where warmth is the job of the middle layer. That’s why lighter base layers make sense in Colorado’s fall conditions. You can always add more clothes later if the temperature drops up the mountain. The one exception to this is socks. My feet always run cold, so I highly recommend a thick wool sock for fall hikes, ones that cover your ankles! As long as your hiking boots are breathable, your feet will be happily dry and warm.

The Insulating Middle Layer

Next up, it is the job of the middle layer to retain body heat and keep you warm in colder temperatures. Where base layers tend to be stretchy and thin, you’ll recognize your middle layer pieces by their soft and puffy qualities. When shopping, you may see middle layer options listed as ‘soft shells.’ Depending on the weather, you can choose a lighter or heavier option, so it’s a good idea to have multiple middle layer pieces if you are planning on frequent fall hikes in Colorado. 

Photo by lucas Favre on Unsplash

Middle Layer Options for Fall in Colorado

For lighter wear, you might go with a microfleece pullover or hoodie. Fleece is nice because it dries quickly and stays warm. It is also breathable so that you won’t overheat. This is a great option for the early fall in Colorado. However, if it’s windy, you will definitely need an outer shell, or you’ll find the breathability a weakness.

For the colder days, a down jacket is the best middle layer. I am partial to synthetic down, both for the animals and the water resistance. Down insulated jackets don’t hold up well when wet, but they compress better than synthetic down if you need to save space in your pack. If a softshell is all you plan on wearing, I’d recommend one with a hood, so your neck stays warm. In this case, though, you will definitely need to pack a waterproof outer shell, as the fall in Colorado sees rain or snow regularly.

The Defending Outer Layer

Once you’ve got the dry and warm inner layers set, the last part of knowing how to layer for hiking is protecting against the elements. Fall in Colorado can be all over the map in terms of weather conditions, and this outer shell is key for making sure the wind, rain, and snow don’t penetrate and leave you cold and miserable.

Photo by Daniel Lincoln on Unsplash

The Best Outer Layers for Colorado’s Fall Season

For both jackets and pants, you will want waterproof outerwear. Trust me when I say that “water-resistant” is not good enough! If you get caught in a downpour, a water-resistant layer is going to soak and leave you shivering. Also, be sure it has a hood. Rain dripping down your neck and back is truly an uncomfortable and dangerous way to spend a hike.

In addition to water- and wind-proof material, your outer layer should also be breathable. These pieces are more expensive, but if you plan on exploring Colorado’s fall hikes, this feature is a must. Breathable jackets, ones with zippers in the armpits and such, are key for longer hikes because they keep you dry while you work hard. If the inner layers are wicking away moisture, but your outer layer isn’t breathable, the moisture will condense against it and soak your middle layer. You need breathability to allow fresh air to move through and clear out the humidity. 

One final feature of a good outer layer is durability. Since this layer has to brave the elements, you want something that will stand up to a bit of a beating, especially for pants that you’ll sit on, trek through the brush, and more. If your outer layer gets torn, you’ll have leaks when it rains. And with the expensive nature of these clothes, you want to make sure to buy something that is a good investment.

Packing for a Fall Hike in the Rockies

Now that you know the options for layering clothes, let’s talk about how to pack for day hiking in Colorado. Seasoned hikers are always carrying day packs, and it’s not just for the granola bars. 

When you start at the trailhead, you might be in your base layer and outer shell. Mid-fall in Colorado is comfortable, and you might reason that it’ll only be a few hours. But as you hike up the mountain, the weather changes. It will get colder and windier the higher you go, with less protection from surrounding trees. You may even get an unexpected shower or snow flurry. 

Before you leave, always check the weather to know what to expect. Then, pack that insulating middle layer anyway. A light fleece or down jacket won’t take up much room or add much weight, and you will be glad you have it when you need it. Wearing appropriate clothing and knowing how to layer for hiking will keep you comfortable and protected during your hike so you can enjoy mother nature, no matter what weather she brings.

What is the Easiest 14er to Hike in Colorado?

Did you know that Colorado has 58 peaks above 14,000’ elevation?

Commonly known as the ‘fourteeners,’ these mountains are popular bucket list items for serious hikers. If you are just getting started on your mountaineering journey, you’ll be glad to know that there are a handful of beginner 14er hikes with lesser mileage and elevation gain.

Best Colorado 14ers for Beginners

Check out this list of routes, and enjoy the beauty of our state’s mountainous terrain!

Pikes Peak

  • Location: Parking available at the Devil’s Playground Trailhead
  • Starting Elevation: 12,932’
  • Summit Elevation: 14,115’
  • Elevation Gain: 1,200’
  • Round Trip Mileage: 5.5 miles
  • Class: 1
  • Standard Route: East Slopes route starts at Devil’s Playground

First on this list is the well-trodden Pikes Peak. This popular destination is a super-accessible twelve miles west of Colorado Springs! The wildflower-adorned trail is used for all sorts of activities including mountain biking and horseback riding. Your pup will be glad to know that dogs are allowed on this trail. 


The trail has loads of picnic spots and observation points along the way, so it’s also great for a leisurely hike that’s not focused on summiting. Pikes Peak is arguably the easiest 14er in Colorado, but if you are looking for a little more help on your first mountaineering trip, be sure to check out our Pikes Peak guided hiking tour.

Handies Peak

  • Location: American Basin parking lot
  • Starting Elevation: 11,619’
  • Summit Elevation: 14,058’
  • Elevation Gain: 2,430’
  • Round Trip Mileage: 5.3 miles
  • Class: 1
  • Standard Route: Western route along the American Basin Trail

Located in the San Juan Mountain Range, Handies Peak is one of the easiest 14ers to hike. There aren’t many options with fewer miles or less elevation gain. Handies Peak isn’t just known for its relative ease, though. The San Juan Range is a beautiful place to spend time, and it is more underrated (aka less busy!) than the Colorado 14ers further north and easier for Denverites to visit.

Closest to Silverton, CO, this trail is accessible for vehicles with four-wheel drive and decent clearance. Otherwise, two-wheel drives are advised to park in the first lot and hike the mile to the trailhead. 

Mount Sherman

  • Location: 9700 4 Mile Creek Rd, Fairplay, CO 80440 
  • Starting Elevation: 12,009’
  • Summit Elevation: 14,035’
  • Elevation Gain: 2,020’
  • Round Trip Mileage: 5.2 miles
  • Class: 2
  • Standard Route: Southwest Ridge along Four Mile Creek Road

Part of the Mosquito Range, Mount Sherman is one of the best fourteeners in the Colorado Springs area. The most commonly traveled Southwest Ridge route is a direct ascent, and views from the top are amazing. You’ll have a gorgeous vista of two of Colorado’s highest peaks, Mount Elbert and Mount Massive. 

Other cool sites along the way include mining ruins, mill structures, and prospecting caves. This is an excellent beginner 14er hike for budding mountaineers and amateur geologists alike!

Mount Evans

  • Location: start at Summit Lake Park 
  • Starting Elevation: 12,850’
  • Summit Elevation: 14,265’
  • Elevation Gain: 1,400’
  • Round Trip Mileage: 5.5 miles
  • Class: 2
  • Standard Route: Northwest route, summiting Mount Spalding (13,842’) along the way

The 12th highest summit in the state, Mount Evans is part of the Rockies’ Front Range. Accessible from Idaho Springs, this peak is about a two-hour drive from Colorado Springs. Mount Evans is a very popular destination, in part due to its relatively tame elevation gain. 

This hike has a lot of cool bonuses, namely the beautiful Summit Lake and the population of local mountain goats. There are also a number of other trails you can take to summit Mount Evans, including a short walk from your car because, yes, there is a parking lot at the top.

Mount Bierstadt

  • Location: Parking available at the Bierstadt Trailhead 
  • Starting Elevation: 11,633’ (trail first descends to 11,470’)
  • Summit Elevation: 14,065’
  • Elevation Gain: 2,600’
  • Round Trip Mileage: 7.8 miles
  • Class: 2
  • Standard Route: Western route via the Bierstadt Trail

The western (and slightly smaller) neighbor of Mount Evans, Mount Bierstadt is known as one of the most iconic of the 14ers. Being an hour’s drive from Denver, the hike is quite popular and often crowded. Aim for a visit during the week or off-peak season in order to get a little space to yourself on the trail.

Quandary Peak

  • Location: Quandary Peak Trailhead parking by reservation only 
  • Starting Elevation: 10,930’ 
  • Summit Elevation: 14,265’
  • Elevation Gain: 3,340’
  • Round Trip Mileage: 6.6 miles
  • Class: 1
  • Standard Route: East Ridge route, Quandary Peak Trail

Regarded as the least technical peak, Quandary is one of the most accessible, easiest 14ers in Colorado. The standard East Ridge route is a straight shot to the top where you’ll have outstanding views of Breckenridge and other peaks. 

This peak is part of the Tenmile Range, and one of the more robust elevation gains on this list. Still, it is a Class 1 hike and boasts a short-ish round-trip mileage. That might explain why it is often the most traveled, seeing 50,000 visitors last year! If you’re in the Colorado Springs area, you’ll definitely want to check out Quandary Peak. 

Grays and Torreys Peaks

  • Location: Grays Peak Trail 
  • Starting Elevation: 11,280’
  • Summit Elevation: 14,278’ (Grays) & 14,275’ (Torreys)
  • Elevation Gain: 3,600
  • Round Trip Mileage: 8.6 miles (for both summits)
  • Class: 2
  • Standard Route: Northeast Route forks off to both summits

Grays and Torreys Peaks are decidedly not the easiest on this list. However, they are quite popular and for good reason. First, located in the Front Range, these peaks are just past Mount Evans and around ninety minutes from Denver.

More importantly, the two peaks have a saddle ridge between them, meaning it’s very doable to summit both peaks in one day. It only adds a mile and a half to the hike! If you are new to mountaineering and looking to cross some of Colorado’s 14ers off your list quickly, these make a great two-in-one opportunity.

Other popular beginner 14er hikes in Colorado include Mount Antero (14,275’) in the Sawatch Range and Mount Elbert (14,439’) which is the highest summit in the Rocky Mountains.

With 58 fourteeners in the state, you have a long list to choose from. Be sure to do your research, including double-checking parking reservations, learning the signs of altitude sickness, and planning around weather forecasts. No matter where you choose to hike, these Colorado peaks are sure to provide exciting trails and outstanding views.

How to Pack for a Day Hike in Colorado

The variety of terrain and difficulty found on day hikes requires the skill of adequately packing. 

How to pack for a day hike is a skill that many have been working towards mastering for years and that all hikers need to know the basics of. Before you head out into the backcountry, your pre-trip will always require you to take a look at all of your hiking essentials. 

Day hikes in Colorado Springs can be laid back or some of the more strenuous hikes out there. To take these hikes on safely, you need to pack efficiently and effectively. While optimism and a positive mental attitude should be the first thing you pack, you can’t forget that emergencies do happen. If they happen to you, what’s inside your day pack will often determine how the situation plays out. 

If you’re new to hiking or have never hiked in Colorado before, we recommend booking a hike with a guide. Guided hiking tours will help you feel confident in a new environment and help lower risk while hiking in the mountains.

10 Essentials to pack for a day hike

The Ten Essentials are a great place to start when learning how to pack for a day hike. These were created over 80 years ago and have been modified as our technology and knowledge advance.

To begin, we’ll take a quick look at each of the ten essentials.

1. Navigation

Before you head out, you’ll need to know where you’re going and how to get there.

A map and compass are an excellent pick for navigational aids, but you can up your technology game and bring along any satellite navigation and communication devices. 

2. Sun Protection

The sun will quickly ruin your day hike and potentially lead to more serious problems if you’re unprepared.

If you adequately protect yourself with the proper layers, hats, and sunscreen, you are much less likely to experience heatstroke, dehydration, or any other sun-related illnesses. Even on cloudy days and in the winter, the UV rays can still reach you, so always be prepared!

3. Insulation

If you’re packing for a long day hike or even packing to prepare for potential hazards, extra layers will be key to keeping you safe and comfortable.

The weather flips like a switch in some environments, especially in the mountains. With the proper jackets, hats, and rain shells, you can be ready to take on anything mother nature throws at you. 

4. Illumination

Any day hike can turn into an overnighter if you lose the trail or get turned around unexpectedly (especially if you neglect navigation).

Pack a headlamp or flashlight with spare batteries, so you don’t need to shuffle your way through the dark. 

5. First-Aid

There’s no need for a complicated first aid kid unless you are a professional, but it’s important to have a basic kit ready for any injuries you or other hikers may have.

Remember, not all kits are made for all environments. Buy a basic kit and make changes to it to fit your experience level and the needs of your group. 

6. Fire

Being ready for anything means being prepared to keep yourself warm, cook food, and treat water when in the backcountry.

Fire starting supplies such as waterproof matches, a lighter, or a Ferro rod are great options to help get a fire anywhere. Pick what you are the most comfortable with and pack a spare.

7. Repair kit and tools

Packing a repair kit can seem like overpacking when you’re planning on just going out for the day, but it can be one of the most important things you bring along.

You will find more uses for duct tape and a knife than you ever thought imaginable when you need it out there. 

8. Nutrition

Every day of our lives appears to be driven by, “what meal will we have next?”

When you go out into the backcountry, this question is asked even more frequently as your body works harder than normal to bring you from place to place. Even if you bring out just a few calorie-dense snacks on your day hike, you’ll be grateful. The best practice is to bring at least an extra day’s worth of calories.

9. Hydration

No matter if you’re out in the dead of winter or on one of the guided hiking tours in Colorado Springs during the hottest day of the year, water is always your best friend.

Water keeps you warm in the winter and cools in the summer. Almost every ailment you start experiencing in the backcountry comes with the initial treatment recommendation of “drink some water.” Unsurprisingly, it usually works. 

10. Emergency Shelter

Going out means going out ready for your trip plans to change drastically. In most cases, you’ll never end up spending a night out that was unplanned.

However, if you ever find yourself in that situation, an emergency shelter will be a lifesaver. This can be a small bivy (like a one-person waterproof cocoon) or simply a tarp to protect yourself from the elements. 

More about comfort, less about survival

The Right Pack

The right backpack for day hiking is going to be a complete game-changer when you’re out hiking. A comfortable bag with enough space and support will turn a miserable experience into a walk in the park. For starters, I recommend buying a 30-40 liter pack if you are focused on day hikes.

40-liter packs can be used for short overnight trips but aren’t overkill for just a day. 

Do some research on different packs that give you the back support you need. Certain brands like Osprey will form-fit each pack to your back. This can be helpful, especially if you have a history of back problems. 

Don’t let not having the perfect day hiking pack stop you though! Start with the bag you have and upgrade when you’re ready.

The Right Shoes

Nobody wears flip-flops to the prom, and nobody should wear high heels out on the trail. The right shoes for you will be shoes that are comfortable, sturdy, broken in, and give you good ankle support. After those basics, you can begin looking at the different styles of rubber, traction designs, and waterproof construction.

Wearing the right shoes helps to avoid blisters, which means you won’t need to break into your first aid kit. The more preventative measures you can take to save on supplies will leave you even more prepared for your next day hike. 

How to Pack for a Day Hike

Now that we’ve hit the basics of what you need to pack, it’s important to talk about the process of packing.

The ABCs

The ABCs are a valuable tool for packing a backpack so that it fits comfortably and makes hiking easier. While most people will only use this method with multi-day trips, it’s helpful to consider when you are doing day hikes as well. Like I mentioned earlier, some day hikes in Colorado Springs can push you to your limit. Packing a comfortable bag will take a lot of strain off your back and make these hikes more enjoyable.

Accessibility- When you’re packing, make sure things you’ll need while hiking are packed on top or in an external pocket that you can easily get to. This includes things like rain gear, snacks, and especially a headlamp. Looking for a headlamp without a headlamp can be the most frustrating thing you’ll do all year long. 

Balance- Having a bag that pulls you to one side will end with a cranked back and one leg that takes on a lot more stress throughout the day. The key is to make your pack well-balanced to maximize comfort. The weight should be evenly distributed from side to side, and you want the majority of the weight to be in the bottom third of your bag. 

Compression- Here’s what can save you after packing a long list of essentials to bring on any day hike. Gear that compresses down into a small pouch is the best gear for hiking. After all, you don’t need to buy an 80-liter pack to go out for the day. Invest in a few compression bags to squeeze everything down into a small space. 

Know your Environment

You need to know what kind of a hike you are headed into and what that environment may throw at you. This means looking at the current weather forecast, the weather trends for your location, and reviews of the hike from recent days. 

You can gather information from apps (like AllTrails), with hikers going out onto these trails every day. If one person notices a dried-up river where most hikers rely on water, you wouldn’t know this without their comment. Utilize social platforms to gather as much information as you can before heading out. 

This information will help you greatly when packing your bag. It will tell you if you need extra socks because everything is muddy and wet or if you need to bring a down jacket for when you get up above 11,000 feet of elevation.

If you’re uncertain about reading this information and transferring it into packing, don’t hesitate to reach out for guided trips in Colorado Springs. These are fantastic resources when first learning how to be comfortable in the backcountry.