Free (and Cheap) Events in Colorado Springs – Winter 2022-23

Looking for some fun events this winter? There’s always plenty to do in and around Colorado Springs. From outdoor recreation to holiday celebrations to arts and crafts, we have activities for everyone. Before it gets too cold to enjoy the outdoors, be sure to check out some of these exciting free events near Colorado Springs.

Photo by Aranxa Esteve on Unsplash

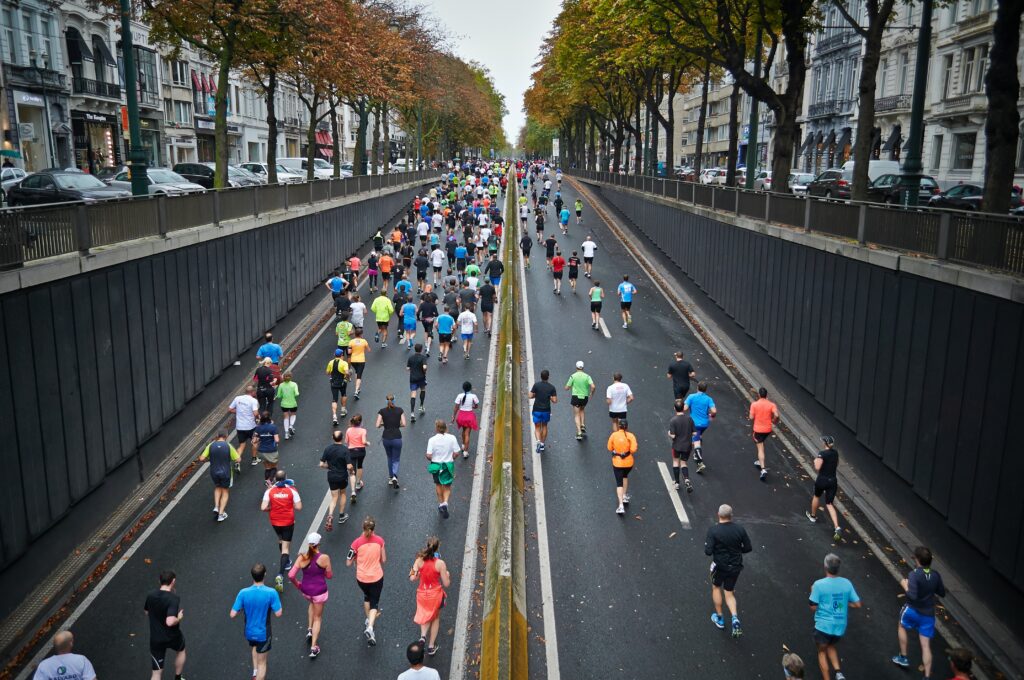
Winter Races Near Colorado Springs

Timeless Turkey Trot Prediction Run

Where: Iron Horse Park, 6151 Elwell Street, Fort Carson

When: Saturday, November 5, 9:00 AM – 12:00 PM 

Reserve your free spot: Eventbrite

Just south of Colorado Springs in the spacious Iron Horse Park, this race is a fun variation of a standard 5k. The course is not revealed until the day of the race, and when you arrive to register, you have the opportunity to predict your time. The top ten racers who come closest to their predictions will win a prize.

The race starts at 9:30 am, and prize winners are announced at 11:40 am. While you are waiting for the announcement, you can enjoy local vendors selling merch, food, and beverages. Strollers and leashed dogs are allowed, so be sure to bring the whole family. 

Veterans Day 5k

Where: Goat Patch Brewing Company, 2727 North Cascade Avenue, Colorado Springs

When: Saturday, November 12, 10:00 AM 

Buy your ticket: $35, Eventbrite

Offered by the Colorado Brewing Running Series, this 5k starts and ends at Goat Patch Brewing. No matter whether you walk or run the course, you will get a free craft beer at the finish line. And you don’t need to be 21 to participate: underage runners will receive a free non-alcoholic beverage at the end of the race. 

Your ticket gets you into the event where you can enjoy live music, food trucks, and local vendors. You are also supporting a good cause as 10% of all proceeds go to local Colorado nonprofits that support the community.

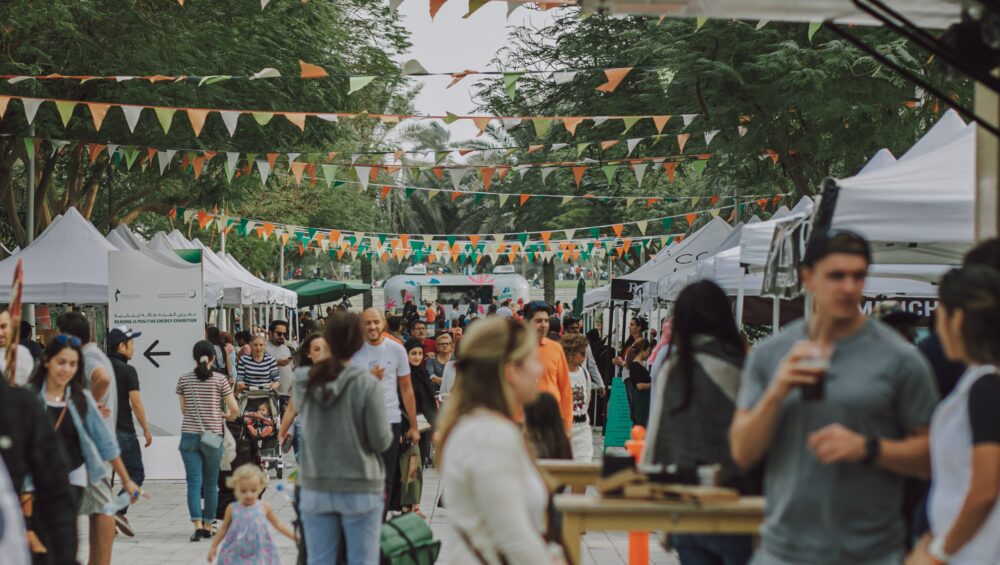
Free Arts and Crafts Fairs

Black Forest Arts and Crafts Guild Fall Show and Sale

Where: 12530 Black Forest Rd, Black Forest

When: Wednesday, November 2, 4:00 – 7:00 PM; Thursday – Saturday 9:00 AM – 7:00 PM; Sunday, November 6, 10:00 AM – 2:00 PM  

No tickets needed.

Entry is free into this arts and crafts show. This Northwest Colorado Springs neighborhood event offers an amazing array of beautiful, handcrafted goods. The guild is open to all Black Forest residents and promotes fine arts, decorative arts and crafts, and culinary arts. This free Colorado Springs event is a great place to appreciate the local art scene and find holiday presents sure to amaze your loved ones.

Holiday Craft Fair

Where: Cheyenne Mountain High School, 1200 Cresta Road, Colorado Springs

When: Saturday, December 3, 9:00 AM – 4:00 PM

Reserve your free spot: Eventbrite

This holiday craft fair is an event not to be missed. It has free admission, free parking, and a free shuttle from the parking lot to the venue. There are 140 vendors all selling handmade crafts and delicious goodies as part of a “Taste of the Holidays” bake sale. This conveniently located Southwest Colorado Springs event will give you ample opportunities to get holiday presents for your loved one and enjoy the atmosphere of a community fair.

Winter Events for Families and Kids

10th Annual Noche de los Muertos

Where: Rockledge Lodge/SunMountain Center, 328 El Paso Blvd, Manitou Springs

When: Wednesday, November 2, 5:00 PM

Get tickets: $35, Eventbrite

This unique cultural event includes live music and dance performances, an authentic Mexican dinner (included in the ticket price), and a Dia de Los Muertos-inspired altar (called an ofrenda) to honor loved ones who have passed on. This event also supports a good cause, as it is held by the Smokebrush Foundation for the Arts. This is a great place to bring the kids for a night of entertainment and exposure to Mexican culture.

Junior Ranger Walk Garden of the Gods

Where: Red Rocks Room, Garden of the Gods, 1805 N. 30th St., Colorado Springs

When: Tuesday, November 8, 3:00 – 4:00 pm

Register here.

If you are searching for a family-friendly idea for the little ones, Garden of the Gods regularly offers Junior Ranger Walks at the park. Get the kids excited about wildlife and nature on this one or two-mile hike around the park. Tickets are $5 per child and free for accompanying adults. Get the kids off the couch to see one of the most beautiful sites Colorado Springs has to offer.

Skate in Acadia Park

Where: Acacia Park, 115 E Platte Ave, Colorado Springs

When: Opening Day is Friday, November 11, 4:00 pm 

Tickets ($10 includes skates) are available only at the rink.

This event is not quite free, but it’s such a great opportunity for the kids that we couldn’t skip it. The beautiful Acadia Park in downtown Colorado Springs has an ice rink available from November 11 through January 31. If your little one has a birthday in the winter, the Acadia Park ice rink makes for one of the best party ideas in Colorado Springs.

There are also tons of events through the winter including Skating with the Air Force Falcons Men’s Hockey Team (Sat, Dec 10, 4:00 – 6:00 pm) and Learning to Skate with US Figure Skating (Sat, Dec 17, 10:00 am – 12:00 pm). Another great event for teens is Glow Night (Friday, December 16, 7:00 – 9:00 pm). Check their website for more event information.

Annual Christmas Tree Lighting

Where: Outlets at Castle Rock, 5050 Factory Shops Boulevard, Suite 340, Castle Rock

When: Saturday, November 12, 4:00 PM

Get tickets: Eventbrite

Who doesn’t love a tree-lighting ceremony? Ring in the holiday with a joyous celebration and display of a sparkling Christmas tree. There will be a Santa available for photo opportunities with the little ones and a performance by the Denver Broncos cheerleaders that the whole family will enjoy. Beer, wine, and hot chocolate are for sale, as well as plenty of holiday shopping at the outlets.

Photo by Markus Spiske on Unsplash

Free Events to Explore Colorado Springs 

First Friday ArtWalk

Where: See the stops here.

When: Friday, November 4 (offered the first Friday of each month April through December)

No tickets needed.

Offered the first Friday of each month, the Colorado Springs ArtWalk is a great way to explore your neighborhood and see the incredible diversity of our local art scene. This free walk spans downtown Colorado Springs, Old Colorado City, and Manitou Springs. There are live demonstrations and a shuttle to help you get around to the stops more easily. You will see public street art, exquisite sculptures, and architecture, and get to walk through some of the city’s best art galleries. 

CONO Winter Block Party

Where: Sunshine Studios Live, 3970 Clear View Frontage Road, Colorado Springs

When: Tuesday, December 6, 5:30 – 8:00 PM 

Reserve your free spot: Eventbrite

If you are looking to make connections with friendly neighbors, you should check out all the block parties hosted by the Colorado Springs Council of Neighbors and Organizations. This Tuesday night event in Southeast Colorado Springs offers free entry, a cash bar, live music, and a cocktail social hour.

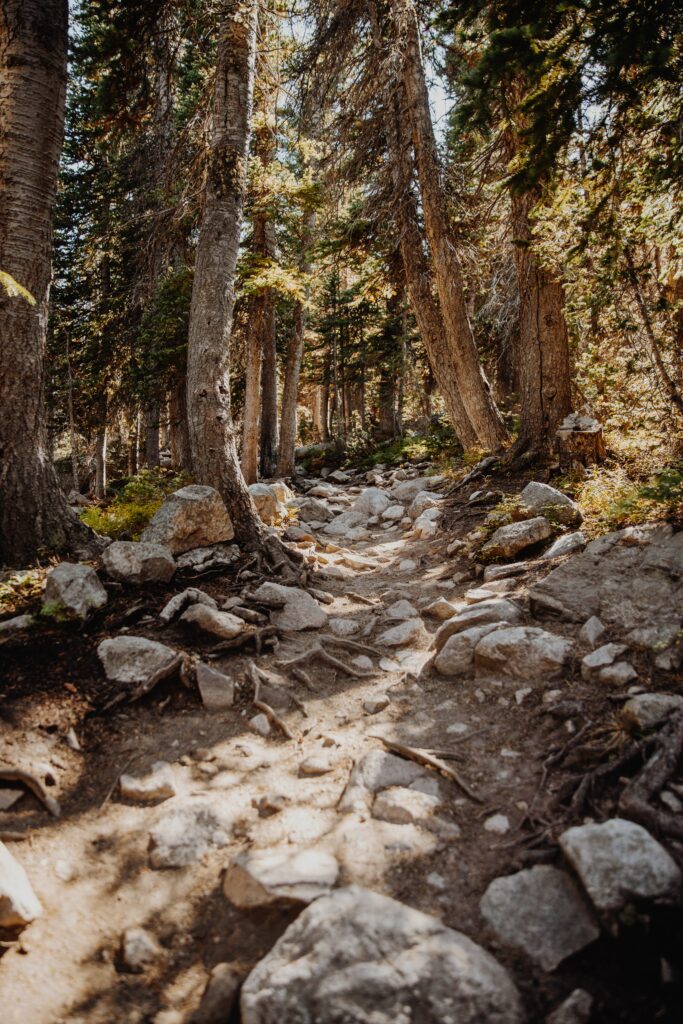
Colorado Springs has so much to offer. It’s no wonder it is a popular tourist destination and an up-and-coming city bringing new residents. While adventuring around town, be sure to check out the accessible public transportation options to make your travel easier. Once you have explored some of these fun free events in Colorado Springs, you will likely want to add some outdoor recreation to your plans. Before it gets too cold, enjoy a guided tour of some of the best hiking spots Colorado has to offer.

Rock Climbing Techniques: A Beginner’s Guide

If you are wondering how to get into rock climbing, there is no wrong way to go about it. You can take a class at your local gym, try a guided rock climbing tour, or try it out with a friend and get some hands-on experience. 

It is admirable to learn something new, and rock climbing is a rewarding activity. It builds self-esteem, provides instant gratification, and exercises your full body. Still, it is always hard to get used to new movements, so we’ve prepared some helpful rock climbing techniques for beginners just starting out with the sport.

Photo by Tommy Lisbin on Unsplash

Before You Climb

Stretch

The most important thing to do, both before and after rock climbing, is to stretch. Be sure to stretch your fingers, wrists, and shoulders. You want to stay loose to avoid over-gripping the wall and tiring out quickly. I often stretch between climbs, too, once my muscles are warmed up and again when I am starting to feel tense. Keep your muscles relaxed as much as possible, and you will have an easier climb.

Plan Your Route

When rock climbing in an indoor gym, there will be color-coded routes to guide you. You can find beginner routes around 5.5 – 5.9 for top rope or V0 – V3 for bouldering. Before you jump right on the wall, take a moment to look at the route. You can climb with your eyes, and you should continue this practice as you move up the wall. Look at each hold and the movements between holds. Is that a right hand or a left? Is there a foothold to help boost you up?

Rock climbing routes are placed with intention. There may be multiple ways to do it, but there is likely one way the route setter intended. Understanding their plan will help you complete the route more efficiently and save time and energy. Plan out the climb before you start so you can go in with confidence. As for transitioning to outdoor climbing, there will not be set holds, but it is still important to look at the route before you begin and try to plan your movements.

Photo by Stephanie Cook on Unsplash

On the Wall – Rock Climbing Technique Tips

Move Your Feet As Much As Your Hands

Beginner rock climbers tend to think climbing is a sport of upper body strength. They forget that they can (and need to) move their feet, too. A good way to use your arm muscles less is to remember that you have other options!

Imagine climbing a ladder. You can stretch your arms to their full extension to reach the highest possible rung, or you can move your feet up and reach that same rung much more easily.

My rule is that you should move your feet just as often as your hands. Alternate hand, foot, hand, foot, if the climb allows for it. This will keep you from overusing your arms and getting tired more quickly.

Hang on Your Skeleton

Another way to avoid burning your arms out too quickly is to use your skeleton more. You can hang with straight arms to give your biceps a rest on the wall. You should pay attention to how your body feels on the wall. Maybe there are spots you can balance and don’t need to use too much upper body strength at all.

Control Your Center of Gravity

When you are on a climb, play around with where your body weight is. Pull your body closer to the wall, or relax your weight lower on bent knees. You will notice that it makes a big difference. When you are farther away from the wall, you will feel that it requires more arm strength to stay on the holds. Learning to recognize where your center of gravity is and how it affects your grip and endurance on a route will help massively while rock climbing.

Rotate Your Hips

In the same vein, be sure to move your hips while climbing. You can redirect your weight in order to reach the next handhold more easily. Sometimes you will want your hips facing the wall. Other times, your will need to put one hip into the wall in order to bend your knees and reach a higher foothold.

Take a Rest

Sometimes there are nice handholds or balance-dependent footholds that make for good break spots. There is no shame in taking a rest on the wall, and when you find a place to do it, take it. You can shake your arms out, stretch, or chalk up. A small, minute-long break can give you that extra ounce of energy to get you to the end.

Photo by Tommy Lisbin on Unsplash

After Your Climb

Review What You Did

The best way to learn to be a better climber is to take a moment after each climb to go over what you did. Were there parts where you had to backtrack or switch hands? It’s possible that you did not complete the route as efficiently as possible. Was there a move that felt too hard or too much of a stretch? It’s possible that you missed a small foothold or a handhold around the corner of the route.

Practice the Same Route

You do not necessarily need to forget about a route the second you send it (“ascend,” or climb without falling). You can climb the same route again and again until you feel confident on each hold and smooth and precise in each movement. As you become accustomed to the most efficient route, you will be able to focus more on your center of gravity, breathing, proper positioning of your feet, and moving with intention between holds.

Stretch Again

For the first few weeks after you begin rock climbing, your forearms will hurt. Everyone goes through this. Continuing to stretch daily will protect you from injuries like tendonitis and make sure your muscles develop in a healthy way.

These beginner rock climbing tips apply equally to bouldering or top rope climbing and indoor or outdoor climbing. If you are looking to get into bouldering, it will also be important to learn to fall safely. In order to be safe while bouldering outdoors, be sure to use a crash pad and have a spotter. If you are planning to head outdoors, make sure you have the proper outdoor climbing safety equipment.

How to Keep Your Feet Warm While Hiking

If you are hoping to hit the trails this winter, you will need to know how to keep your feet warm while hiking. With treacherous temperatures and feet of snowfall not uncommon in the area, warm boots and warm socks are essential pieces of hiking gear here in Colorado. 


We’ve got some of the best fall hikes near Colorado Springs, so let’s dive into the proper gear for your feet and tips for keeping warm so you can get out there and enjoy.

Photo by Oziel Gómez on Unsplash

Gear Necessities for Staying Warm on a Hike

Sock Strategy for Cold-Weather Hiking

In order to keep your feet happy and warm on a hike, you need to wear multiple layers and consider all factors. The first and most important way to keep your feet warm is to keep them dry. Therefore, a moisture-wicking base layer needs to be the first thing you put on your feet. These thin moisture-wicking socks will keep your feet dry no matter how sweaty they get. 

The second layer is insulation. You can wear thick wool socks, which come in different weights (lightweight, midweight, or heavyweight) depending on how cold you are anticipating temperatures will go. If you own insulated hiking boots, these can be worn with just a thinner lightweight wool sock. 

When you are purchasing insulating socks for hiking, there are a few things to keep in mind. In terms of comfort, you want to find socks that fit a little looser. This will help them fit well over your moisture-wicking layer and make sure that your feet are not being squeezed at all. In terms of value, investing in quality socks will definitely make your life easier in the long run. Wool socks tend to be expensive, but they are the best option here as cotton holds moisture and does not insulate as well for the same thickness. 

The Best Boots for Cold-Weather Hiking

The final layer is the boot, and its main job is protection. A good hiking boot protects you from all sorts of injuries, rolling an ankle, stepping on something sharp, and hopefully, preventing frostbite. As noted, insulated hiking boots are a great option for folks who often hike in colder weather or find themselves standing around a lot while on a hike. 

Another must for Colorado hikers is waterproof hiking boots. Many people do not like their boots to be waterproof because it limits breathability. However, if you are hiking in winter or changing elevation substantially, there is a good chance you will come across snow. There is nothing worse than getting your boots wet, from rainy weather or a water crossing, when you are on a hike. If your feet do not have time to dry, you will be risking frostbite, blisters, and surely general discomfort. Even having snow land on your boot can be dangerous, as your body heat will melt it and allow the water to seep in through the tongue. On a very cold day, you could watch your boots freeze up, thus ending your hike.

You may wonder how to fit multiple pairs of thick socks in your hiking boots. When hiking in cold weather, you need to size up on boots. This will allow room for the socks without compressing your feet. You should aim to be able to wiggle your toes in the boots. If you do go for insulated hiking boots, the sizing will understandably vary as well, so it is helpful to go to a physical store to figure out what size will work for you. 

Tips and Tricks for Keeping Your Feet Warm While Hiking

Be Prepared: Watch the Weather

Before you head out on your cold-weather hike, be sure to check the weather and trail conditions. It is easy to learn how to check trail conditions for hiking safety, and it will save you a disappointing and potentially dangerous hike. 

What to Pack to Keep Your Feet Warm

In addition to the warm socks and warm hiking boots already discussed, there are a few specific items that should go in your daypack for your feet. It is always a good practice to have a first aid kit, a blister kit, and in winter weather, chemical warmers for your hands and feet. These will allow you to warm back up in an emergency. You could also consider getting thermal insoles to redirect your body heat back up if you do not have insulated boots. Finally, you should always pack an extra pair of socks: you never know when you will need them, and at the very least, putting on clean socks at the end of the day will be a great reward for your hard work.

Don’t Put Your Boots On Too Early


It is always good to have a second pair of shoes, in case of emergency and for comfort in the car or at the campsite. When you are getting ready for your hike, changing into your boots should be one of the last things you do. This way, your feet will not get sweaty in those waterproof boots before you even get going. 

Don’t Lace Your Hiking Boots Too Tight

The reason that it is so important to have enough wiggle room in your shoes, literally, is because compressing your feet can lead to frostbite. When you are cold, the blood vessels closest to the skin and out in your limbs constrict in order to keep your core at the proper temperature. If you were to tie your shoes too tight, you are only further cutting off blood flow. This will make your feet feel colder sooner, and it can worsen symptoms of frostbite. 

Keep Your Core Warm

This feels obvious, but because your body prioritizes core temperature, your feet will be the first to get cold if you aren’t dressed warmly enough. Therefore, one of the best ways to ensure your feet stay warm while hiking is to make sure the rest of you stays warm, too.  

Get Your Feet off the Ground

The cold, hard ground is going to be one of the coldest places you can step. Even in the snow, the reflection of the sun’s rays makes the ground slightly warmer. When you take a water break or rest on your hike, try to stand on a rock or a tree trunk instead of the ground below. You will find the ground saps the heat from your idle feet faster than anything else.

Always Be Willing to Turn Around

One of the best winter hiking tips (that I believe is applicable year-round) is to always be willing to turn around. If you feel yourself getting too cold, if the trail conditions have changed, or if the weather is taking a turn for the worse, you should head back. The risk of frostbite or other injuries is not worth it.

Photo by Greg Rakozy on Unsplash

How to Warm Your Feet Back Up After Hiking

Get Dry

As keeping your feet dry is one of the most important tips for staying warm, it should be obvious that drying your feet off would be the first step for warming back up if your feet do get cold while hiking. Let your feet air dry for twenty minutes before putting warm socks on. This will make sure your skin is thoroughly dry to prevent blisters. This is especially true if you got your feet wet from something more than sweat, say wading through a river or hiking in a rainstorm.

It can be hard to let your feet dry out properly if it is cold outside. You can dry them off with a towel and then cover them loosely in a blanket or sit inside your tent. This will give them a little space to dry off without getting too cold in the process. 

Go Slow

One thing people often do is try to warm up too quickly. It is tempting to jump in a hot bath when you are cold, but if your toes are cold to the bone, it is not a good idea to try to warm up too quickly. If you’ve done it before, you know it is very painful. The transition from very cold to even tepid can be painful and actually harmful to your vascular system, sending cold blood to the heart.

Rather than shock your system with a quick transition, you can reacclimate to the warmth slowly. If you are camping and building a fire, take a seat far away and get closer as you warm up. Let your feet tell you if you get too close too fast. If you want to warm up with water, make sure you start with colder water and warm it up slowly with your feet.

Skin-to-Skin Contact

The best way to warm up cold feet is with skin-to-skin contact. Use your hands or thighs (sitting cross-legged) to warm your ankles and feet. If your skin is truly frozen, you should not massage or rub it as you can break the skin, but just hold it there to let heat transfer. Or, even better, if there is someone with you who can help, warm breath and skin-to-skin contact with someone else’s warmer body areas like the torso, thighs, and armpits are quick ways to safely warm skin.

If you are looking for some fun and rewarding hiking destinations this season, check out our Guided Hikes near Colorado Springs. You will get expert advice from a certified guide and plenty more real-world experience hiking in the great outdoors in colder weather. 

How to Clean Your Sleeping Bag

A sleeping bag is a vital piece of equipment for anyone who ventures into the outdoors, especially since it’s part of the essential gear you need for camping. But it can also be a spendy investment. Maintaining, storing, and washing your sleeping bag is essential to get the most use out of it. We’ve compiled all the information you need below to help you clean your sleeping bag. 

Photo by Felix M. Dorn on Unsplash

General Care

Sleeping bags should not need washing for many years when properly tended to. The best way to prolong the time between washes is to take good care of your sleeping bag in the first place. Some tips to help maintain cleanliness include:

  • You get what you put in: Keep a clean pair of clothes to sleep in. Try to keep yourself clean as well. That means removing oil, dirt, sunscreen, and bug spray that can permeate into the bag. The cleaner the items are in the bag (you), the greater likelihood your sleeping bag will stay clean too.
  • Liner: A sleeping bag liner is a single-layer enclosed sheet you sleep in inside your bag. The liner serves as a barrier between your body and the bag. It should be easy to remove and should be washed regularly. Liners are slipped inside a bag, not attached.
  • Off the floor: Keeping your bag off of the ground will help keep dirt, pine needles, and other debris out and off of your bag. This does not include your sleeping pad which serves as a barrier between your bag and the ground.
  • Dry it out: Lay your sleeping bag to dry the day after every use. Our bodies produce moisture that gets trapped in our bags from our breathing, sweat, or the environment’s humidity. When camping, try to find a dry spot on a tarp or maybe over a clean log and give the material a chance to dry and breathe. Laying out your sleeping bag prevents mold from forming in your bag.

Be Gentle

Treat your bag with care. Take your time with zippers, gently put the sleeping bag away, and mind where you place them. Most bags are best stored loosely in a well-vented bag or hanging environment. Compression stuff sacs are helpful for compact travel but are not recommended for long-term storage as they compress the material and wear down the fill. Over time, this compression ultimately impacts your bag’s warmth and comfort. Additionally, tight storage can trap smells and moisture, leaving you with a pleasant experience the next time you use it!

Washing

The first factor to consider when cleaning your sleeping bag is how much of your sleeping bag needs cleaning. The second factor to consider is whether you have a down or synthetic bag. The third is whether you have access to a machine wash or if you will need to hand wash. Consider a total wash if you notice a general browning color, overall grime, or an overall smell. For smaller messes or stains, simple spot treatment of the impacted area is fast and effective. 

Spot Cleaning

Often, only a few areas of a sleeping bag need cleaning. To spot clean, use a gentle soap mixed with water and lightly brush or rub the dirty area with the cleaning solution. Do your best to keep the cleaning solution on the exterior material only and not saturate the bag’s fill. Once you have spent some time cleaning, wipe the spot with a wet cloth and leave it to dry.

Photo by Ivana Cajina on Unsplash

Full Wash

Most new sleeping bags come with wash instructions which you can find on the tag. This is the best method to follow when cleaning your bag. If there are no instructions, consider the following techniques and remember that no matter the form, cleaning your sleeping bag takes time and patience:

Machine Wash

  • Device: The best way to machine wash a sleeping bag is to use a front-loading washing machine. Do not use a top loader, as the bag may become damaged and tangled around the center bar. If you do not have access to such as machine, consider going to a laundromat.
  • Soap: If you are machine washing a down sleeping bag, use special soap that is friendly on down material. If your fill is synthetic, you can use a regular detergent, but a technical gear-specific detergent will be best. Nikwax makes different detergents for both down and synthetic fill.
  • Means: Some suggest fully unzipping your bag before loading it into the washing machine, so the upper doesn’t pull apart or catch in the wash. Another option is to turn your bag inside out with the zipper fully closed. Wash your sleeping bag in warm water on a gentle cycle. The sleeping bag may need two or more rinse cycles. It is ready to dry if the bag is wet but not holding large amounts of water. Then be sure to gently squeeze any excess moisture out of the bag as you remove it from the wash.
  • Drying: Use a large dryer if possible; the more room in the dryer, the better the fill can expand when drying. Synthetics will often dry faster. Bags with down fill may take several drying cycles. Set the dryer to tumble on a low heat setting. Consider using tennis balls or other dryer aids to break up condensed pockets of fill towards the end of the cycle or when it is mostly dry.

Hand Wash

  • Device: Fill your bathtub or a similarly large tub with warm or cool water.
  • Soap: Use the same material-specific soap listed above and read the instructions for the recommended amount. When hand washing, it can be more difficult to rinse the soap out, so starting with a smaller amount than recommended may be beneficial, and slowly adding more as you go.
  • Means: Lay the bag in the water and gently rub and massage the bag. Next, soak the bag for around thirty minutes or until it is fully saturated. Rinse your bag with clean water (you may do this multiple times) until the soap is out. Before hanging to dry, gently squeeze excess water out of the bag. It can be helpful to work from one end to the other squeezing section by section.
  • Drying: Follow the directions above. If a dryer is unavailable, lay the sleeping bag on a clean surface or hang it up to dry. Use a location out of direct sunlight and with low humidity. Once it has started to dry, you may need to manually unclump or fluff the fill in your bag to ensure it dries thoroughly.

Final Thoughts

Have a new sleeping bag that you are excited to test out? Autumn is the ideal time to hike and then cozy up in your sleeping bag under the stars! For some spectacular colors and views, check out the best fall hikes near Colorado Springs. While it is safe to hike alone, if you are looking for some expertise, guided hikes through Broadmoor Outfitters are a perfect way to learn about and get familiar with a new area or trail.

How to Check Trail Conditions for Hiking in Colorado

Because our state can have such extreme and diverse weather, it is essential to do some research before you go hiking in Colorado. You should always be aware of weather, trail conditions, and wildlife before you leave for a hike, in part so you can pack accordingly.


There are so many stunning hiking options around the state. If you don’t know where to go, be sure to check out our Colorado Springs trail guide. Once you have a hike in mind, this article provides all the best resources for where to check Colorado trail conditions in order to be properly prepared for your hike.

Photo by Backroad Packers on Unsplash

Trail Condition Resources

All Trails

This amazing community-driven resource has everything you need to ensure a great day on the trail. It is personally one of my favorites on this list because it makes it easy to find variations of trails. This is particularly helpful if you are looking for a shorter mileage or less strenuous option. You can search for accessible trails (for wheelchairs, strollers, etc), parks that allow dogs, mountain biking trails and more. Listed information about trails includes mileage, elevation, reviews, difficulty level, parking information, and pictures.

This is a great resource for figuring out the proper trail for what you want out of the hike as well as staying informed along the way. As you hike, the app shows waypoints and elevation changes and tracks your metrics. You can review the hike, save your favorites, and share helpful tips with others. The app is particularly helpful for popular trails that other users are commenting on regularly. You can read recent reviews for relevant updates on the Colorado trail conditions and also check the weather and UV index for the day.

National Park Service

If you are looking to hike a trail within a national park, you can check the National Park Service’s website for everything you need. They list trail closures, conditions, and other important safety notices regarding wildlife and weather. Trail availability can change rapidly, whether from a storm, maintenance work, or high risk of fire. It is helpful to check the park’s website for updates day-of. This way, you can plan your hike and route around any closures or potentially dangerous areas.

One other especially important factor when visiting national parks is parking and permits. Depending on the time of year, parking can fill up fast. Once you know what hiking trail you want to explore, you can find trailheads and the closest parking lots. Grab the necessary permits or parking lot reservations in order to save time on the drive-in and help your day go smoothly.

Colorado Trail Explorer

Similar to All Trails, Colorado Trail Explorer is a comprehensive resource for exploring the outdoors in Colorado. You can find routes for hiking, horseback riding, skiing, ATV riding and more. Their filtering function also includes so much more than just dog-friendly and wheelchair-accessible options. You can search for special interests like geology or mining or things you’d like to see like wildflowers or waterfalls. 

Once you’ve identified a trail, the website pulls in Google Maps for directions and Weather.gov for forecasts. My favorite feature, though, is the custom ability to see the different sections of the hike. Rather than simply listing the mileage and elevation change, you can look at it step-by-step and see how each leg of the hike will test you. They even have a measure tool that allows you to check out a custom length of the trail. This is very useful if the different sections they list are not specific enough for you. From grade to elevation to mileage, you will get a good sense of the trail’s difficulty before you even get out of the car. 

The crowdsourced trip reports allow you to get updates on trail conditions, crowding, bathroom availability, and insect presence. Once you get the app and download the trail for offline access, you can keep notes on your experiences and track your progress in real-time. There are also fun challenges like identifying wildflowers and noting scenic lookouts to keep you engaged with all the beauty of Colorado’s trails. If you are an outdoor enthusiast, this resource is a fun and informative way to stay updated on Colorado trail conditions and track all your progress hiking around the state.

Colorado Trail Foundation

The 567-mile Colorado Trail between Denver and Durango is an accomplishment of massive proportions. Efforts to build the trail started in 1974 and took over ten years. It is a unique adventure that travels through six wilderness areas, eight mountain ranges, five major river systems, and some of the best views the Rockies have to offer. All up, the trail climbs nearly 90,000 vertical feet, but you don’t have to do it all at once. The trail is divided into 28 segments plus an additional 5-segment, 80-mile trail variation called Collegiate West.

If you are looking to hike any part of the Colorado Trail, the guidebook is strongly recommended. It includes mile-by-mile trail descriptions, driving directions and access points, mileage and elevation stats, and even information on towns to resupply if you do the whole trail at once. The website is also a great resource for information on packing, finding natural water sources along the trail, and preparing for the high elevation. There is a lot of research and preparation necessary before hitting the Colorado Trail. However, with the help of the Foundation, it has been completed in full by nearly 5,000 people.

Photo by Taylor Brandon on Unsplash

How to Interpret Trail Conditions

It is not enough to just check on trail conditions and make sure the trail is still open. There can be some crucial information in these updates that will help you pack well and be properly prepared for your day. If there is a trail closure, you can check out All Trails or Colorado Trail Explorer to find variations or nearby trails with similar stats.

Common information about trail conditions can include obstacles and downed trees, muddy or snowy sections, and standing water. In the case of wet trails, you will want to wear waterproof hiking boots (or boot liners). Additionally, pack extra socks, and read up on some tips for hiking in mud. If you know you will encounter obstacles on your hike, hiking poles can be helpful for extra stability, and gloves will protect your hands from rough tree bark or scrapes from branches.

Other conditions may include loose soil, exposed tree roots, or damage from a mudslide or flash flood. These conditions tell you to be cautious and watch where you step. Wearing your best hiking boots with good grip will help you overcome a damaged trail.

Other Resources to Check

In addition to looking for updates on trail conditions, there are a few other things to research in order to be fully prepared for a hike. First, checking the weather reports for the day will help you pack and dress properly. You should also know about weather changes when hiking to a higher elevation or hiking between different climatic zones.

Next, be sure to check the park or county’s website for guidance on permits and parking. Some parks may require permits for backcountry hiking, in order to limit hikers and protect the landscape. Many places especially around Colorado Springs have limited parking lots and use reserved tickets to control overcrowding. Be sure to look into these aspects of your day hike as well so you do not show up unprepared and miss out on your adventure.

No matter where you go, it is always important to be aware of Leave No Trace guidelines in order to be a good steward of the land. There are plenty of resources available to learn about how best to pack out trash and get rid of waste so you can protect the trails for future generations.

Finally, I like to prepare for hikes by checking information on local wildlife and the flora of the area. I find this information heightens the experience because I am able to identify and appreciate the nature around me more. It can also be important to be aware of wildlife near hiking areas. For example, if bears have been spotted from the trail, make sure you are aware of bear safety tips and don’t go on the hike during their peak hours. You can prepare by learning what wildlife you might encounter and reading up on how to watch wildlife safely

Final Thoughts

Colorado has some of the best hiking in the country. It includes over 5,600 miles of hiking trails according to Colorado Trail Explorer. No matter what type of view or how strenuous a hike you are looking for, you can surely find an exciting and awe-inspiring hiking trail near you. If you are just getting started on your hiking journey, consider going on a Guided Hiking tour in order to become familiar with best practices and helpful techniques while on the trail. Hiking with experienced friends or a professional is the best way to start hiking and get comfortable with packing and preparing for a hike in Colorado.

Celebrating with Broadmoor – Party Ideas in Colorado Springs

Are you looking for an exciting and unique way to celebrate a birthday, promotion, or anniversary? With all the amazing outdoor venues around Colorado Springs, there are many different ways to plan a fun outdoor celebration. Looking for celebratory event ideas? Broadmoor is one of the best places to have a birthday party in Colorado Springs.

Broadmoor Outfitters has a variety of innovative and engaging guided activities that will make any celebration unique and memorable. Whether you’re planning a party for a little one or celebrating a milestone as an adult, there’s an option for you. From invigorating zipline courses to the decked-out paintball arena, the Broadmoor’s property is a well-equipped party venue in Colorado Springs.

Image by sebastian del val from Pixabay 

Party Ideas for Kids

Small Group Party Idea: Wood Course Zip Line

This three-hour beginner zip line course is a thrilling activity perfect for adrenaline junkies of all ages. The course has five zip lines that range from 250 to 1500 feet. Riders can also reach speeds of up to 45 mph, and attain heights up to 150 feet in the air! The guided zipline activity is a great experience for a small group of friends looking to try a new experience. The zipline course can accommodate a maximum of eight participants.

On the Woods Zip Line Course, you will soar over a waterfall and enjoy stunning views of Colorado Springs. Add in the thrill of zip lining, and it’ll surely be a memorable birthday. The exciting experience covers technical guidance from professionals and beginner zip lines for participants to acclimate to the experience. This is the more beginner-friendly of Broadmoor’s two zip lines courses. So it is perfect for a low-stress, enjoyable birthday party. 

Large Group Party Idea: Outdoor Movie Screening

Give your kid a unique gift and a memorable birthday party. The 26-foot inflatable movie projector screen is perfect for an outdoor evening celebration. You can rent the outdoor movie theater and bring it anywhere as it is very portable and easy to set up. This is a great option for large groups and celebrations taking place in spacious outdoor venues near Colorado Springs. 

With the ability to project anything onto this massive screen, you can take a celebration to the next level. Share old photos at a large family reunion, enhance the visuals at a musical concert or theatrical production, or play funny videos in the background of a mixer. There are endless ways to use an inflatable movie projector! This a top-notch addition to any celebration near Colorado Springs. 

Party Ideas for Adults: Happy Hour Celebrations 

Moving on to the adults, If you are looking to celebrate a birthday or anniversary with a few drinks, there are tons of fun ways to spice up a simple cocktail hour with friends. But let’s avoid cramming a large group into a crowded bar. Instead, you can have a private birthday party in a unique outdoor venue. 

The Broadmoor has plenty of unique and thrilling opportunities for adults. You can really make your birthday celebration memorable with the addition of an archery course or the tomahawk toss challenge. If you are looking for a low-key celebration that still has elements of excitement, consider a professional demonstration with birds of prey at a falconry cocktail hour. You can do these activities at the Broadmoor property or rent the equipment to bring to your own space. 

Whether you need to plan a meet-and-greet or a birthday party with different groups of friends, these activity-based happy hour parties will give your friends something to talk about and keep the energy flowing. Broadmoor Outfitters’ happy hour party ideas are fun, stress-free, and surefire ways to please your guests.

Photo by Kelsey Chance on Unsplash

Outdoor Party Ideas Near Colorado Springs

If your idea of a good time involves an outdoor adventure, anywhere can be a party venue! This is especially true in Colorado Springs with its high concentration of outdoor opportunities. With so many parks, mountains, and bodies of water, you don’t have to travel far to find a great party venue in Colorado Springs. 

From drinks in the park to a group hike, there are nearly unlimited ways and places to celebrate. What’s more, Broadmoor Outfitters has guided activities around Colorado Springs for people of all ages and interests. You could bike down Pikes Peak, rock climb in Garden of the Gods, mountain bike through North Cheyenne Cañon, or stand up paddle board at Catamount Reservoir. All of these outdoor activities make for interesting and memorable celebrations, sure to bring you and your friends closer together.

One of the party venues in Colorado Springs is actually the Broadmoor Outfitters property. Located in southwest Colorado Springs, it is a spacious area with a lot of fun activities to do right on site. You can compete against your friends in a scavenger hunt, geocaching search, capture the flag, or other fun challenges. If you haven’t been, these all make for great excuses to explore the Broadmoor property. 

Party Ideas for Coworkers

Finally, Broadmoor Outfitters has a ton of fun happy hour options and team-building exercises designed for corporate retreats. Whether you are planning a celebration to reward your team for a job well done or hoping to bring your team closer with a corporate team-building challenge, The Broadmoor is a great place to unite coworkers outside the office. For a deeper dive into all of Broadmoor Outfitters’ opportunities for colleagues, be sure to check out our tips for planning a corporate event.

Final Thoughts

In conclusion, Colorado Springs is an amazing place with almost unlimited ways to enjoy the outdoors and try new activities. Before you stress over a house party or plan a boring night at a restaurant, check out all the amazing outdoor adventures near Colorado Springs that you could include in your birthday celebration. There is no better time than your birthday to invite your friends to learn a new skill with you, and there is no better place either. The Broadmoor is one of the best places to have a birthday party or celebration in Colorado Springs. Plus, thanks to their guided activities, you can let Broadmoor Outfitters handle all the equipment needs and just enjoy your day!

How to Transition to Outdoor Climbing

With rock climbing gyms popping up around the country, indoor climbing has become more popular than ever. Still, there is nothing like the thrill and challenge of climbing real rock faces in nature. If you are used to climbing indoors, you may be wondering how to get started climbing outdoors. 

There are a few important differences between indoor and outdoor climbing to keep in mind before you make the switch. There are more technical skills and gear requirements, but transitioning to outdoor rock climbing is a worthwhile endeavor. If you are excited to test your indoor climbing abilities on an actual rock face, let’s get started discussing how to climb outdoors.

Photo by Patrick Hendry on Unsplash

Differences between Indoor and Outdoor Rock Climbing

Prepare for No Defined Holds

When transitioning from indoor to outdoor rock climbing, there are a few key differences you will note right away. First, because you will be climbing on actual rock faces, there will be no specific holds for you to grab. Instead of gym walls with color-coded holds, you will have to decide for yourself where to put your hands and feet. While some climbs will have obvious solutions, others will have fewer potential hand holds. 

Before starting an outdoor climb, you should prepare your route, mentally envisioning each move, noting potential hard spots, and planning your approach. You can also refer to climbing guide books which might provide additional information on the climb’s crux, or hardest parts, and beta, which are technique suggestions.

Move Carefully on Rough Rocks

Regarding the holds themselves, depending on the type of rock, outdoor climbing tends to be less comfortable than gym climbing. Rocks can cut up your fingers and wear away at calluses, so be prepared with a first aid kit and move a little more cautiously. Especially if the weather is colder, you will likely want fingerless gloves to protect yourself from the elements.

Anticipate Harder Climb Ratings

While all the climbs use the same rating system (aside from bouldering problems), outdoor climbs will feel a lot harder. Many climbing gyms rate a bit generously, and the lack of structure outdoors is at first challenging.

Start off with beginner routes to figure out your outdoor climbing abilities. If you climb an 11a in your gym, maybe start with an 8 or 9 outdoors, and don’t be hard on yourself if you can’t meet your expectations right away.

How to Pack for an Outdoor Rock Climbing Trip

Now that you know what to expect when switching to outdoor climbing, let’s talk about how to prepare. Aside from where to go, which we will cover soon, you will need extra gear (on top of your harness and climbing shoes) and food for an outdoor rock climbing trip.

As safety is key, the first things on your list are a helmet and a first aid kit. These are two items you wouldn’t need in a climbing gym but are essential when climbing outdoors. In addition to your other essential rock climbing gear, you should add a comfortable and reliable half-dome helmet to your basic climbing kit.

Another difference will be clothes and footwear. If you have a long walk to your climbing area, you’ll want to bring hiking boots with you on the trip. When you learn how to set your own climbs, you will especially need good footwear for the scrambles to the tops of climbs. 

You should also check the weather for the day and bring rain gear and cold-weather gear. It takes a while to set up outdoor climbs. Therefore, you may find an indoor hour-long climbing session is more like a half-day outdoors. On this same note, prepare for your outdoor climbing trip with enough water and snacks for the day. There won’t be water fountains on the trail! If you are looking for other helpful tips, check out how to pack for a day hike

How to Set Up Top-Rope Climbing Routes Outdoors

The last key difference between indoor and outdoor rock climbing is that outdoor climbs are not usually ready for you to just start climbing. Unlike rock climbing gyms, which have fixed anchors and ropes already dropped for you, outdoor rock climbers have to prepare the protection themselves. While it can seem overwhelming at first, the skills needed to set your own top rope climbs are very attainable.

For beginners, top rope is the best introduction to the outdoor climbing world. You would need to set anchors, using nearby trees or rocks, to create a reliable place to attach your top rope. For lead climbers, you would need to learn how to use trad gear, like cams and nuts, in order to create the points along the climb where you can clip in. Both of these options require a lot of additional gear, including static and dynamic ropes and loads of carabiners. 

You should try outdoor climbing a few times with experienced friends before worrying about these pieces. But if you are still interested in learning how to set your own climbs, you’ll need to find a friend or professional guide to help you learn the knots and safety rules.

Photo by Patrick Hendry on Unsplash

Where to Get Started Rock Climbing Outdoors

There are multiple ways to find good outdoor rock climbing spots. Guidebooks are an excellent resource for identifying available climbs at different skill levels, and there are so many great rock climbing spots near Colorado Springs. Garden of the Gods and Cheyenne Cañon Park are two locations that offer a variety of challenges. Both of these locations also include beginner-friendly climbing routes. Once you have identified somewhere to check out, be sure to get the proper rock climbing permits for Colorado Springs parks

Outdoor rock climbing is an invigorating experience that brings you closer to nature and rewards you with stunning views once you finish the climb. Transitioning from indoor to outdoor climbing requires planning, learning to create anchors, and buying additional climbing gear. Before committing, you can experience outdoor rock climbing with a skilled professional guide. Get started and enjoy some of Colorado Springs’ best climbing spots on a guided rock climbing day trip.

Hiking Boots vs. Trail Runners – Which Do You Need?

It’s a constant debate among hikers. Are hiking boots or trail runners better for exploring the backcountry? As professional hiking guides, we’ve heard this question countless times, and now it’s time to list the pros and cons of each option so you can make the best choice for your future adventure. 

So, let’s take a close look at trailer runners vs. hiking boots and what each option brings to the trail. But first, let’s define these two types of footwear. 

What Are Hiking Boots?

Hiking boots are sturdy footwear that can take on everything the trail can throw at you. They typically deploy heavy-duty materials (such as leather) with a proven track record of holding up against harsh trail conditions season after season. Hiking boot soles tend to be stiff and supportive, while the upper can be waterproof or not – depending on your preference.

Boots either sit above the ankle, providing improved support and protection, or below the ankle. The low-cut option can also be referred to as a hiking shoe. But boot or shoe, this dedicated hiking footwear shares the same material and construction.

The last defining characteristic of hiking boots is that they are often noticeably heavier than your average street shoe or runner. This point brings us to trail runners.

Photo by Joanna Nix-Walkup on Unsplash

What Are Trail Runners?

As their name implies, trail runners are designed for runners tackling any terrain that’s not pavement. It could be dirt trails, mud, gravel, rock, or any combination of these options. Since they’re designed for running, trail runners have a flexible and light design to facilitate moving fast and fluidly. Since they’re lighter, trail runners use less robust materials than dedicated hiking boots and offer less cushioning. But their naturally light movement and lower rigidity tend to make up for these drawbacks.

Now that we know the basics of hiking boots and trail runners let’s dive into each one’s benefits and drawbacks for hiking.

Hiking Boots – Benefits and Drawbacks

Benefits

Durability

Hiking boots are the burly tank of the hiking trail. Their heavy design is robust, long-lasting, and offers a great deal of support. Specifically, the heavier boot materials, such as leather, synthetics, and nubuck, are incredibly resistant to everything the trail can throw at you. They’ll hold up season after season (with proper care).

Support

Hiking Boots are also noticeably stiffer than your average footwear, thanks to their midsoles (the middle layer embedded in the sole of the boot). It may initially seem and feel counterintuitive to opt for stiffer footwear, but this design provides more protection and stability when you’re hiking for hours across rocky or uneven terrain.

Additionally, hiking boots offer significant ankle support. The lacing system typically extends above the ankle. This allows you to wrap your ankles in a stiff, supportive shell that significantly improves your stability on the trail. Such ankle support is absolutely crucial for hikers with a history of ankle issues or those tackling very loose or uneven terrain.

Warmth

The thick materials and increased coverage that hiking boots offer also improve warmth retention on chilly hikes. They can block a sharp wind and slow down how quickly heat escapes from your foot area. Combine these benefits with a thick sock, and burly waterproof hiking boots can get you through most 3-season hiking conditions. However, remember that regular mid-winter hiking in sub-freezing temperatures may require a winter-specific boot.

Drawbacks

Weight and Bulk

All the benefits and features that contribute to hiking boots’ benefits combine to form one glaring drawback – weight. Hiking boots are noticeably heavy on the trail – although recent technology advancements are helping – and can sometimes feel ungainly and bulky while hiking.

This bulkiness is often highlighted on longer hikes when your energy starts to dip, and all that added weight on your feet may feel ponderous.

Stiff Materials

While stiffer soles and materials help with hiking stability, they can also detract from your overall comfort on the trail. The uncompromising nature of tough hiking boot material often doesn’t automatically yield to accommodate your foot.

This leads to the common “break-in” period, where you wear your boots on several preliminary hikes before the material very subtly starts to conform to your foot size. Still, the material is stiff, and what may be comfortable at the beginning of a hike may not be hours later when your feet have swelled slightly from the hike.

Photo by Taylor Grote on Unsplash

Trail Runners – Benefits and Drawbacks

Trail runners are almost the exact opposite of hiking boots. Let’s take a close look at what sets them apart in the world of hiking, and where their benefits and drawbacks lie. As we progress through this section, keep in mind that trail runners are – as their name implies – designed first and foremost for running. However, they’ve recently gained an intense following in the hiking community for their comfortable and lightweight design.

Benefits

Lightweight

First off, they place a premium on lightweight materials. The shoes are designed to move light and fast, and every upper material choice reflects this goal. Therefore, trail runners don’t hold you back while hiking and make each step feel light and natural. 

This natural feel is further enhanced by trail runners’ flexible design, which we’ll discuss next. 

Flexible

The bottom sole and midsole (if it has one) on a trail runner feature lightweight and flexible material choices. This flexibility gives these shoes a very natural feel. Every step is fluid and unrestricted, making this footwear option feel much more comfortable than its heavier boot counterparts. 

Breathability

Exceptionally lightweight material choices also facilitate a wonderfully breathable design. Trail runners are often designed to shed heat and moisture very quickly. The result is footwear that helps keep your feet cool and comfortable when you’re working hard and also dry quickly when they get wet – either from a quick downpour or a sweaty hike. 

A note on weatherproofing: Many trail runners are available in a waterproof option. These options won’t be as breathable as their non-waterproof counterparts but offer improved resistance to bad weather. However, keep in mind that the thin and lightweight materials don’t retain the waterproofing treatment as long as full-sized hiking boots. 

Comfort 

As we’ve touched on while discussing flexibility, trail runners are exceptionally comfortable. The light and soft material easily conform to your feet to mitigate almost all rubbing, chaffing, and stiffness. The result is vastly improved comfort that has no break-in period. This point also tends to make trail runners an ideal option for hikers with exceptionally large or wide feet, as many trail runners (such as the Altra Brand) focus on naturally wide designs for optimum comfort.

Drawbacks 

Lower Durability 

The focus on lightweight materials means trail runners aren’t as durable as heavy-duty hiking boots. They’ll often wear down more quickly, and the thin upper material is more susceptible to scrapes or tears. Everyone’s expereince will vary, but we often see trail runners lasting for just one or two seasons of heavy-duty use before materials begin to fail.

Less Support 

Trail runners typically offer minimal support. Their low cut means no ankle support, while less cushioning in the sole leads to a rougher ride than hiking boots. Many trail runner shoes will include a rock plate – a hard plastic insert – in the sole to help lessen the impact of rocks underfoot. But nevertheless, trail runners undoubtedly offer much less support than a burly hiking boot. 

Bringing It Together

We’ve certainly covered plenty of information regarding both trail runners and hiking boots. So let’s bring all the benefits together to see where each option shines in the backcountry.

Trail Runner BenefitsHiking Boot Benefits
– Lightweight– Highly Durable
– Flexible– Supportive
– Natural Step– Excellent weatherproofing
– Breathable– Warm
– Quick Drying– Increased Cushioning

How to Choose Between Hiking Boot and Trail Runners

So which is best, hiking boots or trail runners? Well, the decision comes down to your preferences and what you expect from your footwear. To help you make that decision, let’s consider a few specific questions that dramatically influence which option is for you.

Do your ankles or arch require support in order to hike comfortably? Many hikers need additional support in these areas to prevent a rolled ankle or arch pain. Additionally, a previous injury may also necessitate increased support to avoid flare-ups. If this sounds like your situation, hiking boots may be the best option. Alternatively, do your feet ache in stiff or rigid shoes, or do you always get blisters from your toes rubbing against the inside material of stiff shoes? In this case, trail runners’ soft and flexible comfort will likely be a good choice.

You can see where we’re going with these questions. Think about what will make your feet happy. Everyone’s priorities and comfort levels are different, so consider what works for your feet, the terrain you’re expecting to encounter, and what you expect your footwear to provide out on the trail. Fill in these blanks, and you’ll be well on your way to finding the perfect shoes for your next hiking adventure.

Cycling Events Near Colorado Springs this Fall 2022

If you are looking forward to hopping on your bike this fall, you’re going to want to check out these awesome cycling events near Colorado Springs. Colorado is known for its gorgeous landscape, and the fall is the absolute best time to take advantage and explore the state’s natural beauty. 

Within a couple hours of Colorado Springs, you can find tons of fun and exciting opportunities to ride with other cycling enthusiasts. There are plenty of courses available for beginnings, youngsters, and competitive riders alike. Here are just a few of the best Colorado cycling events you can enjoy this fall in 2022. 

CU Boulder Buffalo Bicycle Classic

When: Sunday, September 11, 2022

Where: Boulder, CO

Register Here

This historical ride is celebrating its 20th year this September, and now is a great time for you to try it out. There are nine different courses for riders of all ages and abilities, ranging from 14 to 100 miles, and all riders are welcome, even those with e-bikers and trailers. The longer routes head west to the foothills of the Rockies and take you to Nederland, then up to Allenspark. If you haven’t been cycling in Boulder, it is a beautiful place!

Aside from how fun the courses look, this cycling event is also the largest scholarship fundraising event in Colorado. Registration and donations support local “scholars” – Colorado residents attending CU Boulder. At less than two hours driving from Colorado Springs, this cycling event is a great opportunity to challenge yourself.

Pikes Peak APEX 

When: Thursday, September 22, 2022

Where: Colorado Springs, CO

Register Here

This epic cycling event is something you do not want to miss. It is a four-day mountain biking challenge with a total of $25,000 in prize money. The course is, on average, about 30 miles and 3,000 feet elevation per day and takes you cycling through all the must-see locations near Colorado Springs. You will get to explore Gold Camp Road, Palmer Park, Pikes Peak, Cheyenne Cañon, Royal Gorge Park (including biking over the Bridge!), and so much more. It is not too challenging on technical biking abilities, though it will certainly challenge your endurance. If you have checked out the Pikes Peak Cog Up Bike Down tour, then you might have some idea of what to expect.

There are also two options for folks looking for something a little less intense. You can sign up to cycle for just one day – either Thursday or Sunday – and complete the route without worrying about the competition. This option is perfect for beginner cyclists looking to get started in more formal events as it follows USA Cycling regulations and will give you a great feel for the spirit of the competition. If you are considering signing up, don’t wait: because of permit and preservation limitations, there are only 370 slots available, so get yours today.

Photo by Axel Brunst on Unsplash

Denver Century Ride 

When: Saturday, September 24, 2022

Where: Denver, CO

Register Here

This Colorado cycling event is a really unique opportunity. All of the courses are urban and take you through the streets of Denver. Not only is this a really cool way to explore the city, but also it will get you used to street cycling and show you all the ways the bike-safe streets of Denver connect. If you are considering commuting to work or cycling more in urban areas, this is a great way to get started and learn how to stay safe as a biker on the road.

The routes are 25 to 100 miles long and open to riders of all ages on all types of bikes: tandem, e-bikes, trailers, and more. The shorter routes take you through downtown, City Park, and the Denver Botanical Garden for what is surely a quaint, scenic ride. The longer rides will give you a tour through the greater Denver area, all the way down to Chatfield State Park and up to Golden. This supportive cycling event is a fun way to see Denver and get comfortable with cycling on urban roads. 

Gravel Locos 

When: Saturday, October 1, 2022

Where: Pueblo, CO

Register Here

The Gravel Locos cycling events happening on October 1 are epic. There are four race options, the shortest (La Pequeña) being a non-competitive 30-mile course and the longest (La Loca) a ridiculous 170-mile race with a 13,242-ft elevation gain. The three competitive, timed races will give you the chance to compete against some high-profile cyclists and see how you match up. 

Just an hour south of Colorado Springs, this event is a great day trip during a consistently beautiful time of year. You will enjoy a picturesque ride through Pueblo and the front range of the Rockies. One nice plus is that the ride is for a good cause: the event is supporting the Red Creek Volunteer Fire and Rescue to help them expand their firehouse.

The ‘Rad Dirt Fest

When: Saturday, October 8, 2022

Where: Trinidad, CO

Register Here

In a beautiful part of Southern Colorado, just two hours south of Colorado Springs, you can enjoy one of three invigorating cycling events. These races are wonderfully scenic, as you will bike past the Spanish Peaks, mesas, and plateaus and surely see some interesting wildlife. The roads are maintained but gravel and dirt, so it is definitely a different feel than biking on paved city streets.

The course options are The Frijole, at 38 miles, the Anteloop at 99 miles, and the longest Stubborn Delores at a killer 166-mile race with an 11,213-ft elevation gain. The longer two races will take you west from Trinidad toward the Spanish Peaks Wildlife Area and San Isabel National Forest. The races may be tough, but the views will surely make it worth it. 

Final Thoughts

There are so many fantastic cycling events near Colorado Springs, not just in the fall but year-round. If you are thinking about getting into cycling or mountain biking and are not sure where to start, you can check out a guided mountain biking tour. This will allow you to see if you like it, learn some helpful safety tips and techniques, and learn more about Colorado’s cycling community.

image of rock climbing gear

Rock Climbing Gear – A Beginner’s Guide

Rock climbing has had an explosion of growth over the last couple of decades. The unique sport offers excitement, a challenge for all abilities, and different ways to explore and play in both indoor and outdoor spaces. Sometimes a new sport can be intimidating: the gear, systems, and language can be a lot to learn. If you are uncertain about what comes first, it can be helpful to research and learn more about how to get into rock climbing

As a beginner rock climber, consider familiarizing yourself with the sport through a guided rock climbing tour. Guided excursions come with all the gear you will need and allow you to get comfortable with proper climbing gear use. If you have never climbed before or want to upgrade from rental gear, this rock climbing gear list has all the beginner climbing essentials you need to start your journey into the vertical world.

Rock Climbing Shoes

Rock climbing shoes are an important part of climbing. The special rubber sole and snug shape allow you to grip the rock, offer protection for your feet, and give you the ability to place your feet on small holds. There are various shoes for all styles of climbing, and climbing shoes can be organized into the following categories: neutral “flat” sole, moderate “slightly downturned” sole, aggressive “very downturned” sole. Many shoes also offer options of “slip-on,” laced, or velcro closures.

As a beginner, you should go with more neutral shoes as they tend to be the most comfortable and least expensive. Downturned, aggressive shoes are tight, uncomfortable, and typically reserved for more technical terrain. When you are just getting started, comfort is key as you get used to wearing these new shoes. Climbing shoes should be snug, but not so tight that they cause pain. Due to the fit, you should not walk in the shoes or wear them if you are not climbing.

Some examples of beginner rock climbing shoes include:

Black Diamond Momentum, La Sportiva Tarantulace, Mad Rock Drifter

Rock Climbing Harness

Just like climbing shoes, a harness is an essential piece of protective rock climbing gear for any rock climbing with ropes. All harnesses come with basic features of holes for your waist and legs, gear loops, and a belay loop. There are many differences between harnesses such as adjustable leg loops, weight, material, and fit. These features become more important if you choose to specialize in a style of climbing down the road.

For a beginner rock climbing harness, look for an “all-around” harness that is comfortable and affordable. Fit will be one of the most important factors when buying your first harness. Make sure it has a snug fit around your upper legs and waist. Some people prefer the ease of non-adjustable leg loops but if you are looking to get used to the fit and feel of a harness, the ability to adjust your leg loops can be helpful.

Some examples of all-around rock climbing harnesses include:

Black Diamond Momentum, CAMP Energy, Petzl LUNA 

Chalk & Chalk Bag

Whether bouldering or top-rope climbing, chalk can be a game changer while climbing, especially if it is hot or humid. Chalk comes in a variety of forms: block, loose, and liquid. An easy way to start is by purchasing a “chalk ball,” which is a small cloth pouch filled with loose chalk. You chalk up simply by grabbing the chalk ball and easily refill the ball when it gets low with separately purchased loose chalk. 

It’s not a great idea to just dump loose chalk into your bag without a ball, and in fact prohibited at some gyms, as it is messy, wasteful, and annoying for your belayer to have chalk dropped on them when you use it mid-climb. Liquid chalk is preferred by some but not as common for top-rope climbing. Also, “eco” chalks, most often reserved for outdoor climbing, vary in color to match the rock.

Most chalk bags are pretty small with a closure mechanism and a waist loop. A bouldering-specific chalk bag or “buckets” will be larger, without a waist strap, and often come with a brush. If you are new to climbing, an affordable waist belt chalk bag with a chalk ball inside should be all you need. Chalk bags come in all sorts of colors, designs, patterns, and shapes so have fun. You can’t go wrong with this piece of rock climbing gear!

Belay Device

If you want to rope climb, belaying will be necessary. You will need a locking carabiner and a belay device. Again, there is a multitude of devices to choose from. Belay devices often come in the following broad categories: tube style, semi-assisted braking, auto-locking, and figure 8 (not commonly used). The most traditional and entry-level option is a “tube style” device such as an ATC. Most climbers learn to belay with an ATC and then switch to an assisted or auto-braking device. No matter which device you choose, be sure to seek instruction on how to use the device safely and appropriately.

Some examples of common belay devices:

Black Diamond ATC- XP, Edelrid Mega Jul, Petzl GRIGRI

Helmets for Outdoor Rock Climbing

While helmets are not commonly used inside, they are a must-have piece of rock climbing gear for any outdoor climbing. This important piece of gear protects you from anything that may fall from above – or protect you from the ground in the event that you fall. You will want to look for a designated rock climbing helmet as they are designed to protect your head from specific injuries that could be encountered in the sport.

There are generally two types: hard shell and shell-foamed helmets. Hardshell helmets are generally more affordable and more durable, making them great for beginners. Shelled foam helmets tend to be more expensive and have less longevity but are more breathable and lightweight. As with most types of gear, fit and comfort are top priorities when selecting your gear. 

Some examples of rock climbing helmets include:

Black Diamond Half Dome, CAMP Armor, Petzel BOREO

Final Thoughts

There is so much more to know about the sport of climbing aside from the rock climbing gear, but it is all worth it to take the time and learn. Rock climbing is one of the most invigorating and satisfying challenges. For an introductory experience, try a guided rock climbing tour. Once you have your own rock climbing gear, the technique and knowledge, and some confidence, be sure to check out the best beginner rock climbing in Colorado Springs and enjoy the views from new heights!