How to Know if Snow is Safe for Hiking

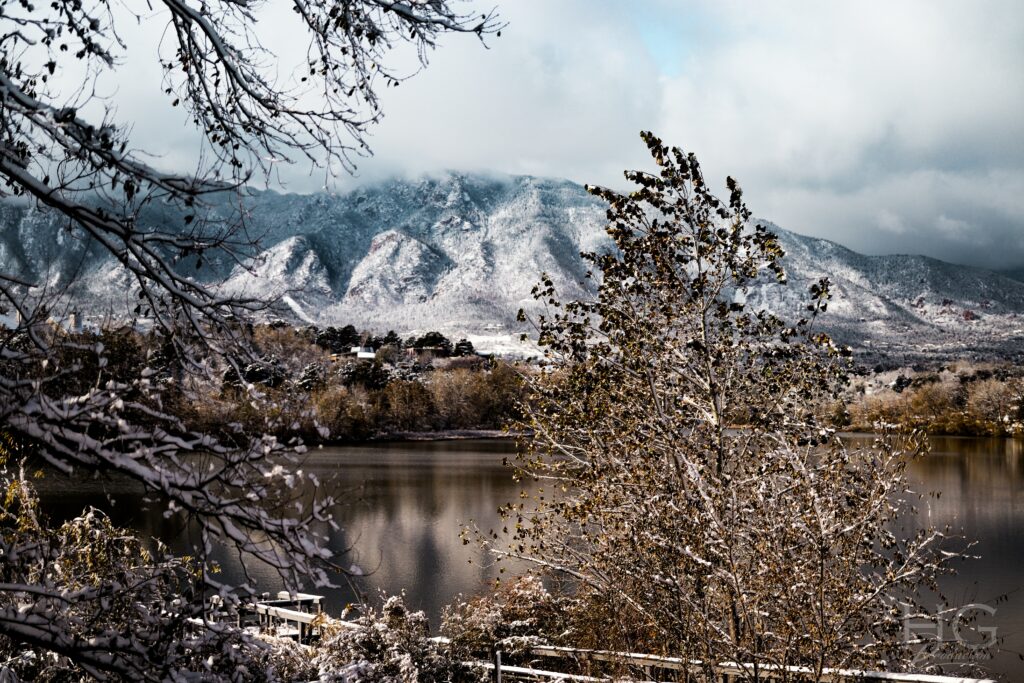
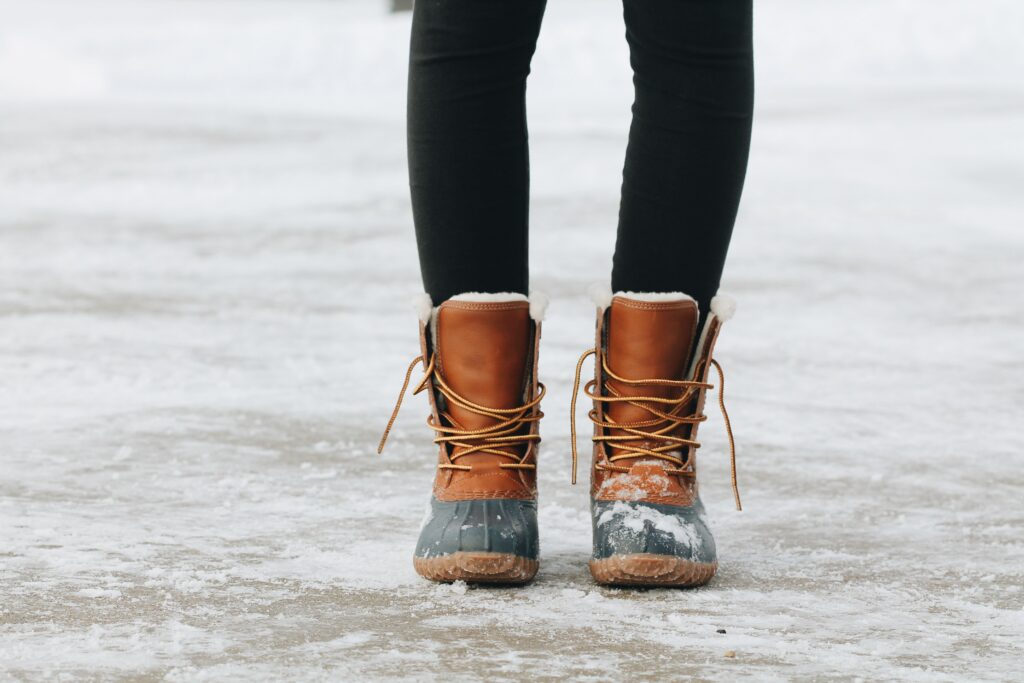
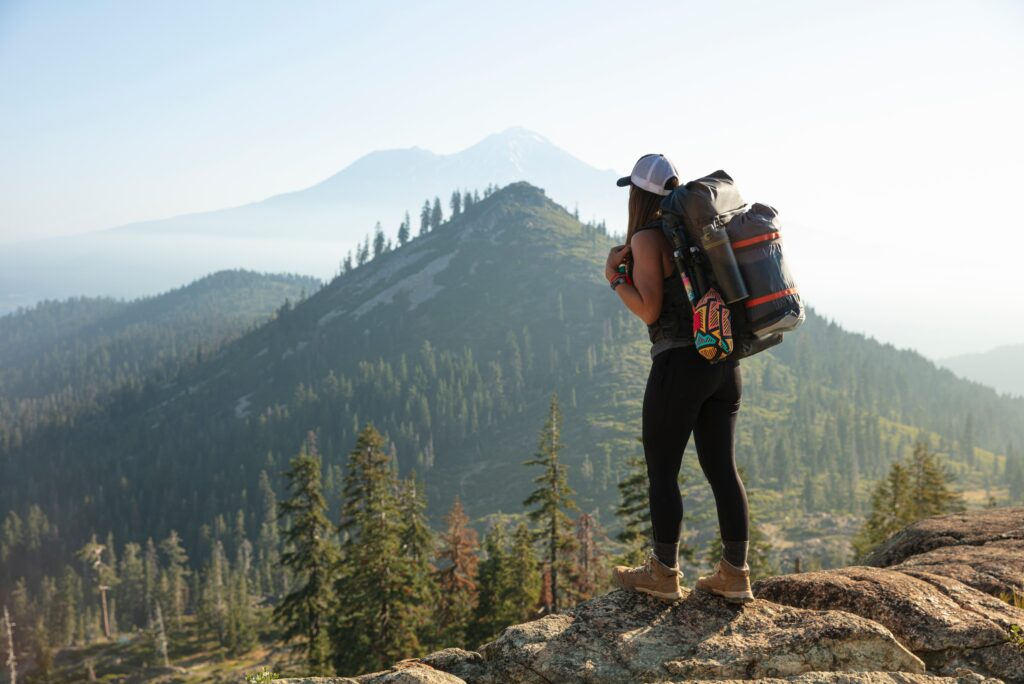
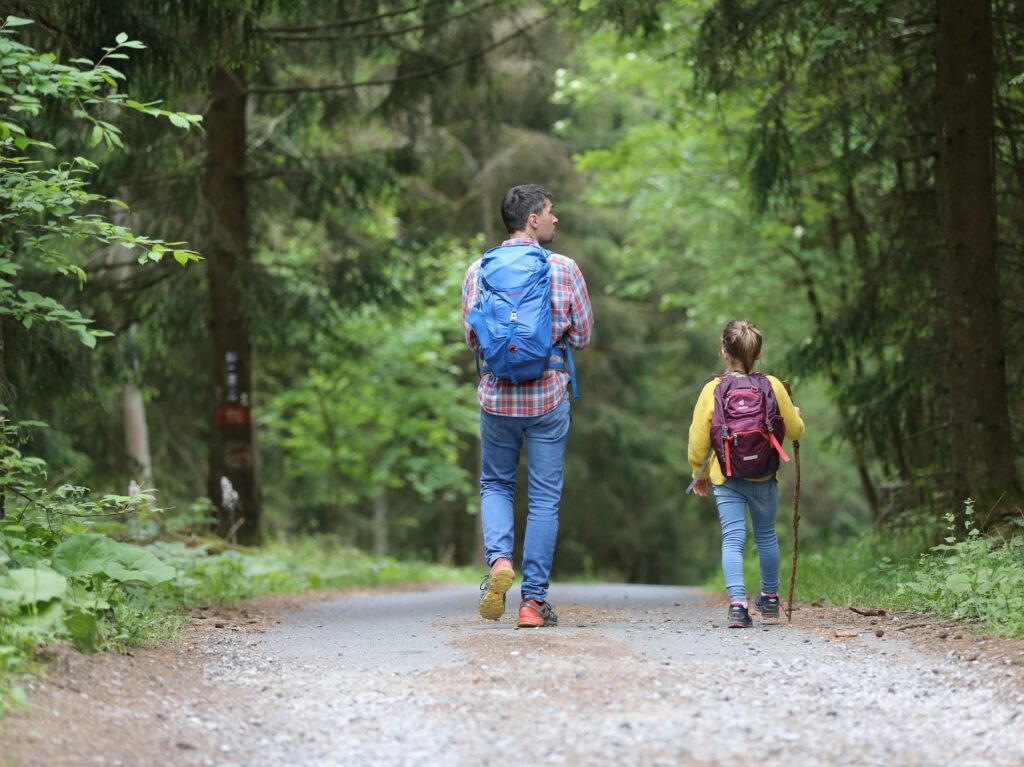
After a long, snow-filled winter, every hiker is itching to get out onto the trails without trudging through feet of snow. The spring is a time filled with temptation and desire to do the thing we all love to do the most: strap on our boots and get outside.

As the world begins to thaw, it’s of the utmost importance that everyone remembers how snow can still be dangerous, even when there isn’t much of it. If you come to a point on the trail covered in snow, is it safe to traverse across, or should you turn around and find another route?

There are dangers to hiking in the snow that can often be avoided. Sometimes the shortest way isn’t the best, and when you’re tired it can be tempting.

We’ll look into the ways to determine the safety levels of the snow, as well as how you can prepare for hiking in the snow. Many of these safety tips remain the same as if you’re hiking on a summer day without any snow in sight, but they are still important to keep in mind. If there’s one thing to remember here, know that in any scenario, it’s best to choose the least risky option and come back to try another day.

Avalanche forecast

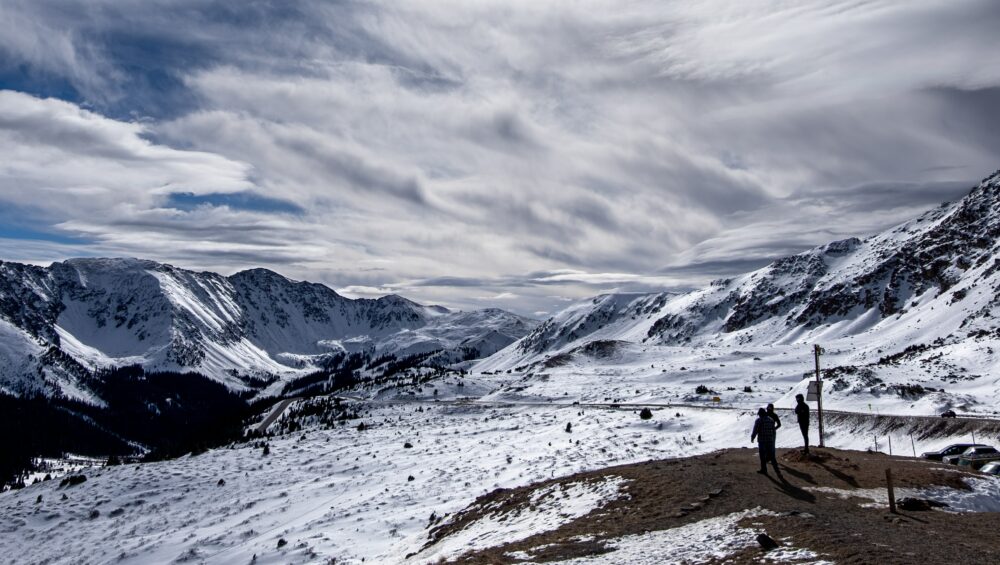
Hiking in the snow can be one of the most dangerous activities in the winter, especially when the snowpack is unstable. With the right training, any user can head out and determine safety levels and decide what they feel comfortable doing in the backcountry. Even users with a high level of training need to approach the trails with caution as avalanches can be unpredictable. 

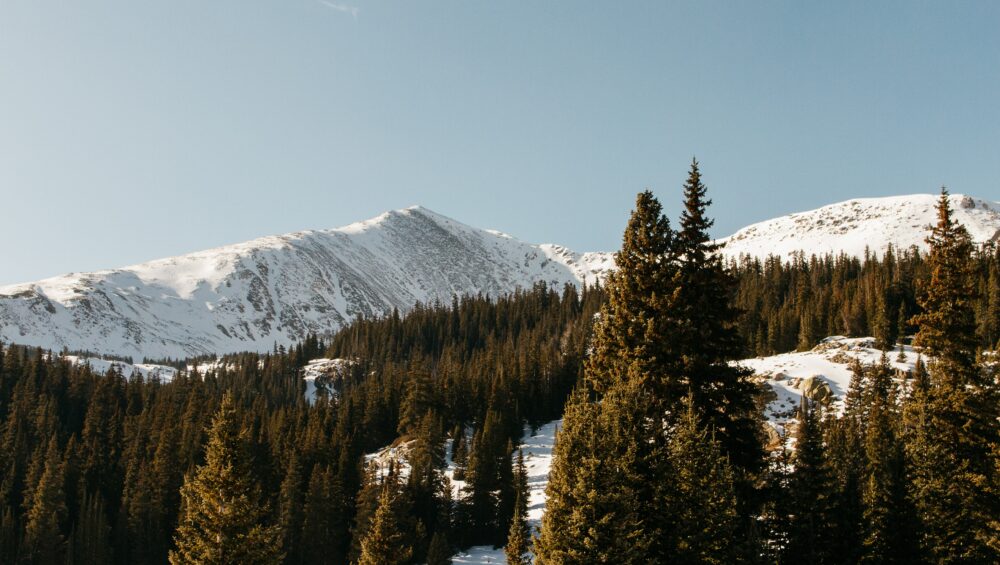
One of the best resources for any user hiking in the snow is the avalanche forecast. The Colorado Avalanche Information Center (CAIC) works closely with different snow forecasters across the state to obtain thorough information that can help keep people safe in the mountains. 

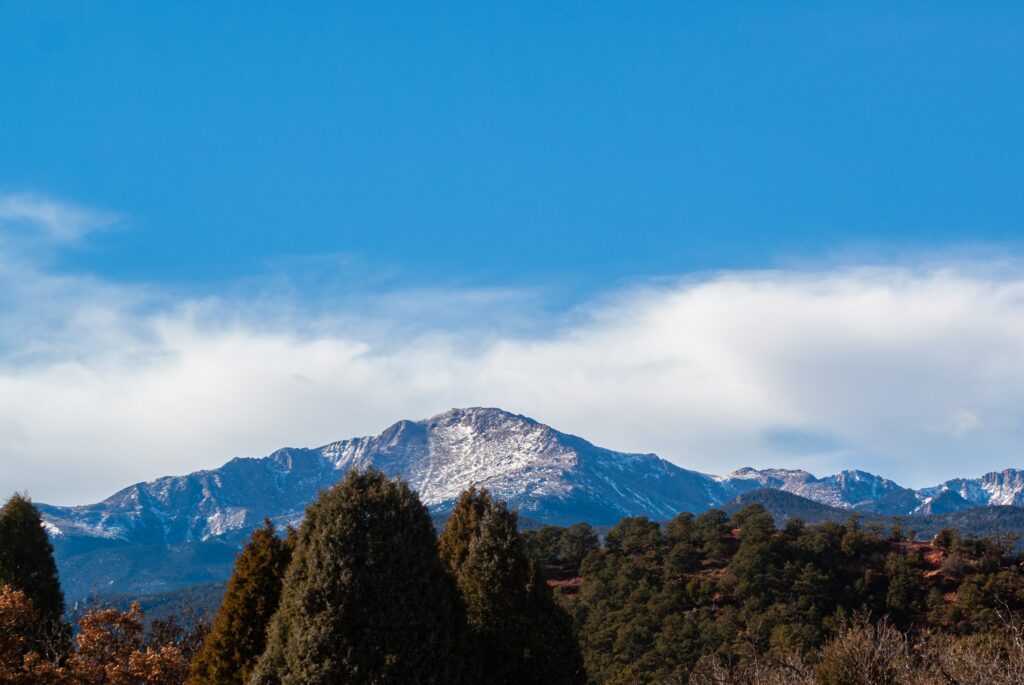
The forecast is easy to read and incredibly helpful, even if you don’t have any formal avalanche training. Although the snow may be gone down low in the cities, the peaks hold onto snow for a huge chunk of the year, meaning avalanches are always possible. 

Before heading out in the spring, the avalanche forecast should be the first thing you check while checking the weather forecast for the day. The conditions can change quickly overnight and throughout the day, so check again today, even if you went hiking yesterday. 

Crossing steep terrain

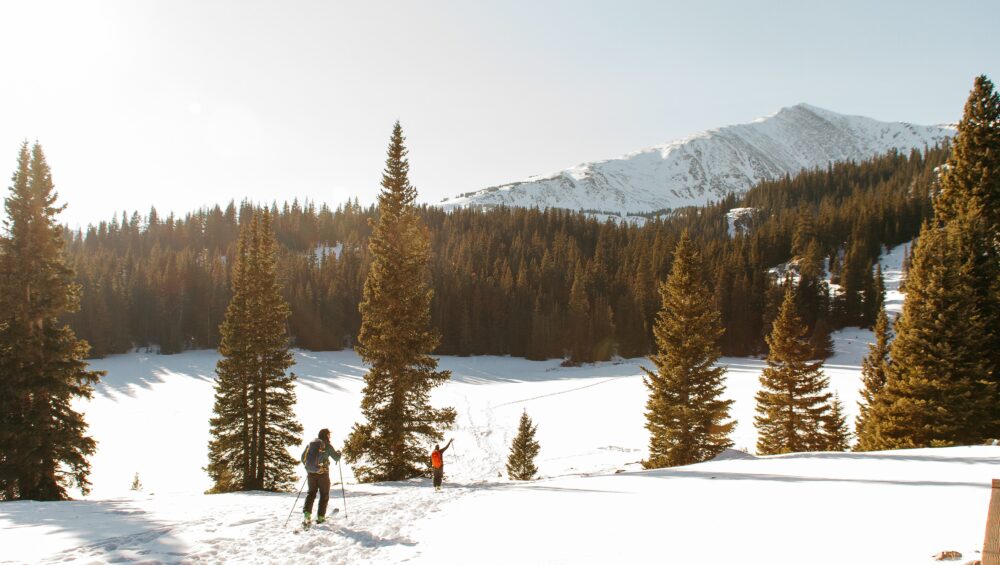
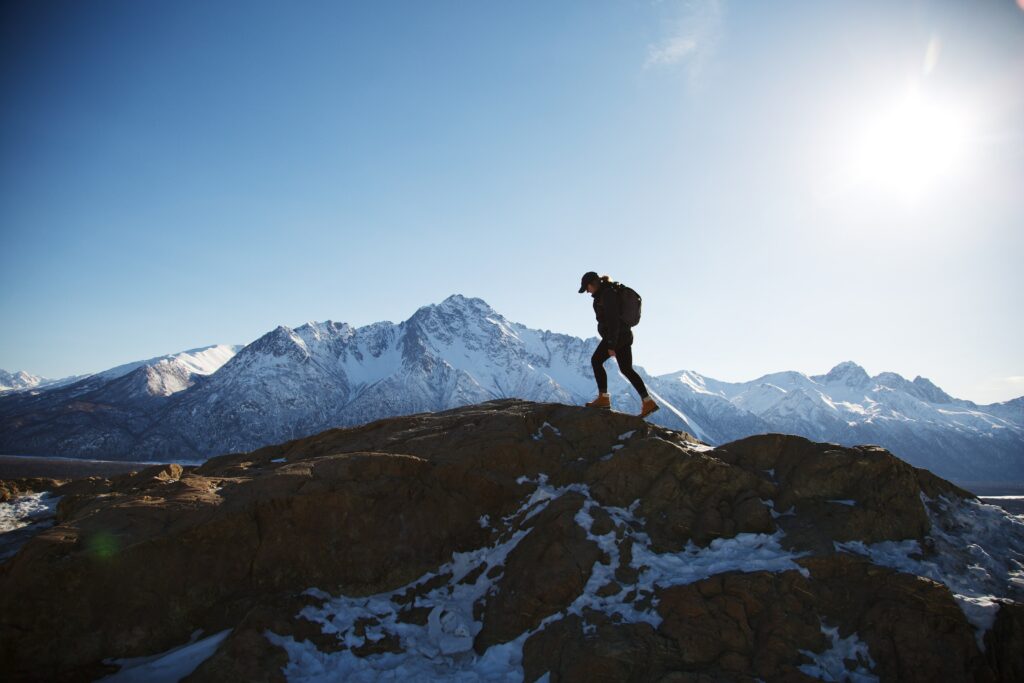
Avalanches generally occur on specific angled slopes, which means crossing steep terrain becomes much more dangerous. Even without snow, steep slopes can be tricky and dangerous. This is likely to happen where the trail doesn’t get much sun, but the snow has built up on the trail that acts as a ledge on the steep hillside. 

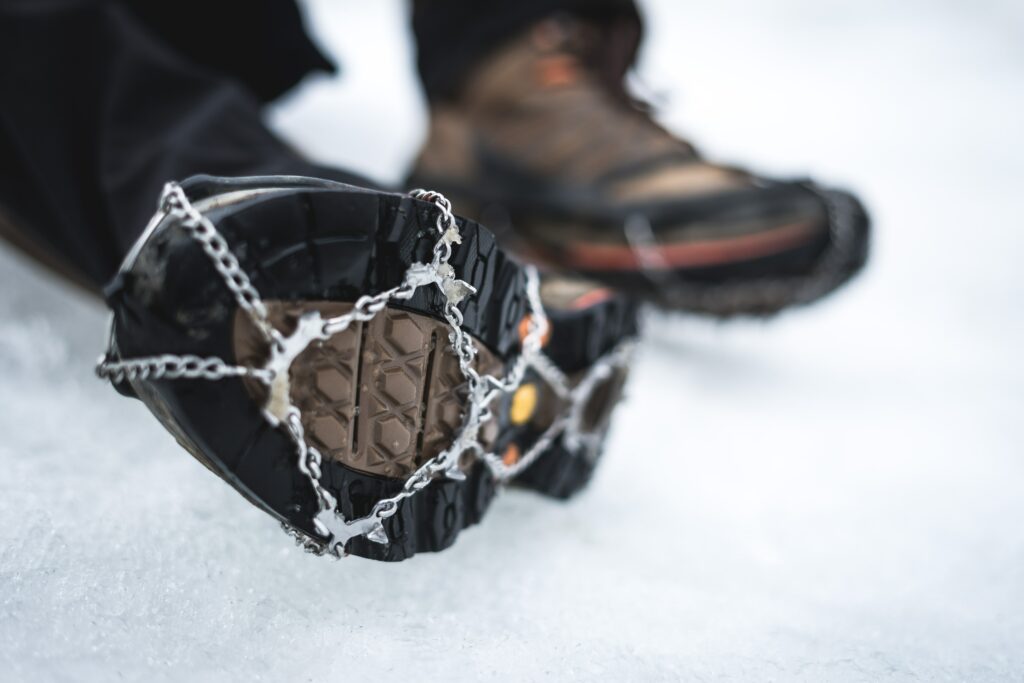
When crossing steep terrain, use your trekking poles to provide extra balance and use your feet to kick steps into the snow. This will give you better traction and control over how your feet are positioned. 

Depending on how steep the slope is and how much snow there is, you may require crampons and an ice ax to self-arrest (stop yourself when sliding down the mountain). Generally, if a large amount of snow spreads down the mountain and you are not an experienced mountaineer, this is the time to head back and find another way.

Avoid taking risks on steep terrain. This is where you can slip and slide for hundreds of feet uncontrollably if you don’t have the proper training and gear. Please don’t risk it. Enjoy the view you have and turn back around to try another day.
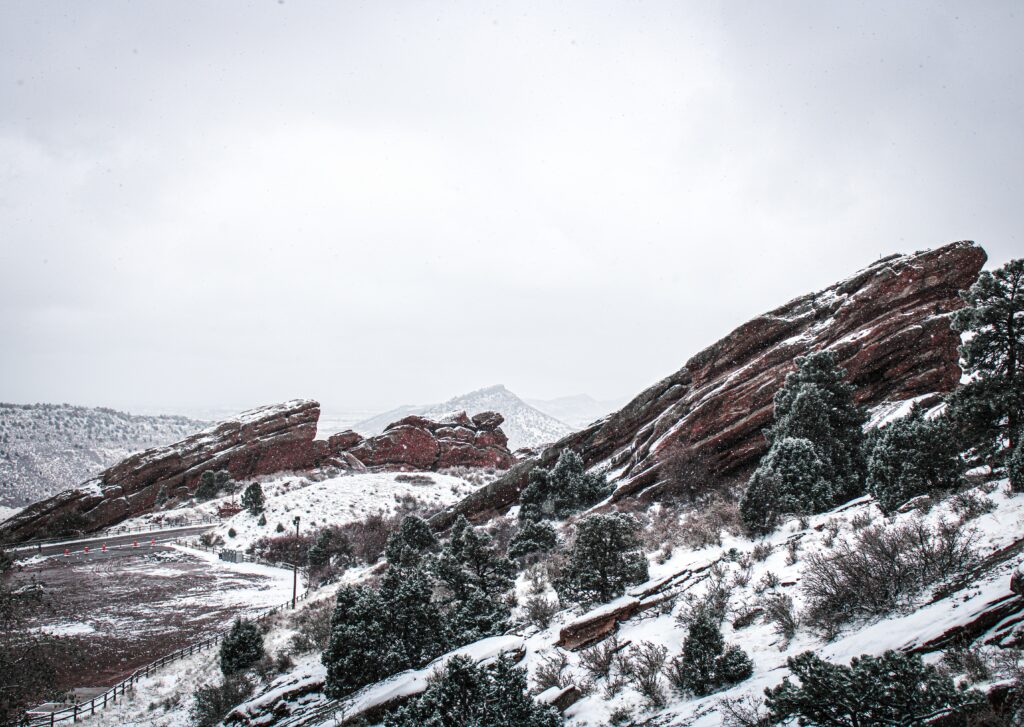
Photo by Moriah Wolfe on Unsplash

General dangers

Snow brings along several different changes in the terrain that you need to be aware of and look out for. You no longer know what you’re actually hiking on top of or how high you are from the ground. Air pockets can form under the snow, and as the temperatures rise, it can be easier to fall into these pockets and struggle to get out. 

The three biggest dangers to be aware of are snow bridges, tree wells, and hazards due to spring melt. 

Snow bridges

Snow bridges form over creeks and other small spaces in the terrain. Running water and open-air will remove the snow near ground level, leaving a “bridge.” Unlike the Golden Gate, these bridges are highly unstable and often won’t support a single person, let alone a long traffic jam of cars. 

If you see a snow bridge, try not to cross it. If you must, move slowly after testing each step and don’t let more than one person cross at a time. There are often better options around. You may just need to look. 

Tree wells

In areas with high levels of snow, trees create spaces near their bases that can be incredibly hazardous for anyone moving through the terrain. The branches don’t let the snow gather as heavily underneath the tree, which leaves a gap that is a tree well. 

Whenever hiking near trees with heavy levels of snow, stay away from the base of trees. It can look completely uniform but, in reality, has nothing underneath it. These wells can be impossible to escape, especially when alone, as hikers can become entirely buried. Give trees a wide berth when hiking in the winter. 

Spring melt

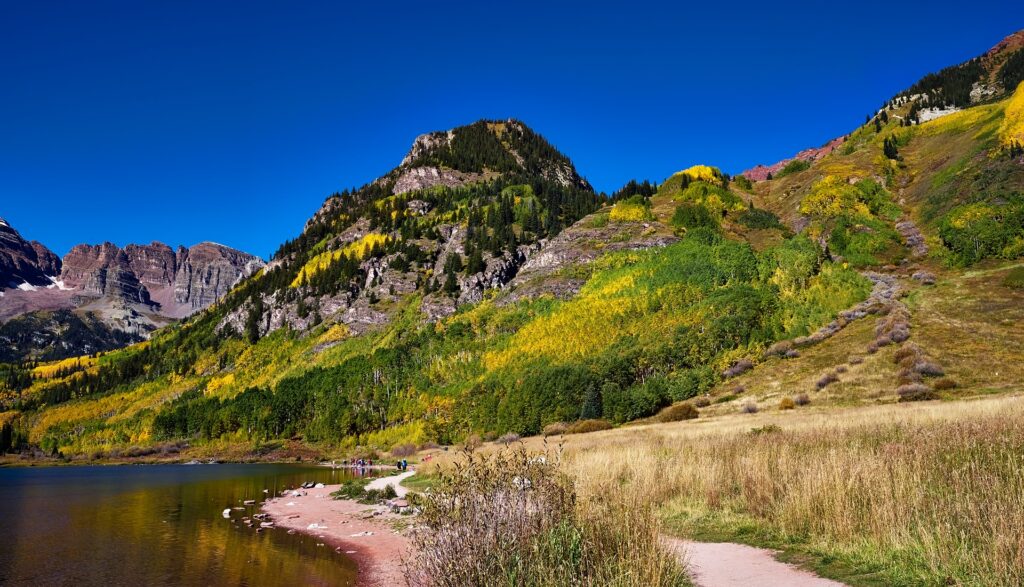
A huge amount of Colorado’s water comes from the snow in the winter. The snow builds up and then quickly melts as the temperatures rise in the spring. This spring thaw or melt can often lead to dangerous flooding in communities and on the trail. 

The increase in melting snow also creates more snow bridges and more open-air pockets underneath the top layer of snow. While these aren’t as deep and dangerous as tree wells, it opens the door to falling deep in the snow and struggling to get out. 

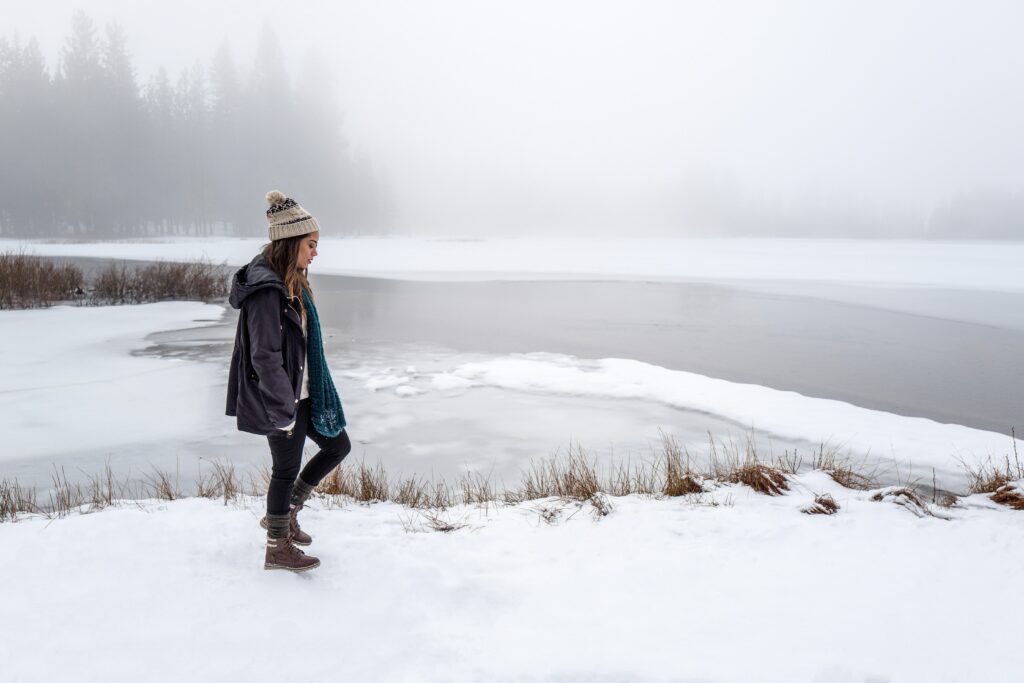
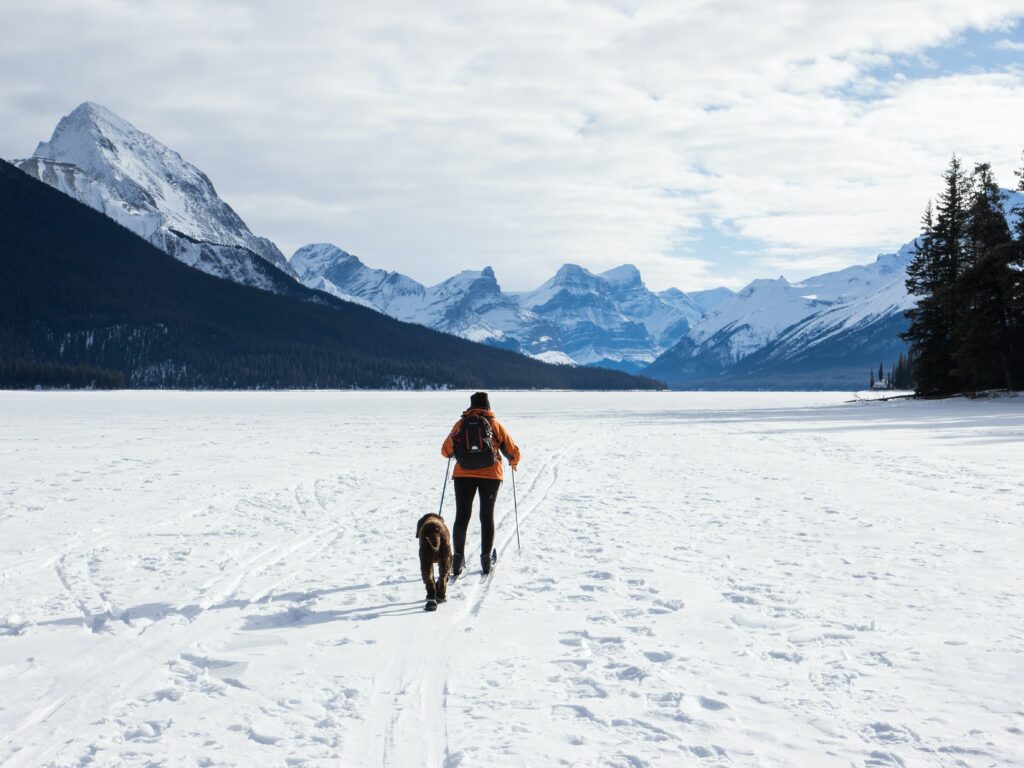
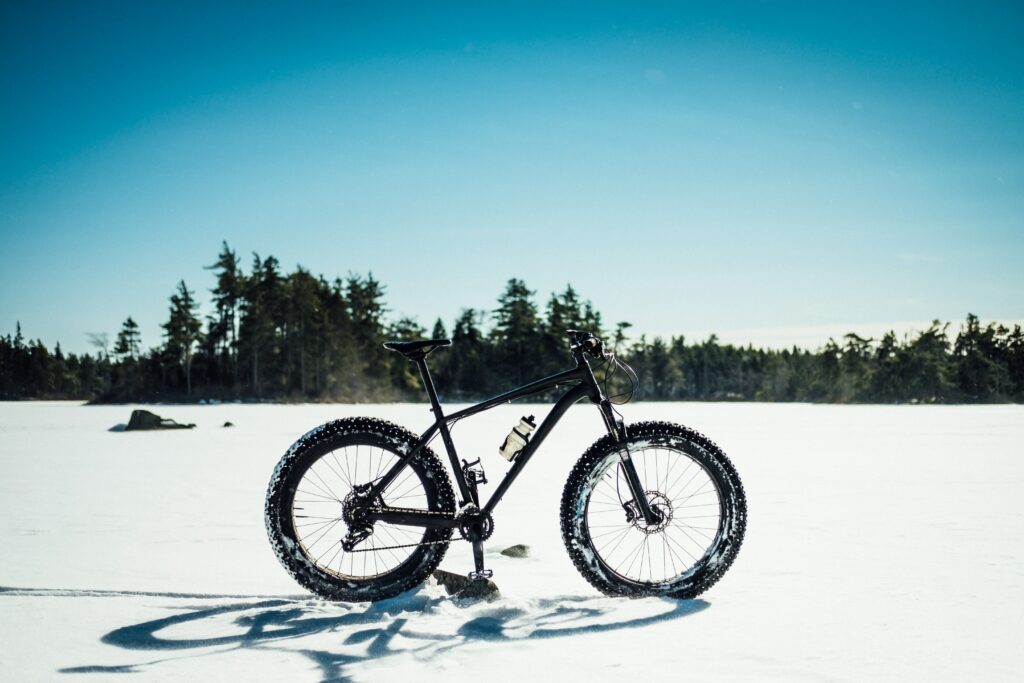
Spring melt means that formerly frozen lakes that you may have been skating or skiing across may be deceivingly thin. Once temperatures start to rise, it’s best to steer clear of any large bodies of frozen water. Even when things look frozen, the thaw can be hidden underneath a thin layer that will break at your first step. 

Choosing the right gear

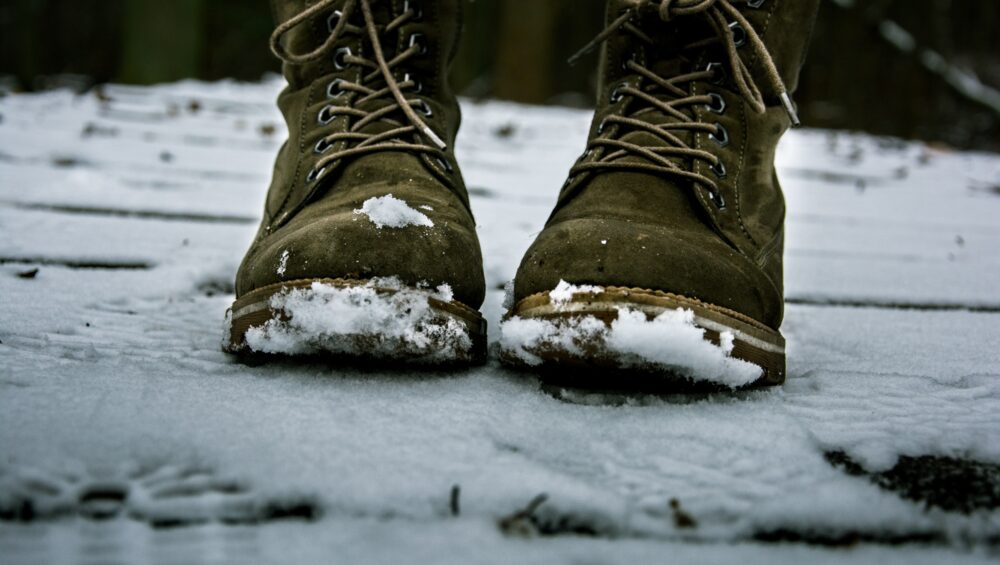
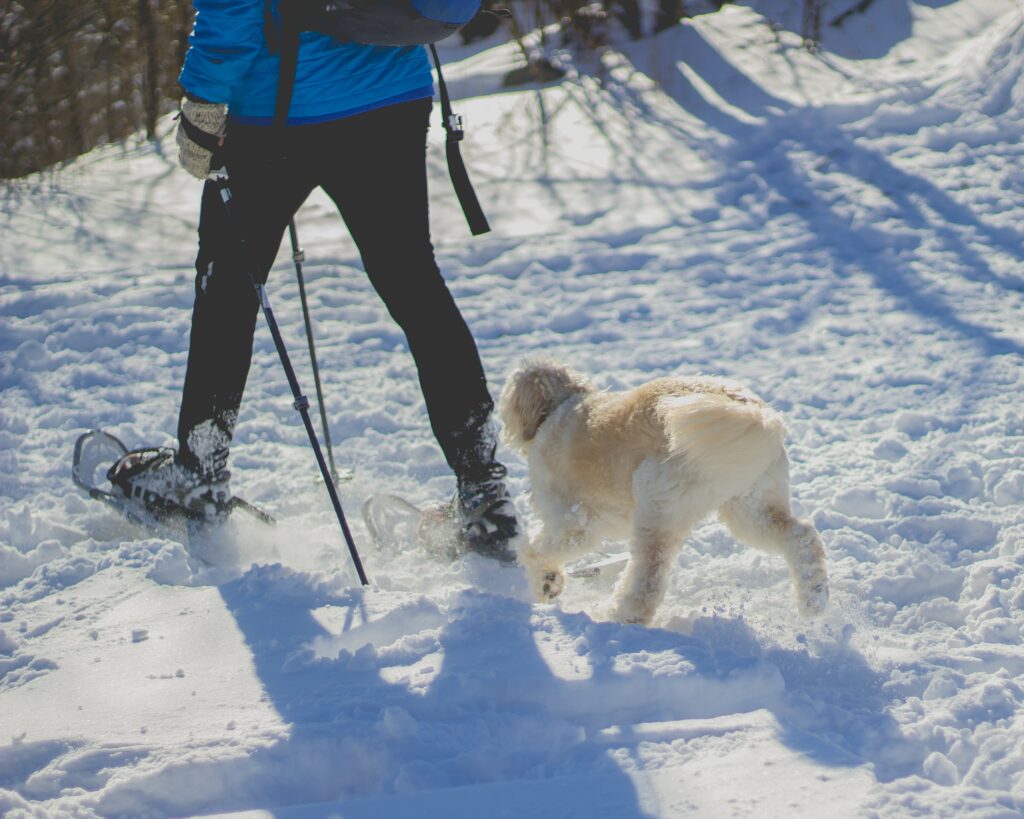
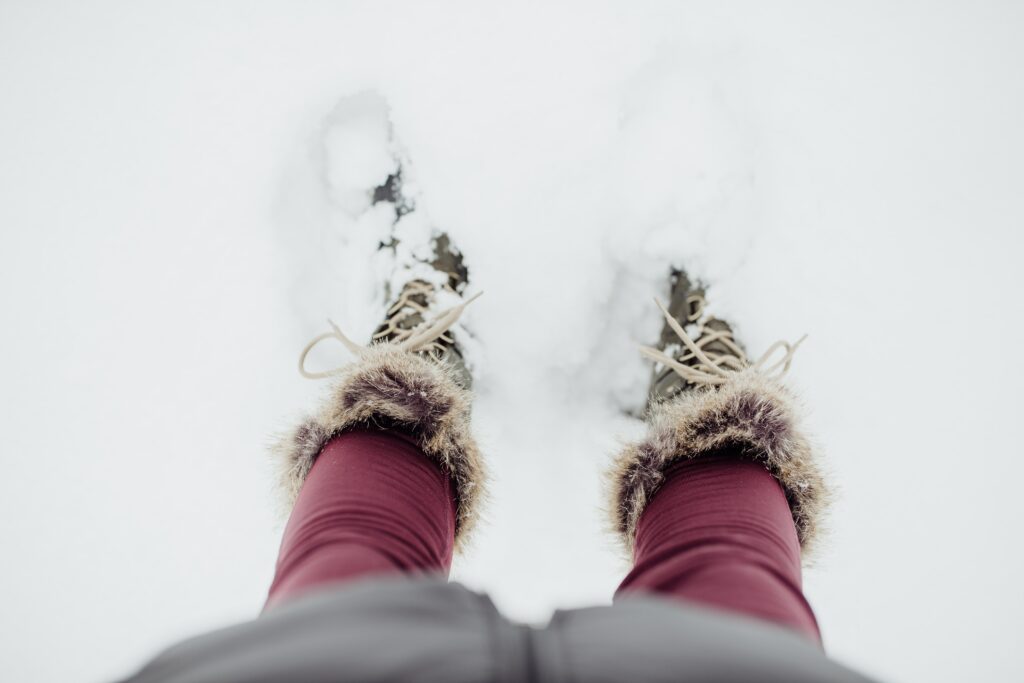
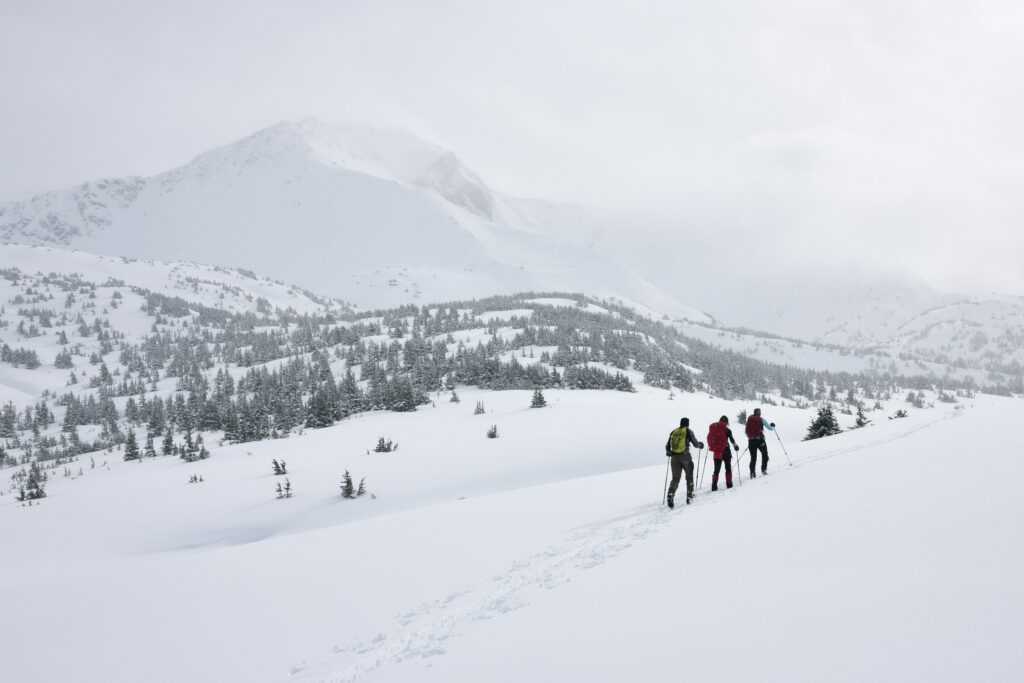
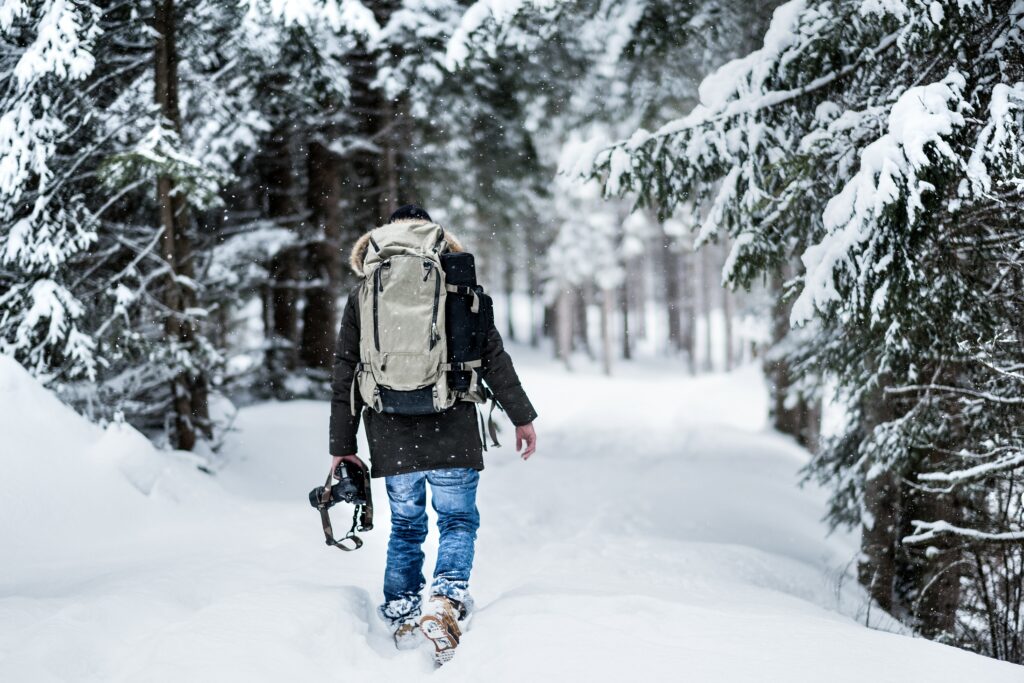
If you’re going to choose to go out in the snow, it’s important to bring the right gear. One of the most important pieces of gear is some form of flotation. 

Flotation refers to staying up on top of the snow rather than post-holing (walking in the snow up to your hips). Different forms of flotation can be snowshoes, cross-country skis, touring skis, or a splitboard. These gear pieces will help you stay on top of the snow rather than falling deep into any hidden air pockets. 

Hiking poles with snow baskets are also an incredible tool for moving safely through the snow. As we mentioned earlier, they add a huge level of balance that can help you cross dangerous patches of snow and stay upright when you hit an icy spot. Even if you prefer to hike without poles in the summer, they make for a great addition in the winter. 

Hike or stay put?

In the end, the decision to hike across a certain patch of snow is up to you. The best thing you can do is learn how to identify the dangers such as snow bridges, tree wells, steep slopes, and results of spring melt. 

There’s no guarantee that any patch of snow will be safe to cross, but you can work to build up your skills and knowledge about snow travel. Provide yourself with a base level of knowledge in the morning by checking the avalanche forecast. This will give you a great starting point for making decisions in the snow.

Remember that the snow can be dangerous and unforgiving. If you are ever in doubt or uncomfortable with a situation, it’s time to turn back and wait a few more weeks for the snow to melt. The trail isn’t going anywhere, and will wait for your return with a snow-free welcome. 

Most Accessible Trails in Colorado Springs

Whenever travel is on the menu, there’s a lot that goes into finding the right thing to do for your adventure. For some, that includes finding the best wheelchair accessible trails. If you’re looking for a spot with accessibility in surplus, Colorado Springs is worth taking a look at. 

The town is well-known for its stunningly beautiful trails and majestic landscapes that become the backdrop of day-to-day life. There are plenty of activities to do in the winter for anyone interested in the outdoors or city life. One of the best parts of these trails and activities is that several of them that are ADA accessible, as well as easier trails that often appeal to families with small children. 

We’ll take a look into the best ADA accessible attraction in Colorado Springs but won’t stop there. This list has a wide array of options that will allow for a longer visit and different styles of activities. 

Cottonwood Creek Trail

The Cottonwood Creek Trail is an excellent choice for anyone looking to explore the city with a wheelchair. The trail runs for 6.3 miles along the northern end of Colorado Springs. The best part? The trail is mostly paved, with only a few areas of dirt or gravel path. The section between Rangewood Drive and Union Boulevard is gravel, but the rest is paved. 

There are plenty of recreation areas along the trail, such as large playgrounds, grassy fields, and seasonal bathrooms. You get a mix of residential feeling along the walk, with some expansive views running alongside the creek with mountains as your backdrop. 

Florissant Fossil Beds National Monument

While it isn’t directly in Colorado Springs, anyone in the area shouldn’t miss this destination. Just around 40 minutes from the city, you’ll find the Florissant Fossil Beds National Monument. This historical monument is filled with over 1700 different species of fossils. You’ll even run into petrified Sequoia trees, bigger than you can imagine. 

This place is wonderful for wheelchair and family-friendly accessibility. It’s an incredible opportunity to fill your trip with education as well as an easy cruise on a paved trail. 

Garden of the Gods Park

Garden of the Gods is one of the largest attractions that brings thousands to the region each year. It’s completely understandable why. The park is filled with red rock structures that tower over an incredible landscape and create a unique environment only minutes outside downtown Colorado Springs. 

The park has an intricate trail system, which is handicap accessible. A few trails stand out as some of the best options for a day hike that accommodates everyone in the family. Before heading out, be sure to read up on how to pack for a day hike to have the best possible experience without forgetting all the essentials. 

Perkins Central Garden Trail

This short 1.1-mile loop is located within Garden of the Gods Park and is the perfect opportunity to see a lot of distinct features of the park. It’s often listed as the best trail for wheelchairs out of all the 15 miles of trails that you can find in the park. The loop is primarily level and completely paved. 

Along the route, you’ll see Kissing Camels, South Gateway Rock, Three Graces, and Sentinel Spires. These are well-known and sought-after attractions, all easily reached in the short mile-long loop.

If you’re hoping to find even more accessible trails in the park, check out some other guided hikes in Colorado Springs to get the most out of each hike as well. 

Olympic Training Center

Athletes come from across the country to use the magnificent facilities in Colorado Springs. This center offers year-round guided tours of the entire Olympic and Paralympic Training Center, where you can see the entire center in only an hour. It’s a perfect fit for a quick trip on a day when the weather may not be perfect for getting outside. 

The grounds of the training center are highly ADA accessible, especially as many of the athletes coming to train here are in wheelchairs themselves. The facility was designed for ease of use and accessibility, so it is well worth checking out whenever you’re in town. 

Pikes Peak Greenway Trail

Running 15 miles throughout Colorado Springs is the Pikes Peak Greenway Trail. This is the connector for other long regional trails in the north and south and provides access to parks and other trails scattered throughout the city. 

The trail is a mix of different surfaces. There are sections that are paved and some that are dirt and stone, but it’s still a highly accessible trail. People ride road bikes along the entire path and never have an issue. Since it’s in the middle of the city, it’s mainly a flat trip. 

Follow this trail to America the Beautiful Park, a famous 30-acre area with breathtaking views. There are plenty of other ways to utilize the Pikes Peak Greenway, and we encourage you to explore the trail system for yourself. 

Colorado Jeep Tours

Finally, if you want something completely different and still accessible for many, Colorado Jeep Tours are a great choice. You’ll get to see a wide variety of terrains within the area, all from the comfort of an off-road Jeep. 

Accessibility includes American Sign Language videos on every tour and a three-point harness seat belt equipped in the front seat for anyone with mobility issues. Don’t worry about leaving your service dog behind, as they are more than welcome to join. 

How Can I Keep Snow Out of My Boots While Winter Hiking?

Warm and dry feet can make all the difference when winter hiking. Keeping the snow out of your boots is critical in achieving optimal levels of comfort and happiness on the trail. Walking through feet of snow and keeping your feet free of snow can seem like a difficult task, but fortunately, there have been many that have come before us and figured out the secrets to happiness. 

Keeping the snow out of your boots comes down to finding the right waterproof footwear, wearing the right accessories, such as gaiters, and layering your waterproof pants in a way that sheds snow away from the boot. The key is a combination of these different techniques rather than a simple answer. The result is guaranteed to make winter hiking a favorite rather than a dreaded activity, no matter the process. 

Wear Gaiters

Gaiters, commonly confused with alligators in common conversation, are designed to keep stuff out of your boots. This can be dirt, rain, and in our case today, snow. Gaiters are a simple design requiring only a low level of research before strapping them on and getting out on the trails. 

No matter what activity you’re doing in the outdoors, whether it be summer or winter, gaiters can be beneficial. They add a high layer of protection for various winter activities and should be considered an essential part of winter gear in general. 

Gaiter Type

While all gaiters will work to keep your boots clear of debris, certain gaiters are made for different activities. It’s important to get the right style of gaiter for what you are planning on doing simply to have the best experience possible. 

Colorado Springs has such a wide variety of terrain and climates throughout the year that you can potentially use these gaiters all year long. Not all hiking in Colorado Springs will require gaiters to be on your gear list, but they are a helpful addition, especially when you are attempting to walk through the snow. 

Hiking gaiters are made of lightweight and breathable fabrics that help to keep out most small-scale debris. This can be light rain, small rocks and pebbles, and dirt or grit. These are a good choice for summer trips that lean closer to the “dry” side of things. 

Mountaineering gaiters incorporate a much more heavyweight fabric that offers protection against snow and the cold. If keeping snow out of your boots is the number one priority, these are the gaiters for you. 

Trail running gaiters are much more lightweight and function mainly to keep small pebbles and dirt out while running on a trail. These may be beneficial for running on a packed trail in the winter but won’t do much for you if you are post-holing to your knees in deep powder. 

Gaiter Height

There are three central heights that you’ll find on the gaiter market–over the ankle, mid-calf, and knee-length. For winter hiking, knee-length gaiters are the best option, as you will likely find yourself trekking through deep snow with even deeper pockets that you don’t expect. These will keep most snow out of your boots but can lead to some sweaty calves amid summer. 

Gaiters will be your ultimate protection for keeping snow out of your boots. These are a great addition to a snowshoe setup where you will be floating on top of the snow but can sink in softer patches. As we mentioned before, snow protection is a combination of different tactics. 

Photo by Emma Dau on Unsplash

Waterproof Footwear 

Keeping the snow out of your boots when it’s in the frozen snow form is an easier task than keeping it out once it’s grabbed onto your boot and starts melting. This is where it’s important to have a pair of the best hiking boots. This is another primary key to keeping your feet dry during winter hiking. 

There are plenty of reasons to keep your feet dry while hiking, and in the winter, these reasons become even more important. 

Find a pair of waterproof boots that are durable enough to withstand the snow. There are several different styles of waterproof boots on the market, and we suggest doing a hefty amount of research into finding the right ones for you. 

Without waterproof boots, all of the snow that you shed away from the inside of your boots will find its way inside through the fabric of the boots. Not all, or really any, boots will keep the snow from getting inside around your ankle, but the right boot can stop the snowmelt from penetrating. 

Photo by Bonnie Kittle on Unsplash

Layer Waterproof Pants

Another small hack to keeping snow out is wearing waterproof pants and basing them correctly. If you’re already wearing gaiters and waterproof boots, this final level of protection will further ensure happy, dry, and warm feet during winter hiking. 

To keep everything as dry as possible, it’s essential to ensure that your pant leg isn’t dragging through the snow and absorbing that moisture when your body melts it. For that reason, tucking both pant legs into socks before throwing a waterproof layer on top is a great move. 

Gaiters should be the final step in the process (other than putting on snowshoes if you’re wearing them). Waterproof pants will add an additional layer of protection underneath the gaiters and between your legs and the snow. They also help shed snow away from your body rather than soaking it in and channeling the snowmelt down into your feet.

Cold Weather Injuries and Treatments

Social media and winter photography can make the winter seem like a wonderland filled with nothing but adventure and fun. The other side of the winter can be a dangerous trek for anyone who might not properly manage cold injuries. Knowing the signs of hypothermia and how to treat it are a small portion of the necessary skills to have under your belt before heading out into a snowy landscape. 

By the end of this, you may ask, “is it safe to hike in the winter?

We want to assure you that hiking in winter is a safe thing to do, so long as you come ready for the cold. Without this preparation, many cold weather injuries can get those who come ill-prepared. To ensure you don’t end up in a dangerous situation, here is a list of the most common cold weather injuries and how to treat them. 

Photo by jasper guy on Unsplash

Hypothermia

The most commonly-known cold injury is likely to be hypothermia. We talk about it as a precautionary tale to anyone going out in the cold, but very few people are fully aware of what it is and what to do about it. 

The idea of hypothermia is simple. The prefix ‘hypo’ means less than normal or below. Thermia relates to temperature, and when applied to us, it’s our body temperature. Hypothermia then is having a body temperature that is lower than normal. This starts to happen in prolonged exposure to cold environments. Your body can’t make enough heat to make up for the heat loss, resulting in a decrease in overall temperature.

Once your body temperature reaches 95 degrees or below, you are considered hypothermic. Measures to prevent reaching this temperature should be taken beforehand, but once it’s reached, the job is focused on warming someone back up and preventing further heat loss. 

There are three main stages that hypothermia can be classified into. The first sign of hypothermia is what you can expect. There will be shivering and reduced circulation. In the second stage, there will be a general slowness that the body takes on. There is a slow pulse, slow movement, a state of confusion, and delayed thinking processes. The final stage is where one may lose consciousness and become unresponsive. 

Becoming hypothermic can threaten one to stay inside all winter long. Still, there are plenty of basic treatments that will allow you to travel around in the winter without ever feeling threatened. 

How to treat hypothermia:

  • Slowly rewarm with skin to skin contact
  • Learn how to make a hypo-wrap (like a warm person-burrito)
  • Take preventative measures to stay dry and warm
  • Use movement to warm up
  • Get to safety

Frostbite

Another one of the most common cold weather injuries is frostbite. This specific injury can range from frostnip to third-degree frostbite and limb loss. While most frostbite cases will fall closer to the frostnip side of things, it’s important to prevent any injuries before they happen. 

Frostbite can happen in surprisingly warm conditions. If it’s raining and your skin is exposed, it’s easy to grab a minor case of frostnip or frostbite in temperatures up to 50 degrees. Unless you’re drinking it, all water becomes your enemy at such low temperatures. Any tissue that reaches 28 to 30 degrees Fahrenheit will take on the symptoms of frostbite, but they can be observed earlier on as well. 

The first symptoms to look out for are numbness, tingling, and pain when rewarming the area. It’s common to get blisters when experiencing second-degree frostbite as well as a wooden or waxy feeling. Third-degree is a much more extreme scenario that often leads to loss of digits. 

Like hypothermia, the most important part of treating frostbite is preventing it. Wearing warm and dry gloves, scarves, and hats that cover the more commonly-exposed areas of the body is the best way to stop yourself from experiencing this injury. Bringing multiple sets on a long trip will help ensure that you stay dry and can switch out when necessary. 

After a cold weather injury like frostbite, you will likely have issues with that body part for the rest of your life. Because of this, we must repeat that prevention is the absolute best way to “treat” any of these injuries. 

How to treat frostbite:

  • Rewarm the area with skin to skin contact
  • Only thaw the area if there is no longer a risk of it re-freezing
  • Do not use excessive heat to rewarm
  • Keep all exposed skin covered and dry
  • Seek medical attention

Chilblains

For anyone that spends long periods in the wilderness, chilblains may be all-too-familiar. It may be a foreign concept for most, but it is still a risk. 

Chilblains are spots on the skin that result from extended periods of time with moisture and lower, non-freezing temperatures. The skin will develop small spots that are itchy, swollen, tender, and often painful. 

One of the best ways to diagnose this injury is rewarming and observing. While many of the symptoms are similar to frostnip or low-level frostbite, these symptoms aren’t resolved when rewarmed. 

The more often your skin develops Chilblains, the more likely it will happen in the future. 

How to treat Chilblains:

  • Rewarm the area and keep it dry
  • Prevention measures such as keeping dry and warm

Trench Foot

The final cold weather injury on our list is trench foot. This happens when feet are wet and cold for an extended period of time. They start to look like old raisins, full of deep wrinkles and crevasses that will be very painful. 

This can happen in the field for a variety of reasons. Anyone who gets their feet wet in the snow and fails to get dry quickly may experience low levels of trench foot. If it goes on all day, this can be a serious injury that isn’t comfortable or fun to even look at. 

How to treat trench foot:

  • Dry the feet and apply baby powder
  • Change socks often
  • Keep the feet clean
  • Stop hiking and go to an area to rest

How to Set Up a Tent in the Snow

A winter camping trip brings about a massive list of perks and small adventures. A short, mile-long trek can quickly turn into hours of tromping through deep snow and laughing with each other as you posthole your way to camp. It’s a trip to be remembered, and if you want to remember it fondly, you need to come prepared. 

Your general skills and knowledge will go a long way when you try to get comfortable in a winter wonderland. If you’ve already figured out how to dress for winter hiking, it’s time to continue adding to your toolbox. 

One of the first steps in the entire process is setting up a tent in the snow. It’s a task that becomes drastically different once the snow hits, and you’ll be developing a brand new set of skills than those you need in the summer. 

Site Selection

Once you’ve arrived at camp, it’s time to look around for the best tent site imaginable. The snow brings a lot of new elements you need to navigate to stay safe while asleep at night. In the summer, it’s watching out for bears or other critters, while in the winter, you’re watching for avalanches. 

Pick a site as far as possible from any slopes, and therefore any avalanche potential. Even a lower angle slope can be triggered at night, leaving you to wake up partially or fully buried. A safe winter camp is far away from any possible avalanche terrain. Even if you’re planning on going up the mountain in the morning, basecamp should be a safe distance from any potential slides. 

Another hazard you need to watch out for in the winter is snowfall from trees. If you’re below the treeline, pay even closer attention to what’s above you. Dead trees are less obvious to spot in the winter, and you now need to watch out for trees that may break under the weight of snow and ice. Even the snow sitting on those branches can be dangerous if it’s filled with ice. 

If you’re sleeping in an area with a large amount of snow, you’ll need to consider what’s underneath you. At higher altitudes, you’ll often be sleeping multiple feet above small trees and bushes that have been buried. The plethora of landscapes you can find below the snow can lead to one major issue.

Depending on how the snow has packed down, you may be on top of some voids that are waiting to collapse inward. If this happens while you’re sleeping, you’ll wake up a few feet lower than where you started and probably covered in a decent amount of snow. To avoid this nighttime disturbance, probe around and try to find a spot that seems like it’s above flat ground rather than rocky terrain. 

Pack it Down to Put it Up

Now that you’ve found a spot, it’s time to make the footprint. If you’ve been hiking in snowshoes, you’ve got the best tool for the job strapped onto your feet. Using the snowshoes, stomp around and flatten out the ground where you will soon put the tent. This will help create a more stable, flat surface where you can sleep. 

Expand the footprint out a bit past where the tent will go. This will give you some more stable ground to walk around on. Be careful when you get out of the tent at night for the bathroom, as it’s easy to forget you’re in the snow and will soon be up to your waist in it. 

The snow shouldn’t pack down any further when you start to walk around on it. Remember, this is where you’re sleeping. You don’t want to start sinking while you sleep. 

Once your area is fully packed down, you can set up your tent. 

Tent Setup

In general, a freestanding tent is better than relying on a staking system. With a freestanding design, you don’t need to worry about staking out the tent without access to solid ground to hammer a stake into. Snow can be tricky to work with, but it can also be incredibly useful. If you’re looking to use a tent that requires staking, look at snow tent stakes. 

These stakes are ingenious. First, you dig a small hole and place the stake horizontally in the snow. After you’ve attached your tent line, you will pack the snow down onto the stake firmly to cement it into place. 

The only drawback to this kind of stake is that they can be difficult to remove in the morning. If there has been any level of melting and freezing overnight, they may be inside a solid block of ice that you’ll need an ice ax to get through. 

Set up Your Dream Camp

According to Leave No Trace, snow is the most durable surface you can travel on. This is because it will melt and disappear without a trace of you present. This means that you can do just about anything with your camp in the snow, and you won’t be creating a huge impact. 

With enough snow, time, and shovels, you can create benches, tables, and full-blown snow castles to enjoy your time in. Whatever you can imagine, you can create. This is one of the best things about winter camping. You’re able to create an entire kingdom in the snow without needing to worry about ruining the campsite. It also makes winter camping a fun-filled activity to do with kids. They get to create their winter wonderland, where they can stay overnight. 

Can You Mountain Bike in the Snow?

The appearance of snow on the ground often covers the dirt tracks that we live to ride during the rest of the year. The disappearing trails will move most to put their mountain bikes away for the season and pull out skis or snowboards as a replacement. What many people can often look past is the joy of mountain biking in the snow and how it brings an entirely different level of enjoyment to the sport. 

Winter mountain biking can be challenging for those who struggle with the cold. Many recent trends point towards needing a fat tire bike to go out biking in the snow. Fortunately, you don’t need to make a considerable purchase to go out riding all winter long. With the right precautions and winter biking tips, you can spend beautiful snowy and bluebird days on your bike doing what you love most. 

Photo by Tim Foster on Unsplash

Keep a good attitude

First and foremost, keep your spirits high. Of all the winter biking tips you read, keeping a smile on your face and a resilient attitude will be the most important.

Your winter ride will be slower and most likely filled with a fair number of falls and slides that will get you cold and wet. Regardless, this can be the most fun you’ll have all winter if you remember to keep smiling and focus on the positive.

Lower your tire pressure

If you’re feeling strapped for cash or want to try mountain biking in the snow without spending a huge amount of money on a fat tire bike, you can start by letting some air out of your tires. Take a look at the sidewall of your tires and find the lower number on the pressure range, then drain the tires to that level.

You’re going for more surface area and contact between your tires and the ground. One great way to do this is to lower your tire pressure and let the tires sag a bit more, and hug the ground. 

The biggest thing to look out for when flattening your tires is pinch flats. A great way to avoid this easy problem is to go tubeless. Tubeless tires are relatively new, and replacing the tube with a sealant makes getting a flat much harder. Not only is that great for lower tire pressure, it means you’re much less likely to get stranded on a snowy trail in the middle of winter!

Widen your tires

Winter mountain biking may be your next big sport, and you may feel that it’s worth it to invest. In that case, buying a fat tire bike is the best way to truly enjoy the snowy drifts that the winter months have to offer.

The wide tires on these rigs allow for more surface contact between the bike and the snow. That way, you’re able to float on deeper powder and slide less. It’s pretty much guaranteed that you’ll slide around a bit while biking in the snow, but this way, you can control it some more. 

That being said, fat-tire bikes are expensive. They aren’t totally necessary, and you can bike without them. They’re also incredibly fun to ride and shift the experience to a much easier ride. 

Photo by Tim Foster on Unsplash

Opt for flat pedals

Clip-in pedals aren’t the best option for cruising on slippery trails. You’re going to do some sliding, which means you’ll need the option of throwing a foot down for stability much more often and faster than normal. With flat pedals, you can get a foot in position quickly and keep yourself upright.

Steel-pin flat pedals allow for the extra grip that is mighty helpful in the slick and icy winter. They’ll give you plenty of traction and the ability to dismount. They also allow for a lot more space, which means the potential for bigger, warmer boots is there. Even riding at your hardest, it’s likely to result in cold extremities if you’re tackling trails in the dead of winter. 

Pay attention to trail conditions

One of the most important parts of riding in the snow is getting to know what you’re riding. True, you can go out and check the trail conditions firsthand, but you may want to save yourself some time and choose the right trail from the start. 

With winter mountain biking being one of the most popular winter activities in Colorado Springs, you’ll be able to find loads of trail information on the web. Mountain biking forums and Facebook groups will certainly have someone on them that has checked out the trail before you have. Use their experience to your advantage and look around before throwing your bike on the car and heading out. 

What you’re looking for is a beautiful snowpack that either allows easier access to the ground or a hard pack of snow. In the middle of winter, you’ll be more likely to find the latter. 

Two to three inches of powder is ideal for biking in the snow. It gives you a nice layer of snow to cruise through but allows some interaction with the ground. As it starts to warm up or the snow gets too soft, you may spend more time picking yourself up than biking. The softer the snow, the more your bike turns into a sled.

Trails that take you on a cruise and slightly hilly rides are much better than those that demand steep climbs and fast, aggressive descents. You’ll find your tires slipping as you push to climb, and the moment you hit an icy patch on the descent will be the end of your riding for the day. Choose a moderate trail that will let you stay on flatter terrain. 

Is It Safe To Hike in the Winter?

Blankets of snow are starting to cover the ground, tucking the world in for a long winter break. Getting out on the trails we have become familiar with over the summer and fall automatically becomes a much more difficult task. Not only are they harder to find, but it can be tremendously difficult to motivate yourself to get out and hike in the winter. There are many steps to getting ready, and the experience is entirely different. 

With the right winter hiking safety tips, you can step outside with the same confidence you take in the summer. A lot of people talk about seasonal depression happening over the winter. Still, the real secret is, getting outside and hiking in the winter is a magical experience that will keep you fit and happy. 

This guide to winter hiking will bring all of the safety tips you need to get up and out with a completely different attitude about winter. 

Photo by Sead Dedić on Unsplash

Winter Hiking Safety

For starters, it’s important to point out that some aspects of winter hiking are the same as going out in the summer. You need to go prepared, check the weather, bring all the proper gear and follow the trail you choose.

While the general ideas are all the same, some specifics make hiking in the winter a completely different game. 

Check the weather

Winter weather is a tricky beast that can sneak up on you anywhere, especially in certain parts of the mountains. You are cautioned against lightning storms and heavy rain in the summer, but the winter brings whiteout snow blizzards that can sometimes last for days. 

Don’t only look at the weather that’s coming, be aware of what the past few days have brought as well. If there was a fresh dump of several feet of snow, it might require taking extra gear or precautions before hiking. A huge snowfall also means increased avalanche risk, so adjustments need to be made to your hiking route. 

When you look ahead at the weather, it can be incredibly tempting to get excited about the first sunny and clear day that winter has brought you after many clouds. What can easily go overlooked here is that clear skies often bring frigid temperatures. Those clouds you hated so much we’re holding the heat in, and now it all has gone. 

So, while the sun can feel like the greatest gift possible, it can also bring some dangerously low temperatures along with it. Don’t forget to pay attention to all the aspects of the weather, not just the little emoticon they paste in by the day of the week. 

Time your hike with the sun

Colorado is chosen by winter lovers all around because of the number of bluebird days it gets. The snow seems to magically appear overnight and leave by the time you wake up, leaving you with fresh snowfall and a bright blue sky to enjoy it under. 

As we get closer and closer to the winter solstice (December 21), the days are getting shorter and shorter. Colorado’s shortest day of the year will see only 9 hours and 21 minutes of sunlight. This is a drastic difference from the longest day of the year, where we see just under 15 hours of daylight every day. 

On top of the fewer hours of sun, the snow can make things a little trickier as well. As the sun sets, there can be an onset of “flat light,” which makes it much more difficult to see the texture of the snow and where there are bumps and grooves, making hiking in the snow a bit more difficult.

Timing your hike with the sun in the winter is incredibly important. Start your hike right when the sun comes up, and make sure you can get off the trail before the sun comes down. It will limit the length of your hikes, especially as you tend to move much slower while trudging through knee-deep snow than you can in the summer. 

Stay hydrated

One of the more challenging winter hiking safety tips to follow is to stay hydrated. No one in the world wants to drink the cold water from the cold water bottle on the exterior of your pack when hiking in the cold. Everything at this point is simply cold, and we’re trying to avoid that.

Well, yes, we’re trying to keep as warm as possible when hiking in the winter. The problem is, you need to stay hydrated to stay warm. Proper hydration allows for your blood to flow around your body smoothly. Your fingers and toes need as much blood as they can get in the wintertime to avoid getting dangerously cold. 

If you’re hiking in the extreme cold, you’ll run the risk of a water bottle freezing while you’re moving. Try wrapping your Nalgene in a wool sock to insulate it. Also, remember to buy an insulating hose cover for your water bladder. Otherwise, the water may freeze in the hose and make drinking is impossible. 

One way to stay hydrated without having to sip on one giant ice cube is to bring a thermos. They may weigh a bit more, but hot liquids will help warm you and make hydrating much more enjoyable. A cup of hot tea on the trail is one of my favorite things about winter hiking. My thermos becomes one of my best friends, going everywhere with me, even into the deepest parts of the winter backcountry. 

Try bringing tea, hot chocolate, spiced chai, or hot cider. The drinks that bring warmth along with calories are a bonus. 

Load up on Snacks

Working through the cold, your body will need to use a significantly higher number of calories to stay warm. That means that hiking in the winter is the greatest excuse this world has ever seen to snack like it’s the last day on earth. Bring all kinds of snacks along with you, especially those you don’t usually let yourself have. 

Calorie-dense snacks that you can eat while you hike are optimal for winter hiking. You can get the 280 calories that a Cosmic Brownie has to offer while on the move. Stopping often means letting your body cool down, especially if you’ve followed the old-time rule of “be bold, start cold.” 

Not only will you feel much colder if you stop more often, but it’s also harder for your muscles to start warming up again after you’ve stopped. That means making your hike even harder on yourself. Eat on the go and forget about whipping up a trailside feast while hiking in the winter. 

Dress the Part

The clothes you choose to wear out are one of the most important parts of winter or any hiking. Knowing what to wear hiking in Colorado is a skill that needs to be mastered all year round but becomes even more important when the cold sets in. 

Utilize the layering system to prepare yourself for the stop-and-go moments of a winter hike. You can throw another layer on quickly when you stop, doing so before you start to feel cold, and take it off right when you start hiking. Layers allow for more controlled temperature regulation while hiking, and that’s an essential aspect of being outside in the winter. 

The main difference in dressing yourself in the winter is that you need to remember to dress your hands and feet. The cold can make your toes and fingers highly susceptible to injury, and wearing the best socks, shoes, and gloves can be a lifesaver. Wool is the winter hiker’s best friend, as it won’t hold sweat and keeps you warmer than most other fabrics. 

Photo by Patrick Schneider on Unsplash

Winter-Specific Safety Risks

There are some specific risks that you will inherently take by being outside in the winter. This is one of the biggest reasons we highly suggest going on any guided winter hikes before setting out on the trail by yourself. If you’ve never hiked in the winter before or maybe want some more experience at it, these guided hikes are one of the best ways to get the knowledge and skills you need. 

Avalanche Risk

Snow-capped peaks are stunning to see and photograph, but they can also be unforgiving. One of the more dangerous aspects of winter hiking is entering into avalanche terrain without knowing it. Avalanches are widespread in Colorado, and the past couple of years have been considerably more dangerous than others. This is only one of the many reasons everyone who goes out in the winter should be well-versed in avalanche safety. 

If you choose to go without a guide, we highly recommend taking an AIARE (The American Institute for Avalanche Research and Education) Level One course before heading into the mountains. This course teaches you how to identify avalanche terrain, what factors increase the risk of avalanches, and how to stay safe in the backcountry. It also is a great resource to learn how to use avalanche safety gear to save yourself and the partners you hike with. 

One of the best things you can do is check conditions before heading out. Avalanche.org is a fantastic resource that shows you the level of risk in particular areas. The trick here is knowing what you are looking for, which brings us back to taking an avalanche safety course. 

To attempt to provide you with enough information about avalanches to provide the level of safety needed. What I can say is, be careful and stay out of avalanche terrain unless you genuinely know what you are doing. There are plenty of beautiful places to go with little to no risk of avalanches. 

Hypothermia and Frostbite

Cold injuries are much more common than we give them credit for. Hypothermia and frostbite are the most common and most well-known cold injuries, but conditions such as Chilblains can happen more quickly and more often. Chilblains is the inflammation of blood vessels that results in swelling, pain, and itchiness from cold exposure. While it isn’t as “serious” as frostbite, the more our bodies are exposed to the cold and not appropriately treated, the easier it is to get more injuries. 

Hypothermia is any time your body temperature starts to drop below 95 F. There are a couple of sure-fire ways that you can distinguish hypothermia from other issues while in the backcountry. 

The main signs of hypothermia will start with uncontrollable shivering that slowly moves towards slurred speech and lethargic movements. Keep in mind that this only describes mild cases of hypothermia, and when your body continues to get colder, you will experience worsening symptoms. 

Preventing hypothermia and frostbite is all about dressing appropriately, staying dry, and keeping your body fueled with food and water. Learn more about treating and preventing these two common cold injuries by taking a wilderness first aid or first responder course. 

How to Layer for Fall Hiking in Colorado

If you are a big hiker or nature enthusiast, you know that fall is arguably the best season for hiking. The energizing nip of crisp air on your face, the colorful foliage as nature buckles down for winter – personally, it’s my favorite time of year. If you are hoping to enjoy fall hiking here in Colorado, you certainly need to know how to layer for hiking. These tips on proper layering techniques will help ensure you are prepared for the weather you might encounter on a fall hike in the beautiful Rocky Mountains.

The Principles of Layering for Colorado’s Fall Weather

The first thing to know is that the term ‘layering’ doesn’t mean just wearing more and more clothes. In order to brave the elements and stay comfortable and safe, you need to wear the proper clothes in the proper order. First, the base layer serves to keep you dry when you sweat. Next, the middle layer is insulating to help retain body heat in Colorado’s colder weather. Finally, the outer layer protects against the harsher conditions you may experience on a fall hike.

We’ll start at the base layer and work our way out, so you understand what fabrics are best for each layer. We’ll also learn how to layer for the specifics of fall weather in Colorado and the hikes you are planning. As you likely know, fall in Colorado can range from warm to very cold. The weather can change quickly, and conditions can worsen with no warning. Especially if you are hiking to a higher elevation, say summiting one of the state’s many fourteeners, you will find temperatures and precipitation requiring a much different outfit than what you had on in the parking lot. It’s important to dress and pack well, as you will learn.

Image by David Mark from Pixabay

The Wicking Base Layer 

You can think of the base layer as the clothing that touches your skin. This is more than just a t-shirt and shorts or a long-sleeved shirt and long underwear. Remember that the base layer also includes underwear (boxers, briefs, bras, and more) and socks.

The main goal of the base layer is to wick away moisture and keep your skin dry. As you know, sweat cools you down, stealing your body heat much faster than a cold breeze. In the hot summer, you may not mind a cotton shirt absorbing and holding your sweat. In the fall and winter, though, cotton is at the top of the “Absolutely Not” list. Seriously, it’s one of the most important hiking safety tips of all time.

Photo by Stephen Leonardi on Unsplash

The Best Base Layer Materials

The best synthetic fabrics for base layers are polyester and nylon. You likely have these in your closet as your running or exercise clothes. You can go by personal preference, as long as it is ‘moisture-wicking,’ ‘dry-fit,’ or the like. Again, make sure your bras and boxers meet these criteria, too. A great natural fabric, especially for socks, is wool, as it wicks moisture and provides great heat retention. Wool is good for clothing, too, if you are in colder temperatures or hiking Colorado’s many mountains. It will keep you warm without being too heavy, but it also is more expensive than synthetic fabrics.

There are a few different options in terms of the weights of base layers, and you can decide based on the time of year and anticipated weather. No matter what you choose, your base layer should always be moisture-wicking. This layer should also fit snugly against your skin. You don’t want gaps between your skin and the material as it won’t be able to wick sweat away as effectively. A tight but comfortable base layer will keep your skin dry, which in turn will keep you warm and prevent skin irritation, like chafing and blisters.

Base Layering Tips for Colorado’s Fall Weather

Base layers are organized by weight; lightweight or ultra-lightweight for hotter weather and midweight or heavyweight for the colder months. This might mean shorts and a t-shirt in early fall when Colorado temperatures are in the 50s or 60s, and long johns and long-sleeved shirts in late fall when it’ll be in the 30s and 40s on average. Because the weather can change quickly here, especially in the mountains, I prefer to keep my base layer light and carry a heavier middle layer in my day pack.

Remember, the goal of this layer is moisture-wicking, where warmth is the job of the middle layer. That’s why lighter base layers make sense in Colorado’s fall conditions. You can always add more clothes later if the temperature drops up the mountain. The one exception to this is socks. My feet always run cold, so I highly recommend a thick wool sock for fall hikes, ones that cover your ankles! As long as your hiking boots are breathable, your feet will be happily dry and warm.

The Insulating Middle Layer

Next up, it is the job of the middle layer to retain body heat and keep you warm in colder temperatures. Where base layers tend to be stretchy and thin, you’ll recognize your middle layer pieces by their soft and puffy qualities. When shopping, you may see middle layer options listed as ‘soft shells.’ Depending on the weather, you can choose a lighter or heavier option, so it’s a good idea to have multiple middle layer pieces if you are planning on frequent fall hikes in Colorado. 

Photo by lucas Favre on Unsplash

Middle Layer Options for Fall in Colorado

For lighter wear, you might go with a microfleece pullover or hoodie. Fleece is nice because it dries quickly and stays warm. It is also breathable so that you won’t overheat. This is a great option for the early fall in Colorado. However, if it’s windy, you will definitely need an outer shell, or you’ll find the breathability a weakness.

For the colder days, a down jacket is the best middle layer. I am partial to synthetic down, both for the animals and the water resistance. Down insulated jackets don’t hold up well when wet, but they compress better than synthetic down if you need to save space in your pack. If a softshell is all you plan on wearing, I’d recommend one with a hood, so your neck stays warm. In this case, though, you will definitely need to pack a waterproof outer shell, as the fall in Colorado sees rain or snow regularly.

The Defending Outer Layer

Once you’ve got the dry and warm inner layers set, the last part of knowing how to layer for hiking is protecting against the elements. Fall in Colorado can be all over the map in terms of weather conditions, and this outer shell is key for making sure the wind, rain, and snow don’t penetrate and leave you cold and miserable.

Photo by Daniel Lincoln on Unsplash

The Best Outer Layers for Colorado’s Fall Season

For both jackets and pants, you will want waterproof outerwear. Trust me when I say that “water-resistant” is not good enough! If you get caught in a downpour, a water-resistant layer is going to soak and leave you shivering. Also, be sure it has a hood. Rain dripping down your neck and back is truly an uncomfortable and dangerous way to spend a hike.

In addition to water- and wind-proof material, your outer layer should also be breathable. These pieces are more expensive, but if you plan on exploring Colorado’s fall hikes, this feature is a must. Breathable jackets, ones with zippers in the armpits and such, are key for longer hikes because they keep you dry while you work hard. If the inner layers are wicking away moisture, but your outer layer isn’t breathable, the moisture will condense against it and soak your middle layer. You need breathability to allow fresh air to move through and clear out the humidity. 

One final feature of a good outer layer is durability. Since this layer has to brave the elements, you want something that will stand up to a bit of a beating, especially for pants that you’ll sit on, trek through the brush, and more. If your outer layer gets torn, you’ll have leaks when it rains. And with the expensive nature of these clothes, you want to make sure to buy something that is a good investment.

Packing for a Fall Hike in the Rockies

Now that you know the options for layering clothes, let’s talk about how to pack for day hiking in Colorado. Seasoned hikers are always carrying day packs, and it’s not just for the granola bars. 

When you start at the trailhead, you might be in your base layer and outer shell. Mid-fall in Colorado is comfortable, and you might reason that it’ll only be a few hours. But as you hike up the mountain, the weather changes. It will get colder and windier the higher you go, with less protection from surrounding trees. You may even get an unexpected shower or snow flurry. 

Before you leave, always check the weather to know what to expect. Then, pack that insulating middle layer anyway. A light fleece or down jacket won’t take up much room or add much weight, and you will be glad you have it when you need it. Wearing appropriate clothing and knowing how to layer for hiking will keep you comfortable and protected during your hike so you can enjoy mother nature, no matter what weather she brings.

What is the Easiest 14er to Hike in Colorado?

Did you know that Colorado has 58 peaks above 14,000’ elevation?

Commonly known as the ‘fourteeners,’ these mountains are popular bucket list items for serious hikers. If you are just getting started on your mountaineering journey, you’ll be glad to know that there are a handful of beginner 14er hikes with lesser mileage and elevation gain.

Best Colorado 14ers for Beginners

Check out this list of routes, and enjoy the beauty of our state’s mountainous terrain!

Pikes Peak

  • Location: Parking available at the Devil’s Playground Trailhead
  • Starting Elevation: 12,932’
  • Summit Elevation: 14,115’
  • Elevation Gain: 1,200’
  • Round Trip Mileage: 5.5 miles
  • Class: 1
  • Standard Route: East Slopes route starts at Devil’s Playground

First on this list is the well-trodden Pikes Peak. This popular destination is a super-accessible twelve miles west of Colorado Springs! The wildflower-adorned trail is used for all sorts of activities including mountain biking and horseback riding. Your pup will be glad to know that dogs are allowed on this trail. 


The trail has loads of picnic spots and observation points along the way, so it’s also great for a leisurely hike that’s not focused on summiting. Pikes Peak is arguably the easiest 14er in Colorado, but if you are looking for a little more help on your first mountaineering trip, be sure to check out our Pikes Peak guided hiking tour.

Handies Peak

  • Location: American Basin parking lot
  • Starting Elevation: 11,619’
  • Summit Elevation: 14,058’
  • Elevation Gain: 2,430’
  • Round Trip Mileage: 5.3 miles
  • Class: 1
  • Standard Route: Western route along the American Basin Trail

Located in the San Juan Mountain Range, Handies Peak is one of the easiest 14ers to hike. There aren’t many options with fewer miles or less elevation gain. Handies Peak isn’t just known for its relative ease, though. The San Juan Range is a beautiful place to spend time, and it is more underrated (aka less busy!) than the Colorado 14ers further north and easier for Denverites to visit.

Closest to Silverton, CO, this trail is accessible for vehicles with four-wheel drive and decent clearance. Otherwise, two-wheel drives are advised to park in the first lot and hike the mile to the trailhead. 

Mount Sherman

  • Location: 9700 4 Mile Creek Rd, Fairplay, CO 80440 
  • Starting Elevation: 12,009’
  • Summit Elevation: 14,035’
  • Elevation Gain: 2,020’
  • Round Trip Mileage: 5.2 miles
  • Class: 2
  • Standard Route: Southwest Ridge along Four Mile Creek Road

Part of the Mosquito Range, Mount Sherman is one of the best fourteeners in the Colorado Springs area. The most commonly traveled Southwest Ridge route is a direct ascent, and views from the top are amazing. You’ll have a gorgeous vista of two of Colorado’s highest peaks, Mount Elbert and Mount Massive. 

Other cool sites along the way include mining ruins, mill structures, and prospecting caves. This is an excellent beginner 14er hike for budding mountaineers and amateur geologists alike!

Mount Evans

  • Location: start at Summit Lake Park 
  • Starting Elevation: 12,850’
  • Summit Elevation: 14,265’
  • Elevation Gain: 1,400’
  • Round Trip Mileage: 5.5 miles
  • Class: 2
  • Standard Route: Northwest route, summiting Mount Spalding (13,842’) along the way

The 12th highest summit in the state, Mount Evans is part of the Rockies’ Front Range. Accessible from Idaho Springs, this peak is about a two-hour drive from Colorado Springs. Mount Evans is a very popular destination, in part due to its relatively tame elevation gain. 

This hike has a lot of cool bonuses, namely the beautiful Summit Lake and the population of local mountain goats. There are also a number of other trails you can take to summit Mount Evans, including a short walk from your car because, yes, there is a parking lot at the top.

Mount Bierstadt

  • Location: Parking available at the Bierstadt Trailhead 
  • Starting Elevation: 11,633’ (trail first descends to 11,470’)
  • Summit Elevation: 14,065’
  • Elevation Gain: 2,600’
  • Round Trip Mileage: 7.8 miles
  • Class: 2
  • Standard Route: Western route via the Bierstadt Trail

The western (and slightly smaller) neighbor of Mount Evans, Mount Bierstadt is known as one of the most iconic of the 14ers. Being an hour’s drive from Denver, the hike is quite popular and often crowded. Aim for a visit during the week or off-peak season in order to get a little space to yourself on the trail.

Quandary Peak

  • Location: Quandary Peak Trailhead parking by reservation only 
  • Starting Elevation: 10,930’ 
  • Summit Elevation: 14,265’
  • Elevation Gain: 3,340’
  • Round Trip Mileage: 6.6 miles
  • Class: 1
  • Standard Route: East Ridge route, Quandary Peak Trail

Regarded as the least technical peak, Quandary is one of the most accessible, easiest 14ers in Colorado. The standard East Ridge route is a straight shot to the top where you’ll have outstanding views of Breckenridge and other peaks. 

This peak is part of the Tenmile Range, and one of the more robust elevation gains on this list. Still, it is a Class 1 hike and boasts a short-ish round-trip mileage. That might explain why it is often the most traveled, seeing 50,000 visitors last year! If you’re in the Colorado Springs area, you’ll definitely want to check out Quandary Peak. 

Grays and Torreys Peaks

  • Location: Grays Peak Trail 
  • Starting Elevation: 11,280’
  • Summit Elevation: 14,278’ (Grays) & 14,275’ (Torreys)
  • Elevation Gain: 3,600
  • Round Trip Mileage: 8.6 miles (for both summits)
  • Class: 2
  • Standard Route: Northeast Route forks off to both summits

Grays and Torreys Peaks are decidedly not the easiest on this list. However, they are quite popular and for good reason. First, located in the Front Range, these peaks are just past Mount Evans and around ninety minutes from Denver.

More importantly, the two peaks have a saddle ridge between them, meaning it’s very doable to summit both peaks in one day. It only adds a mile and a half to the hike! If you are new to mountaineering and looking to cross some of Colorado’s 14ers off your list quickly, these make a great two-in-one opportunity.

Other popular beginner 14er hikes in Colorado include Mount Antero (14,275’) in the Sawatch Range and Mount Elbert (14,439’) which is the highest summit in the Rocky Mountains.

With 58 fourteeners in the state, you have a long list to choose from. Be sure to do your research, including double-checking parking reservations, learning the signs of altitude sickness, and planning around weather forecasts. No matter where you choose to hike, these Colorado peaks are sure to provide exciting trails and outstanding views.

How to Pack for a Day Hike in Colorado

The variety of terrain and difficulty found on day hikes requires the skill of adequately packing. 

How to pack for a day hike is a skill that many have been working towards mastering for years and that all hikers need to know the basics of. Before you head out into the backcountry, your pre-trip will always require you to take a look at all of your hiking essentials. 

Day hikes in Colorado Springs can be laid back or some of the more strenuous hikes out there. To take these hikes on safely, you need to pack efficiently and effectively. While optimism and a positive mental attitude should be the first thing you pack, you can’t forget that emergencies do happen. If they happen to you, what’s inside your day pack will often determine how the situation plays out. 

If you’re new to hiking or have never hiked in Colorado before, we recommend booking a hike with a guide. Guided hiking tours will help you feel confident in a new environment and help lower risk while hiking in the mountains.

10 Essentials to pack for a day hike

The Ten Essentials are a great place to start when learning how to pack for a day hike. These were created over 80 years ago and have been modified as our technology and knowledge advance.

To begin, we’ll take a quick look at each of the ten essentials.

1. Navigation

Before you head out, you’ll need to know where you’re going and how to get there.

A map and compass are an excellent pick for navigational aids, but you can up your technology game and bring along any satellite navigation and communication devices. 

2. Sun Protection

The sun will quickly ruin your day hike and potentially lead to more serious problems if you’re unprepared.

If you adequately protect yourself with the proper layers, hats, and sunscreen, you are much less likely to experience heatstroke, dehydration, or any other sun-related illnesses. Even on cloudy days and in the winter, the UV rays can still reach you, so always be prepared!

3. Insulation

If you’re packing for a long day hike or even packing to prepare for potential hazards, extra layers will be key to keeping you safe and comfortable.

The weather flips like a switch in some environments, especially in the mountains. With the proper jackets, hats, and rain shells, you can be ready to take on anything mother nature throws at you. 

4. Illumination

Any day hike can turn into an overnighter if you lose the trail or get turned around unexpectedly (especially if you neglect navigation).

Pack a headlamp or flashlight with spare batteries, so you don’t need to shuffle your way through the dark. 

5. First-Aid

There’s no need for a complicated first aid kid unless you are a professional, but it’s important to have a basic kit ready for any injuries you or other hikers may have.

Remember, not all kits are made for all environments. Buy a basic kit and make changes to it to fit your experience level and the needs of your group. 

6. Fire

Being ready for anything means being prepared to keep yourself warm, cook food, and treat water when in the backcountry.

Fire starting supplies such as waterproof matches, a lighter, or a Ferro rod are great options to help get a fire anywhere. Pick what you are the most comfortable with and pack a spare.

7. Repair kit and tools

Packing a repair kit can seem like overpacking when you’re planning on just going out for the day, but it can be one of the most important things you bring along.

You will find more uses for duct tape and a knife than you ever thought imaginable when you need it out there. 

8. Nutrition

Every day of our lives appears to be driven by, “what meal will we have next?”

When you go out into the backcountry, this question is asked even more frequently as your body works harder than normal to bring you from place to place. Even if you bring out just a few calorie-dense snacks on your day hike, you’ll be grateful. The best practice is to bring at least an extra day’s worth of calories.

9. Hydration

No matter if you’re out in the dead of winter or on one of the guided hiking tours in Colorado Springs during the hottest day of the year, water is always your best friend.

Water keeps you warm in the winter and cools in the summer. Almost every ailment you start experiencing in the backcountry comes with the initial treatment recommendation of “drink some water.” Unsurprisingly, it usually works. 

10. Emergency Shelter

Going out means going out ready for your trip plans to change drastically. In most cases, you’ll never end up spending a night out that was unplanned.

However, if you ever find yourself in that situation, an emergency shelter will be a lifesaver. This can be a small bivy (like a one-person waterproof cocoon) or simply a tarp to protect yourself from the elements. 

More about comfort, less about survival

The Right Pack

The right backpack for day hiking is going to be a complete game-changer when you’re out hiking. A comfortable bag with enough space and support will turn a miserable experience into a walk in the park. For starters, I recommend buying a 30-40 liter pack if you are focused on day hikes.

40-liter packs can be used for short overnight trips but aren’t overkill for just a day. 

Do some research on different packs that give you the back support you need. Certain brands like Osprey will form-fit each pack to your back. This can be helpful, especially if you have a history of back problems. 

Don’t let not having the perfect day hiking pack stop you though! Start with the bag you have and upgrade when you’re ready.

The Right Shoes

Nobody wears flip-flops to the prom, and nobody should wear high heels out on the trail. The right shoes for you will be shoes that are comfortable, sturdy, broken in, and give you good ankle support. After those basics, you can begin looking at the different styles of rubber, traction designs, and waterproof construction.

Wearing the right shoes helps to avoid blisters, which means you won’t need to break into your first aid kit. The more preventative measures you can take to save on supplies will leave you even more prepared for your next day hike. 

How to Pack for a Day Hike

Now that we’ve hit the basics of what you need to pack, it’s important to talk about the process of packing.

The ABCs

The ABCs are a valuable tool for packing a backpack so that it fits comfortably and makes hiking easier. While most people will only use this method with multi-day trips, it’s helpful to consider when you are doing day hikes as well. Like I mentioned earlier, some day hikes in Colorado Springs can push you to your limit. Packing a comfortable bag will take a lot of strain off your back and make these hikes more enjoyable.

Accessibility- When you’re packing, make sure things you’ll need while hiking are packed on top or in an external pocket that you can easily get to. This includes things like rain gear, snacks, and especially a headlamp. Looking for a headlamp without a headlamp can be the most frustrating thing you’ll do all year long. 

Balance- Having a bag that pulls you to one side will end with a cranked back and one leg that takes on a lot more stress throughout the day. The key is to make your pack well-balanced to maximize comfort. The weight should be evenly distributed from side to side, and you want the majority of the weight to be in the bottom third of your bag. 

Compression- Here’s what can save you after packing a long list of essentials to bring on any day hike. Gear that compresses down into a small pouch is the best gear for hiking. After all, you don’t need to buy an 80-liter pack to go out for the day. Invest in a few compression bags to squeeze everything down into a small space. 

Know your Environment

You need to know what kind of a hike you are headed into and what that environment may throw at you. This means looking at the current weather forecast, the weather trends for your location, and reviews of the hike from recent days. 

You can gather information from apps (like AllTrails), with hikers going out onto these trails every day. If one person notices a dried-up river where most hikers rely on water, you wouldn’t know this without their comment. Utilize social platforms to gather as much information as you can before heading out. 

This information will help you greatly when packing your bag. It will tell you if you need extra socks because everything is muddy and wet or if you need to bring a down jacket for when you get up above 11,000 feet of elevation.

If you’re uncertain about reading this information and transferring it into packing, don’t hesitate to reach out for guided trips in Colorado Springs. These are fantastic resources when first learning how to be comfortable in the backcountry.