How To Stand Up on a Paddle Board

Stand-up paddle boarding (SUPing) is a widely recognized water sport that involves standing on a board, similar to a surfboard and using a paddle to move around the water. It’s been a method people have used to move in the water since around 3000 B.C. but has only become popular since the early 2000s. You’ve likely seen spectacular photos on social media or other advertisements of people posing on their stand-up paddleboard (SUP) while on a beach vacation – but what you don’t see is the clumsiness that often preludes their picture-perfect pose. 

Stand-up paddle boarding may look like a piece of cake, but it isn’t entirely intuitive. Balancing on a floating board while steering with a paddle takes a lot of coordination and core strength. But don’t let the challenge stop you! After all, paddle boarding is so popular partly due to how beginner-friendly and inclusive it is. All you need is a good attitude and this guide we’ve created for you to learn how to stand up on a paddle board. 

Photo by Peter Csipkay on Unsplash

How to Get On The Board

If you’re a beginner, mounting the SUP in calm, shallow waters (about knee deep) will be the easiest. Trying to get on the board while in deep waters or strong currents as a beginner could leave you up a creek without a paddle. To get on the board from the water, stand beside the board and lay your paddle across the nose of the board (horizontally) with the handle on your side. Hold the board on both sides, with the hand closest to you holding both the paddle handle and the board. Lift your alternate knee out of the water and onto the board, then pull the rest of your body onto the board, ensuring the nose stays in the water. Different SUPs have different balancing points, but you should be near the middle of the SUP. Continue kneeling and get your balance before attempting to stand up. 

Go From Kneeling to Standing

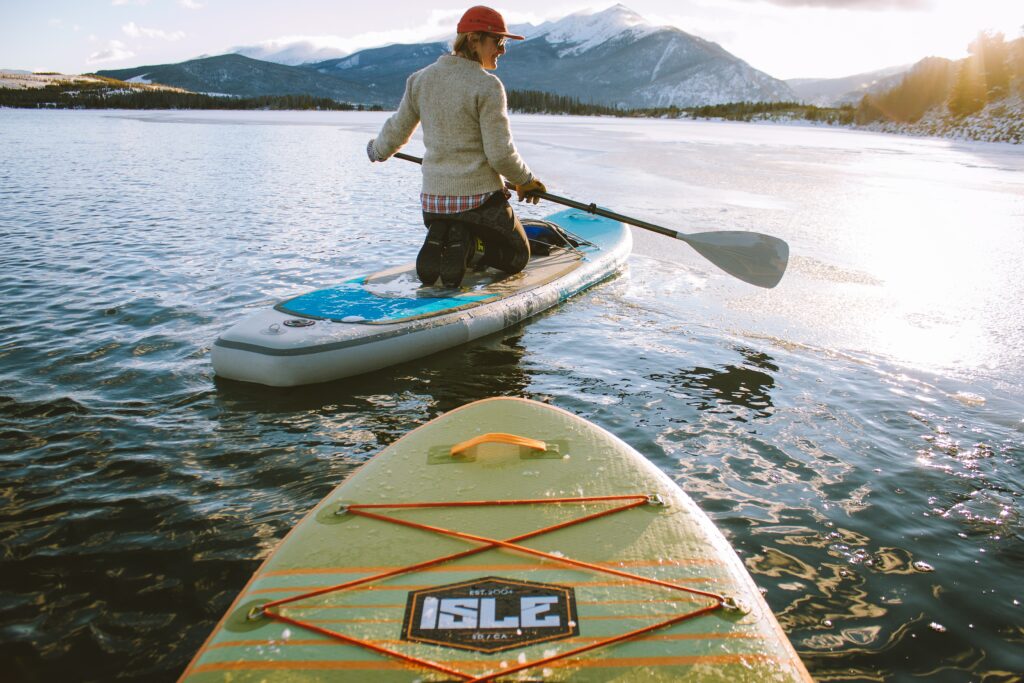
Once you’ve paddled around on your knees and gotten your balance for several strokes (or however many it takes!), you may feel comfortable transitioning into the standing position. This will be easier for some than others. For those with stiff knees, choosing a wider board might make standing up on your board easier. Staff at Broadmoor will definitely help you choose the perfect board for our Stand Up Paddle Board Tours. Now, here are a couple of methods to stand up on your board.

If you’re a reasonably agile person, you can lay your paddle down across the nose of the board, then lean down to place your hands on the board in front of your knees to balance. At this point, you should be able to bring your knees up and get your feet under your torso, then lift your body up into the standing position.

For those who aren’t exactly spring chickens or who aren’t as limber, follow the steps above, except instead of laying your paddle down, use it as a prop to help you bring your body to standing upright.

Once you’re standing, you will want to make sure your feet are in the same position on your SUP as your knees were. That way, you already know where the sweet spot of balance is on your SUP.

Photo by Holly Mandarich on Unsplash

How to Balance

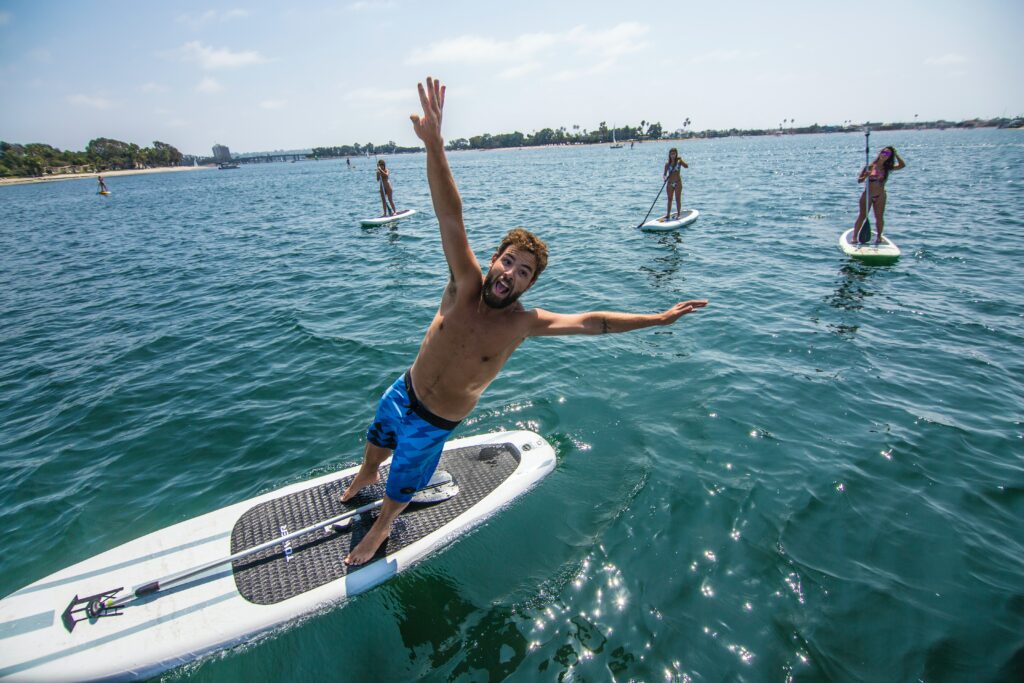
The number one tip for how to stand up on a paddle board is: Don’t look down. SUPing is one of those sports that requires you to get out of your head and into your body, so really try to feel it in your feet, hips, back, shoulders, and core while learning. Place your feet around the middle of the board, about hip-width apart, and point your toes forward. Keep your posture solid but not too rigid. Also, move from your hips and core rather than trying to walk around on the board. And last but not least- prepare to fall. It happens!

How to Paddle

Now that you know how to stand up and balance on a paddle board, you need to learn how to use your paddle. Believe it or not, there is a wrong way to paddle a SUP, and most beginners do it incorrectly when left to their own devices.

First, you want to ensure that the paddle’s T-grip handle feels comfortable in your hand. You’ll be paddling on both sides, but start with the handle in your dominant hand, so you can get the hang of the paddling technique. Hold around the middle of the paddle with your other hand.

To paddle, put your blade in the water, ensuring that the angled part of the paddle blade is pointed toward the nose of your SUP and that the entire blade is submerged in the water. Now, make a big sweeping motion, pushing down with your top hand, as opposed to pulling the paddle through the water toward you. Paddle from about two feet in front of you, back to your ankles, and lift the paddle out of the water. Keep your arms straight during the paddle motion, and only move with your torso and upper body. Keep in mind that you should be paddling with your core strength, not with your arms. 

Prepare Your Body

If you’re planning on spending a big chunk of time SUPing or want to SUP several days in a row, you’ll be wise to exercise first. Building your core muscles as well as increasing stamina will pay off on the water! And, you might not be as sore after paddle boarding as you might be if you don’t work those muscles in the days and weeks before your SUP adventure. Plank (traditional and side plank) exercises, mountain climbers, and squats are a good starting point if you want to stand up on a paddle board. 

Final Thoughts

Now that you know the basic steps for how to stand up on a paddle board, you’re ready to get on the water and rock it. Remember, to be good at something, you’ve got to be bad at it first. So don’t be afraid to practice and perhaps take a couple of falls. But this beginner’s guide to stand up paddle boarding will send you on your way! 

Is It Safe to Hike Alone?

We’ve all been there – maybe you’re new in town or have found yourself with an empty weekend and have no one to explore with, or perhaps your schedule just can’t line up with your friends’. But regardless of the reason, this may beg the question, is it safe to hike alone? The answer is yes! Being solo certainly does not need to end your adventure before it begins.

If you are someone with an unusual work schedule, who travels often, or are looking to get outside on your own schedule, hiking alone can be a freeing experience if you do it safely.

Like most new endeavors, hiking alone can seem intimidating; however, with the proper preparation and knowledge, hiking solo is safe and empowering. To help you mitigate and control the potential safety risks, see the below tips to keep you safe while getting started on your solo journey!

Photo by Julien Flutto on Unsplash

1: Start Small

While hiking alone is often depicted through the stories of lengthy endeavors or epic circumstances, hiking alone can be what you make it! Your first hike (and any hikes after that) does not have to be far, extreme, or to unknown places. 

To get used to hiking alone, picking a trail close to home, one you’ve been on before, or one you have walked with a friend first can be helpful. You may also want to consider going on a guided hike in a new area to get a feel for the terrain and to learn a few things from your experienced guide.

Once you’re comfortable, consider hiking on a new to you, well-established,  and populated trail. Some popular trails have maps at intersections (but always bring your own!), and there is often comfort in seeing others around. From here, the possibilities to increase your adventure and push your comfort zone are endless.

2: Know Your Trail

One of the most important aspects of hiking alone is researching your route. The depth of this research may vary depending on the types and lengths of trails you choose. No matter the trail, be sure to note the general direction you will be traveling, the length of the route, possible exits, turnaround options, the type of terrain you’ll encounter, and important features or landmarks such as rivers, intersecting trails, and more. 

Part of knowing your trail is also knowing what you may encounter. This may include wildlife, flora and fauna, exposure, closures, and more. When it comes to wildlife, be sure to inform yourself about the various animals and how to respond if you encounter them. For example, hiking in areas with Grizzy Bears usually means you will need to carry bear spray and know how to use it. Some areas may also have seasonal closures due to conditions, wildlife breeding/nesting patterns, or areas to avoid to due to damage or erosion. No matter the reason, check online, at state park offices, or wherever is needed to get the information you need to prepare for what’s ahead.

3: Carry a Navigation Tool

Some trails have maps for users at the trailhead entrance; some have occasional maps throughout the trail system. However, many trails have no markers or directions for where you are or where the trail goes. Consider using a paper map with a compass, a GPS device, or other technology to navigate as needed. 


There are many tools available online and via phone applications to help with navigation. Some common resources include Gaia GPS, All Trails, or Hiking Project. If you like gadgets, many smartwatches now offer GPS maps and safety features that allow you to retrace your steps to your starting location. Other options (especially for hikers who venture into more remote territory) worth exploring are handheld GPS devices, satellite phones, and other safety gadgets such as the ones offered by Garmin.

Photo by Annie Spratt on Unsplash

4: Tell Someone Where You’re Going

Sometimes in life, things don’t go as planned, no matter how much you prepare. Therefore, it is imperative that you tell a close, trusted, and available friend or family member about your plan. Be sure to tell them which trail you will be on, the intended direction and length of travel, as well as the approximate time you should return home and contact them. 

The goal, of course, is that this is a backup and never needed. It may seem simple; however, this easy step in planning may just be the one thing that saves your life or gets you the help you need if the unexpected happens.

5: Carry The 10 Essentials

The 10 essentials are made up of various emergency and first aid items. They include navigation items (discussed above), sun protection, insulation and clothing layers, illumination, first aid supplies, fire-starting equipment, repair kit and tools, food/nutrition, hydration, and emergency shelter. 

These are items that, if you need them, you do not want to be caught without them! These items make all the difference when it comes to the safety of hiking alone. Hiking has potential risks, but many of these risks can be mitigated and prepared for with the above items. The degree to which you carry some of these items may vary based on a number of factors specific to your hike, so again, do your research.

6: Know The Weather 

When you are outside, mother nature is in control. Be sure to look up the weather patterns for the area you are hiking. Of course, be sure to look at the weather forecast for the day you plan to hike, but also consider the weather patterns of the previous days to get a better picture of the trail conditions. For example, a week’s worth of rain before your trip may mean muddy conditions and partially flooded trails.

Additionally, mountains can have unique weather patterns such as afternoon storms in the summer, snow, changes in cloud cover, or wind. Therefore, the weather can vary dramatically at different elevations, and it may be challenging to get an accurate forecast. For example, if you are going up to hike at elevation, the forecast and weather patterns may be different up high than from a town or city below. If you plan to hike in the winter or at elevation where there can be winter conditions, be sure to check out Broadmoor’s tips for safely hiking in the winter

Photo by Davide Sacchet on Unsplash

7: Know Your Limits 

 Everyone has different abilities. This spectrum of capabilities can vary from outdoor knowledge, fitness, weather, or time limits. You may want to ask yourself: what am I hoping to get out of this hike? Have I done a comparable hike before? Is this within my knowledge or fitness abilities? Is this within my risk tolerance (distance, technical difficulty, conditions, exposure/ hights)?

A fun aspect of hiking for many people is pushing your own limits. But remember, doing this a little bit at a time is okay. Don’t overwhelm yourself or put yourself at risk by getting too far out of your limits. Trust what feels right to you both before and during your hike, and make sure to listen to your body. Make hiking alone an activity you can return to, love, and enjoy. 

So, is it safe to hike alone? Yes. And by keeping the tips above in mind, hiking alone can be a safe activity and may just open up a whole new world of possibilities.

Zip Lining Colorado Springs – How to Do It

How to Get Started Zip Lining Colorado Springs

Beginning as a way to transport goods and materials across rough terrain and rivers, ziplines quickly became a safer alternative for the workers, too. Nowadays, the sport has become more and more popular, with zip lines popping up in tourist areas all over the world. Zip lining is a great summer activity, a way to see awesome views of the surrounding area, and a thrilling ride for those looking for a rush of adrenaline.

What Is Zip Lining?

In zip lining, riders sit in a harness and hang under a long cable that starts higher on a slope and ends somewhere in the distance. You are connected to the cable via a pulley, whose wheels coast seamlessly along the cable, allowing you to fly through the air at awesome speeds, upwards of 40 miles per hour. 

Ziplines are often set up in forests or jungles, high in the trees. You may also find a zipline across a river or canyon or going down a mountain. In addition to a harness, zipliners must wear helmets. It is also suggested to wear pants and gloves to protect yourself from scratches by rogue branches. 

Image by AaronHM from Pixabay 

Why You Should Try Zip Lining

If you’re not already thrilled at the opportunity to fly through the air, there are plenty of other reasons to try ziplining. First, it’s a great way to experience nature. Ziplines often start at great heights – Broadmoor’s highest point is more than 500 feet in the air. You’ll get amazing views of the Front Range as you soar over the trees on this upside-down roller coaster. 


Next, zip lines immerse you in nature. These courses, which are among the best Colorado Springs attractions, include rope bridges, hikes, and rappels. While you’re on the zip line, you’ll get views of the forest canopy like you’ve never seen before. Colorado Springs has some amazing wildlife and scenery, and these zipline courses are unique and thrilling ways to experience that nature.

Is Zip Lining Safe?

All outdoor and adventure activities come with some risks, but zip lines in the United States are certified by an agency that notes a one-in-a-billion chance of one breaking. When properly constructed and run by trained professionals, ziplines are one of the safest ways for adrenaline seekers to get that rush.


The Broadmoor’s ziplines also have a minimum weight requirement of ninety pounds to make sure that riders can properly wear their safety equipment. All this is to say that a zipline course is an awesome family-friendly activity, and you can rest assured that ziplines are safe for kids.

Image by sebastian del val from Pixabay 

Zipline Courses in Colorado Springs

Now that you’re convinced to try it, let’s discuss the best zip line courses Colorado Springs has to offer. Between the Woods and Fins Courses, the Broadmoor property has eight zip lines of up to 1,800 feet in length and heights up to 500 feet.

The Woods Course

The first and more beginner-friendly course offered at Broadmoor for zip lining Colorado Springs, the Woods Course, travels over Midnight Falls and includes 5 zip lines ranging from 250 to 1500 feet long. The tallest starts 150 ft high in the air, and you’ll reach speeds upwards of 45 miles per hour. 

This thrilling course starts with two shorter zip lines to allow riders to get used to the experience. After a short walk, the third zip line takes you over a beautiful granite canyon and creek 150 feet down below. The fourth zip line leads riders to the top of Seven Falls, and the final 1,500-foot ride brings you back to the hiking trail. 

The Fins Course

If you want something a little more blood-pumping, the Fins Course is the way to go. This extreme ziplining adventure takes you to high altitudes, steep drops, and an experience in the Front Range like you’ve never had before. 

This half-day adventure has 5 zip lines of 250 to 1800 feet long and heights up to 500 feet. The course also involves two rope bridges, and a 180-foot assisted rappel. This awesome journey is definitely not for those who fear heights!

The course has two introductory zip lines, just like the Woods Course, before the third zipline takes you to Seven Falls Canyon and its rock fins. You’ll walk across two rope bridges and enjoy views of Colorado Springs before the fourth zipline takes you over the canyon to the south side of Mt. Cutler. Being 500 feet above the canyon road provides stunning view and an experience you’ll never forget. Finally, the last zip line leads back to the canyon, where you will rappel 180 feet down to the canyon floor.

The Combo Course

If you can’t choose between these awesome options, you’ll be relieved to know that you don’t have to! The Broadmoor’s combo course allows you to experience both the best zip lines in Colorado Springs. 

This four-hour day starts with the Woods Course, including the introductory zip lines and the awesome Midnight and Seven Falls rides, then all of the Fins Course, from the rope bridges to the thrilling ziplines to the assisted rappel. All in all, this exciting course has 8 zip lines and a 25-minute hike between the two courses. This great half-day adventure introduces you to the world of ziplining and provides other unique experiences in nature.

Photo by Anthony DELANOIX on Unsplash

When Is the Best Time to Go Ziplining In Colorado Springs?

If you are wondering when you can go zip lining here in Colorado Springs, Broadmoor’s courses are open year-round. While it is fun to go zip lining anytime, there are definitely better months and some weather tips to keep in mind. Summer is the best time for zip lining Colorado Springs. With the sunny, hot weather, the relief of wind and fast speeds will feel great. Spring and fall are also beautiful times to enjoy the weather from a zip line, and don’t forget about the gorgeous foliage you’ll see.

If you choose to go zip lining in the winter or colder weather, be aware of the temperature drops. On top of the mountains, it will be colder and windier. And with the ziplines propelling you to speeds greater than 40 miles per hour, you will want warm clothes and wind protection. Gloves and face protection are necessary for certain conditions to prevent frostbite. The only other risk is storms or lightning, which might result in closed courses until the bad weather passes.

Final Thoughts

Zip lining is an invigorating way to experience nature and see the stunning vistas of Colorado’s Front Range. This family-friendly activity is accessible from downtown, where you’ll have access to some of the best ziplines in Colorado. Simply make a reservation, dress well, and you’ll be all set. At Broadmoor, we include all the gear and instruction from trained guides. So all you need to do is show up and you’re sure to have a memorable time zip lining Colorado Springs – Enjoy!

Best Colorado Springs Activities for Families

Not many states call-in visitors from all over the world quite like Colorado does, and for good reason. Sitting at the Eastern foot of the Rocky Mountains, Colorado Springs is often ranked one of the best places to live and retire. Its residents are also known to be some of the happiest people in America. Maybe it’s the picturesque mountain views that are always accessible, or the neverending list of things to do outside that makes Colorado Springs one of the best destinations for families. 

Either way, whether you’re considering moving your family to the area, already live nearby, or just want to have an unforgettable summer vacation with your kids, we’ll help inspire your list of things to do in Colorado Springs.

Photo by Pragyan Goswami on Unsplash

1: Explore Pike’s Peak

Pike’s Peak, dubbed “America’s Mountain,” is a National Historic Landmark and even claims to be the most visited mountain on the continent. We added this to our list of Colorado Springs activities for families not only for its fame but also for its easy access. Pike’s Peak is one of the only Fourteeners (mountains above 14,000 feet elevation) accessible by more than just foot. You can summit Pike’s Peak by hiking, biking, driving, or train. Additionally, Broadmoor Outfitters offers an exciting combination of two modes of transportation: ride up and bike down!

2: Cave of the Winds Mountain Park

Believed by the Apache to be home to the Great Spirit of the Wind, the Cave of the Winds cavern is a geological time capsule. The main cavern is around 4 to 7 million years old. However, there are no written records of the cave until two school-aged boys discovered it in the 1800s. This is one of the best Colorado Springs activities for families because the Cave of the Winds Mountain Park offers customized plans for your family’s day based on your group’s adventure level and how much time you have to explore.

While there are dozens of things to do at the Park, two main (and exhilarating!) tours explore the entire cave system. The Discovery Tour is 45 minutes and perfect for everyone in the family! The Haunted Lantern Tour is a little longer, 90 minutes, and is a thrilling, deep exploration into the mountain with only candles lighting the way. The Haunted Lantern tour is only suitable for children 8 years old and up. All tours fill up quickly, so be sure to reserve yours as soon as possible. 

Photo by Colin Lloyd on Unsplash

3: Broadmoor Hunt

This scavenger hunt activity is probably one of the most unique experiences on our list of things to do in Colorado Springs. It also happens to be located on the same property as some of the best lodging in Colorado Springs! The Broadmoor Hunt is perfect for families and large groups of up to 100 people. You’ll download the app on your phone to access the scavenger hunt’s challenges and explore every bit of the historical property around The Broadmoor. All the while taking photos, solving riddles, and even asking Broadmoor staff for tips! This is a highly interactive game-like activity that lasts about two hours.

4: Royal Gorge Suspension Bridge and Park

The Royal Gorge Bridge and Park is home to the tallest suspension bridge in the United States. What’s more, it also has Colorado’s #1 Bucket List Zipline, and the World’s Scariest Skycoaster. Visiting the park and walking across the tallest bridge in America is a must-do for adventurous families. This attraction is so thrilling. It also made it onto our list of Best winter activities for families in Colorado Springs. Assuming everyone in your family is ok with heights, this park has tons to offer the thrill-seeking family, from walking the bridge that hangs 1000 feet over the river to riding in aerial gondolas.

Photo by Jonathan Chaves on Unsplash

5: U.S. Olympic and Paralympic Training Center

If you’re a family who likes to gather around the television to cheer on your favorite nations and athletes during the Olympic Games, you’ll not want to miss out on the opportunity to visit the Olympic Training Center. This is America’s hub for the country’s top-performing athletes and their coaches. This facility in Colorado Springs offers lodging, dining, training, and recreational facilities. It can accommodate 500 athletes and coaches. You’ll need a reservation to embark on one of the three tours offered at Bronze, Silver, and Gold tiers. Each tour offers varying levels of access to the facilities. For example, Bronze tours will show you around some major areas of interest, whereas the more expensive Gold tour will get you inside access to pools, basketball courts, and even the dining hall. On occasion, when their schedules allow, Olympic athletes offer exclusive tours.

6: Garden of the Gods Visitor and Nature Center

This is one of the top destinations and things to do in Colorado Springs. Picturesque views of sandstone rock formations and mountain passes make this Nature Center a must for your family-friendly activities! Among the activities offered with breathtaking views as the backdrop are hiking, canoeing, ziplining, and open-air Jeep rides. Additionally, there are indoor activities like museums and informational videos covering the stunning rock formations and towers. There’s something for everyone at Garden of the Gods. 

Conclusion: 

We’re hopeful this list offers you a starting point and inspiration for things for families to do in Colorado Springs. This is by no means an exhaustive list, as Colorado Springs has thousands of attractions, trails, and activities to explore. “Fun” could be a full-time job in this city, and we hope to be part of yours! 

Rock Climbing in Colorado Springs – Where to Go

Situated against the foothills of the Rocky Mountains lies the City of Colorado Springs. Just south of Denver, this city is a premier gateway to adventure, offering access to various activities and awe-inspiring landscapes. Of these activities, rock climbing in Colorado Springs is one of our favorites.

Colorado Springs has it all, from unique sandstone rock formations to glistening glaciated peaks. Rock climbing in Colorado Springs is an activity you do not want to miss! But with so many options, it can be hard to know where to go. To save you time, we have laid out a quick guide to Colorado Springs rock climbing locations to suit climbers of all skill levels.

Before heading to the crag, remember to review the rules and regulations for rock climbing in Colorado Springs. These include very important safety information and general rules for each park to make sure all climbers have a fun and safe adventure.

Photo by Patrick Hendry on Unsplash

A Quick Note

Climbing is inherently dangerous. However, it can be a safe, enjoyable, and memorable activity with the proper equipment and skills. If you have never climbed before, first try climbing in an indoor space or seek a guided tour. To learn more about rock climbing safety for outdoor climbing, check our rock climbing safety guide.

If you’re ready to try climbing outdoors and don’t have the necessary skill and equipment, try going with a guide! Broadmoor Outfitters offers several guided rock climbing tours in Colorado Springs to phenomenal climbing locations in the area. This is also an excellent option for those looking to transition from indoor climbing to outdoor climbing. Or for those who have never climbed before but would like to immerse themselves into new landscapes and exciting rock climbing experiences in Colorado Springs.

Beginner Rock Climbing in Colorado Springs

City Rock (Indoor Climbing Gym)

Location: 21 N Nevada Ave., Colorado Springs

Parking: There is metered parking on downtown streets and many parking garages nearby. See parking information here. 

Approach: Easy walk in town from street or garage parking.

City Rock offers fantastic indoor rock climbing in Colorado Springs. This gym includes bouldering, auto-belays, sport climbing, and top-roping for all ages and ability levels. In addition to the climbing, City Rock also features a yoga studio, fitness training, a kids’ area, and more. This is a great option for first-time climbers or those seeking an alternative activity due to inclement outdoor weather.

Intermediate Rock Climbing in Colorado Springs

Ute Valley Park – Excellent Bouldering Opportunity

Location: 1705 Vindicator Dr, Colorado Springs

Parking: A parking lot is available at the Ute Valley Park Entrance at the address listed above.

Approach: Per Mountain Project, it is best to access the boulders by following Mule Deer Drive past Pinon Valley Park and turning left onto Pinon Park Drive. Pinon Park deadends at a gate; park along the street and walk up the dirt road. After about 100m, you will be at the boulders.

Ute Valley Park is primarily comprised of bouldering – short climbs with hard movements. No ropes or belays for this style of climbing. However, having enough crash pads, a confident partner to spot you, and some practice falling will make this more enjoyable.

While this climbing style is safe and accessible to most, we rank this location as intermediate due to the difficulty of the “problems” (routes). These problems typically range from V1-V12, which can be challenging for beginners. In this scale, V0 is the easiest (or VB for ‘beginner’), and the routes get harder as the number increases towards V12. Therefore, this is an excellent place to improve your climbing strength or challenge yourself on a tricky problem.

Red Rock Canyon Open Space – Sport Climbing

Location: 3550 W High St., Colorado Springs

Parking: Designated parking areas on the right side of W. High St. – Exact directions on Mountain Project

Approach: Find the trailhead by turning south from US 24 at the only turnoff between 30th Street and the first Manitou Springs exit.

Red Rock Canyon Open Space offers accessible and friendly climbing to novice and expert alike. With 80+ routes from 4th class to 5.13, there is a route for everyone. This area is primarily sandstone climbing with face holds, offering holds and movement very similar to gym climbing. Most climbs are bolted sport routes with lowering and rappelling anchors. 

NOTE: A free permit is required before climbing and is obtainable online. Be sure to watch the video on the climbing permit page, as this includes very important rules and regulations for the area.

Photo by Mark McGregor on Unsplash

Advanced Colorado Springs Rock Climbing

Cheyenne Cañon Park – Primarily Sport with Crack and Trad Options

Location: 4682 Gold Camp Rd, Colorado Springs

Parking: Enter near the Starmore Discovery Center, drive along the road, and park at various pullouts. There is also parking at the Powell parking lot on Gold Camp Road – See Mountain Project for more directions.

Approach: Most approaches are short and accessible from the parking lot or pullouts.

Situated in a narrow canyon with beautiful views, this fantastic granite crag contains a mixture of climbing styles. The options include bouldering, trad, and sport routes of varying difficulties. Although primarily a sport climbing location, there are a handful of crack climbs and trad routes offering a place to learn crack climbing techniques and trad climbing skills. 

This rock is also known to be of varying quality, so be sure to assess your routes. Cheyenne Cañon is an excellent option for hot days as it tends to stay cooler in the canyon shade. If you happen to be around in the winter months, this area is also known for its Ice Climbing.

NOTE: A free permit is required before climbing and is obtainable online. Be sure to watch the video on the climbing permit page, as this includes very important rules and regulations for the area.

Garden of the Gods – Great Trad Climbing

Location:  180 N. 30th St., Colorado Springs

Parking: Parking is available in the Visitor Center lots

Approach: From the parking lot along well-marked and traveled paths. See Mountain Project for specific route information.

Garden of the Gods is the most well-known rock climbing area in Colorado Springs. This area comprises beautiful towering sandstone formations with picturesque snowy peaks in the background. This area is well protected, so obtaining a park permit and learning about rules and regulations is mandatory before entering. 

While there are some beginner routes, this area is best known for traditional “trad” climbing – often reserved for advanced climbers only. Trad climbing grades range from 5.3 to 5.12. Climbing in this area requires advanced rope system knowledge, gear placement techniques, crack climbing skills, and more. Many famous and historical “test pieces” are available to measure your skill. While mostly known for traditional climbing, this area also offers bouldering up to V8 and sport climbing up to 5.13.

Photo by Sean Benesh on Unsplash

Final Thoughts

No matter where you go or what style you choose, rock climbing in Colorado Springs will be an unforgettable experience. Whether you are testing your abilities, trying out a new sport, going on a guided climbing tour, or searching for the perfect view, Colorado Springs will meet your needs. Grab a friend or guide, be safe, and climb on!

Colorado Springs Trail Guide – Best Hiking Trails in Colorado Springs

The city and area surrounding Colorado Springs have gorgeous scenery and ample ways to enjoy the great outdoors, perhaps one of the best parts of Colorful Colorado. Whether you are looking for a quick walk or a long, tiring trek, there are plenty of hiking trails in Colorado Springs at every difficulty level. And for those just getting started, be sure to check out our guided hiking tours.

If you are looking for the absolute best trails in Colorado Springs, we have an in-depth review of our top 5 favorite hikes near Colorado Springs. You’ll also see them on this list along with many other excellent options for hikers of all abilities. This list is organized roughly by difficulty level, as determined based on reviews from fellow hikers, length, and elevation gain. So if you are wondering where to hike in Colorado Springs, look no further. 

Easy Hikes

Memorial Park Prospect Lake Loop Trail

Parking: 280 S Union Blvd, Colorado Springs, CO 80910 (Tons of parking available in the park along Memorial Dr)

Elevation Gain: 26 feet

Round Trip Mileage: 1.3 miles

Highlights:

  • Paved loop, very accessible for wheelchairs, strollers, etc.
  • Great views of mountains and scenic lake
  • Beach area and playground

Palmer Park Cheyenne and Grandview Trail Loop

Parking: Palmer Park Trail Cave Outlook, 3120 N Chelton Rd, Colorado Springs, CO 80909

Elevation Gain: 183 feet

Round Trip Mileage: 1.8 miles

Highlights:

  • So much to see here including a botanical reserve, horse stables, canyons, ravines, bluffs, and more
  • Tons of wildlife: Palmer Park is popular among birdwatchers

Stratton Open Space The Chutes, Laveta, and Chamberlain Trail Loop

Parking: North Cheyenne Cañon Park & Stratton Open Space Trailhead, N Cheyenne Canyon Rd, Colorado Springs, CO 80906 (on the right, just past the Starsmore Visitors Center)

Elevation Gain: 705 feet

Round Trip Mileage: 3.8 miles miles

Highlights:

  • Most popular hiking trail in Stratton Open Space
  • Excellent wildflowers and wildlife
  • Beautiful views of the Gold Camp Reservoirs

Garden of the Gods The Palmer, Buckskin-Charley, Niobrara, and Bretag Trail Loop

Parking: 3105 Gateway Rd, Colorado Springs, CO 80904

Elevation Gain: 449 feet

Round Trip Mileage: 4.0 miles

Highlights:

  • Gorgeous views of the National Natural Landmark that is Garden of the Gods
  • Combines four popular trails around the park
  • Access to horseback riding, rock climbing, and biking trails
  • A Top 5 Pick! Learn More.

Ute Valley Park Ute Valley Park Trail

Parking: Ute Valley Trail Head, Ute Vly Trl, Colorado Springs, CO 80919

Elevation Gain: 488 feet

Round Trip Mileage: 4.3 miles

Highlights: 

  • Excellent views of Pikes Peak
  • Plenty of side trails to explore
Photo by Bailey Galindo on Unsplash

Moderate Hikes

North Cheyenne Cañon Park Mount Buckhorn Peak

Parking: Upper Gold Camp parking lot, 4415 Gold Camp Rd, Colorado Springs, CO 80906

Elevation Gain: 859 feet

Round Trip Mileage: 3.9 miles

Highlights:

  • Beautiful views along the way 
  • Boulders to climb at the summit (the tallest offers panoramic views)
  • A Top 5 Pick! Learn More.

North Cheyenne Cañon Park Seven Bridges Trail

Parking: Seven Bridges Trailhead, N Cheyenne Canyon Rd, Colorado Springs, CO 80906 (right before Helen Hunt Falls)

Elevation Gain: 912 feet

Round Trip Mileage: 3.5 miles

Highlights:

  • Very popular trail due to its history and uniqueness
  • Meanders alongside a creek and crosses over via seven charming bridges
  • Close to Helen Hunt Falls and Silver Cascade Falls

Pike National Forest The Crags Trail

Parking: Crags/Devil’s Playground Trailhead, 615 Teller Co Rd 62, Divide, CO 80814

Elevation Gain: 820 feet

Round Trip Mileage: 4.8 miles

Highlights:

  • Awesome views of unique geological features
  • Well marked trail
  • Challenging, but a good introduction for beginner hikers
  • A Top 5 Pick! Learn More.

North Cheyenne Cañon Park Mount Muscoco Trail

Parking: Mount Cutler and Muscoco Trailhead, N Cheyenne Canyon Rd, Colorado Springs, CO 80906 (on the left, 1.5 miles past Starsmore Visitors Center)

Elevation Gain: 1,292 feet

Round Trip Mileage: 4.0 miles

Highlights:

  • Includes a fun scramble at the summit
  • Outstanding views of the surrounding mountains
  • Well marked and well maintained
  • A Top 5 Pick! Learn More.

North Slope Recreation Area North Catamount Reservoir Trail

Parking: Pikes Peak Toll Rd, Woodland Park, CO 80863 (just past the Crystal Reservoir Visitors Center)

Elevation Gain: 262 feet 

Round Trip Mileage: 2.7 miles

Highlights:

  • Short but steep (15% grade around the 1.5-mile marker), so you’ll get a good workout
  • Beautiful views of meadows and wildflowers along the way
Photo by Jonathan Chaves on Unsplash

Hard Hikes

Red Rock Canyon Open Space Sand Canyon, Mesa, Greenlee, Red Rock Canyon Loop

Parking: 3550 W High St, Colorado Springs, CO 80904

Elevation Gain: 882 feet

Round Trip Mileage: 5.4 miles

Highlights:

  • Varied terrain and interesting geology
  • Lots of sun as shade is limited
  • Good views without too difficult an elevation gain

Pike National Forest The Incline Trail

Parking: Barr Trailhead, 98 Hydro St, Manitou Springs, CO 80829

Elevation Gain: 1,978 feet

Round Trip Mileage: 4.0 miles

Highlights:

  • The most popular trail in the Pike National Forest
  • All the elevation is in the first mile – at the hardest point, it’s an extremely challenging 61% grade!

North Slope Recreation Area Limber Pine, Mule Deer, Mackinaw, and Ridge Trails Loop

Parking: Catamount Recreation Area, 3168 Co Rd 28, Woodland Park, CO 80863

Elevation Gain: 1,036 feet

Round Trip Mileage: 8.4 miles

Highlights:

  • Challenging trek around the North Catamount Reservoir with a bunch of elevation changes
  • At times follows the water, and at other times, you’ll be in the forest

North Cheyenne Cañon Park Columbine Trail

Parking: Starsmore Discovery Center, 2120 S Cheyenne Canyon Rd, Colorado Springs, CO 80906

Elevation Gain: 1,607 feet

Round Trip Mileage: 7.6 miles

Highlights:

  • Great views of the surrounding mountains
  • Plenty of wildlife (don’t forget to check out the Starsmore Discovery Center at the trailhead
  • Gradually inclining slope, no huge scrambles
  • A Top 5 Pick! Learn More.

Pike National Forest The DeCaLiBron: Mounts Democrat, Cameron, Lincoln and Bross Trail

Parking: Kite Lake Trailhead, Co Rd 8, Alma, CO 80420

Elevation Gain: 3,136 feet

Round Trip Mileage: 7.0 miles

Highlights:

  • Ability to summit three 14-ers, the highest being Mount Lincoln at 14,295’ (Note that Mount Bross is private property and illegal to summit)
  • Real right of passage for serious Colorado hikers

Final Thoughts

Before you hit one of these awesome hiking trails in Colorado Springs, be sure that you are well prepared for your trip. Bring plenty of water, sunscreen, and other essentials that we cover in how to pack for a day hike. Happy trails!

Bike Maintenance Basics – How to Clean Your Bike

When you think about hitting the trails with a mountain bike or e-bike, maintenance is never top of mind. However, bike maintenance is a very important part of any ride, and in fact, every ride. Skipping the bike maintenance basics not only leads to more wear and tear, but it can even be dangerous to you as the rider. 

That’s why we’re here to discuss bike maintenance basics to make sure you keep your gear in peak condition. It might seem hard, but taking a little time to learn how to clean your bike and how to complete a pre-ride inspection will save you a lot of hassle down the line. So let’s get to it.

Don’t want to worry about bike maintenance? Join our Cog Up/Bike Down Pikes Peak experience or a guided mountain bike tour in Colorado Springs to reap the benefits of our perfectly maintained bikes and expert guides. Or alternatively, utilize our bike rentals in Colorado Springs to use for your own adventure.

Photo by Tim Foster on Unsplash

How to Do a Pre-Ride Bike Inspection 

A quick check before each ride is essential bike maintenance to keep you safe and keep your bike functioning optimally. Many people call this the ABCs of bike maintenance. If you remember that, you’ll be able to keep track of these critical steps of the pre-ride inspection.

Air in the Tires 

Look closely at the sidewall of your bike tires, and you will find a range of recommended tire pressures (PSI). There are a lot of factors that go into deciding what pressure within this range you want. You can begin at a pressure in the middle of the specified range to start, and learn your preferred tire pressure by feel as you get more experience. But in short, a more inflated tire will have less resistance and allow you to go faster (best for road cyclists), while a less inflated tire will absorb more shock (best for trail riders) and achieve better grip (safest for riding in wet conditions).

While you are inflating your bike tires to the desired pressure, be sure to inspect the tires for damage or deformities, and make sure the quick release lever or thru-axle (depending on your bike) are securely tightened. Finally, don’t forget to bring your pump and tire repair kit or patch kit on the ride with you in case of emergencies.

Brake Check

Your bike’s manufacturer can tell you how often you need to replace your brake pads and rotors, but it is also important to use your own judgment and look for excessive wear. In addition to a visual check, be sure to spin the tires and apply the brake mechanisms. 

Here, you want to make sure they move smoothly, don’t get stuck anywhere, and clamp down strong on the tires. If you feel a hitch or resistance, you may need to lubricate the parts. These cables and assemblies need lubrication to function correctly, and that’s ongoing maintenance we’ll discuss in the post-ride section covering how to clean your bike.

Chain Inspection

Bike chains are one of the most important pieces on the entire bike, and unfortunately, they’re also one of the most fragile. Before every ride, you should turn the pedals slowly and examine every chain link. 

Check to make sure the bike chain is not dirty or rusted, that there is no gunk or other impediment, and that the chain moves smoothly. Also, check the gears and the drivetrain, making sure the bike shifts without a hitch. 

The Nuts and Bolts of Bike Maintenance Basics

The last thing to do pre-ride is to ensure that the bike’s many nuts and bolts are tight and secure. Especially with mountain biking, it is normal for these to loosen over time as you maneuver the bike over obstacles and force different stressors on it. 

With hex keys and a Torx wrench, a decent bike tool will allow you to tighten all these pieces and make sure your bike is ready for the next adventure. This multi-tool is a great piece to bring with you on the ride, too, in case something loosens mid-ride. Loosening parts are all potential sources of problems that you do not want to learn about while on the trail, so invest a few minutes pre-ride in this important bike inspection.

Photo by Anastasia Shuraeva from Pexels

How to Clean Your Bike Post-Ride

After every ride, it pays to give your bike a quick wash. Especially if you have been hitting trails on a mountain biking tour, you don’t want to leave your bike dirty. Over time, dirt and grime accumulate and impact the smooth functioning of the bike’s fragile mechanisms. It causes rust and leads pieces to break earlier than they would otherwise.

Rinse and Dry

So, one of the most critical bike maintenance basics is also the easiest. Using good old soap and water (or bike wash cleaner), carefully wipe down the bike frame, handlebars, seat post, and brake mechanisms. You want to be gentle with these sensitive pieces, so don’t use a pressure washer. 

It’s also harmful to get soap on the brake pads themselves. Instead, use rubbing alcohol or rotor cleaner to degrease the rotors and brake pads. As noted above, you do not want to leave the bike to air dry as that can cause rusting, so use clean rags to get the bike nice and dry. 

Degreasing

For the chain and drivetrain, you want to really get in there and clean out any debris and grease. Especially for mountain bikes, these parts can get very dirty quickly, and you will find debris stuck in hard-to-reach areas. Cleaning out these parts is essential bike maintenance for preventing your bike from wearing out too rapidly and also ensuring future rides will be smooth and safe. 

You can clean the drivetrain with a rag and degreaser if it is not too dirty, or use a toothbrush to scrub off built-up grime. A bike chain cleaner is a good investment for thoroughly cleaning your chain without making a mess. Be sure to go through a couple of full rotations of the chain and shift gears a couple of times to make sure no dirt or grease remains. You can then use a clean rag to wipe away any leftover muck and clean the degreaser from the bike.

Lubrication

Once your bike is clean and dry, it is time to apply lubrication. You should lubricate your bike after cleanings, anytime it starts to squeak, and after wet rides to prevent rust. Keeping all these parts well lubricated will ensure a smooth and safe ride and keep the bike from unnecessary wear and tear. Depending on how frequently you ride, you might end up doing this weekly or more, but it is an essential step of bike maintenance and well worth the effort. 

Lubricate the drivetrain, chain, brake cables, and assemblies. When you lubricate your bike, you really only need a few drops for each component. Give the lubrication a few minutes to soak in and work it around by turning the pedals and moving the mechanisms. Then, be sure to use a clean rag to wipe away the excess. After it has soaked in, wipe down the parts gently, so it is not dripping with lubricant. Overlubricating your bike can actually hurt it, as dirt and debris are attracted to and accumulate in the excess lubrication.

Storage

Now that we’ve covered how to clean your bike, you’re ready to store your bike until the next ride. You might not have considered it, but there are actually better and worse ways to store a bike. First, don’t store a bike outdoors where it will be exposed to the elements. This will increase rust and corrosion, not to mention the fading of the paint job and increased risk of theft! 

Regarding positioning, storing a bike by hanging it with hooks or a wall mount is the best way to keep your bike in peak condition. If you are storing your bike upright, be sure to put rugs under the wheels and make sure to keep the tires inflated. Otherwise, you could find the tires have bulged or cracked over long periods of disuse.

Photo by Jan Kopřiva on Unsplash

Extra Notes for Electric Bike Maintenance Basics

On top of everything we’ve covered, e-bikes have some extra maintenance steps. Once you understand how electric bikes work, these extra maintenance requirements make sense since there are additional parts to consider. Specifically, we’re concerned about the e-bike’s battery and motor. 

E-Bike Battery Maintenance

Just like any battery, good maintenance procedures help extend the battery’s lifespan and optimize its capacity. First, top off your electric bike’s battery after every ride. It’s not good for batteries to sit empty for extended periods. However, it is equally bad for a battery to sit fully charged for too long as it puts excessive stress on the battery’s components. 

Therefore, if you don’t plan to ride for a while, put your electric bike’s battery in storage, so to speak, by unplugging the battery and hooking it up to a charge tender. Battery tenders allow batteries to naturally discharge and then recharge in a cycle. This keeps the battery in optimal condition no matter how long you leave it. 

E-Bike Component Maintenance

The other main consideration with e-bikes is the extra wear and tear on the drivetrains and chains. Because of this, it is important to clean, dry, and relubricate your electric bike more frequently than you would a non-electric model. 

When cleaning, be sure to avoid using high-pressure water to rinse off your e-bike. While the batteries and electrical components are sealed and waterproofed against rain, pressurized water can prove too much and cause damage. 

Final Thoughts

With a little investment in time spent cleaning and lubricating your bike, you can rest assured that it will last longer and give you a smooth, safe ride. If you struggle with any of these bike maintenance basics or feel like your bike is still not riding right, be sure to bring it to a bike repair shop for more expert repair. Also, if you are thinking about switching to an e-bike, check out e-bike guided tours in the Colorado Springs area. Finally, don’t forget that our bike rentals in Colorado Springs and mountain bike tours in CO Springs are both fantastic avenues to ride a clean and perfectly maintained bike. Happy riding!

How To Get In To Rock Climbing

As a fun and challenging all-body workout, it is no surprise that rock climbing is such a popular sport. With indoor gyms popping up in cities all over the country, you might be wondering how to get into rock climbing.

We will explore the different types of rock climbing that you can try as a beginner, whether you plan to climb indoors or outdoors, as well as the gear you will need to get started. With some of the best beginner rock climbing routes right here in Colorado Springs, outdoor climbing is a fun way to explore nature, get access to some beautiful views, and learn a new athletic skill.

Also, don’t forget that a Guided Rock Climbing Trip with Broadmoor can also be an excellent introduction to this exciting sport.

Photo by Patrick Hendry on Unsplash

Types of Rock Climbing

Top-Rope Climbing

There are two types of climbing that are suitable for beginners, top-rope climbing and bouldering. In top-rope, as the name suggests, a rope hangs down from above, and as you climb, a belayer takes in the excess slack to keep the rope taut in case you fall. In an indoor gym, ropes hang from anchors like large pulleys. If you climb outdoors, a guide or qualified friend will create an anchor system using ropes and trees or rocks. 

Top-rope climbing routes range in difficulty from 5.0 to 5.15d, with 5.10s and above using a, b, c, and d to further distinguish difficulty. Where a 5.10a is easier than a 5.10d. Based on strength and athleticism, beginner climbers can generally climb up to a 5.4 or 5.6 on their first go. Climbers who are tall or strong might get away with these higher routes upfront, but as you move into intermediate climbs, technique and precision become more important than brute force.

Bouldering

Bouldering is a rope-free experience, with climbs typically up to fifteen feet maximum. If you are at a gym, the bouldering area will be padded to keep you safe when you jump down or fall. Learning how to fall correctly (stay loose and bend your knees!) will keep you safe from injuries. I generally downclimb to protect my knees, but it’s still important to know how to fall safely. If you are climbing outdoors, crash pads are essential for rock climbing safety.

The bouldering rating system is different from top-rope. Bouldering routes go from V0 to V17, with V2 being the hardest I’ve seen first-timers accomplish. Not only are these ratings different from top-rope, but they also don’t translate easily. Some people are much better at the big, power moves that many bouldering problems have. Others are more skilled with finesse and balance – challenges that are also more common to top-rope. Top-rope climbs at indoor gyms also range from 30 to 60 feet, making them a lot more of a cardio workout than bouldering climbs.

Photo by yns plt on Unsplash

Advanced Climbing Options

For more advanced climbers, lead climbing, sport climbing, and trad climbing are fun options that you can look forward to after learning to climb. Once you know what type of climbing you are looking to start with, you can get out there and take the first step.

Getting Started with Rock Climbing

The Gear

Whether you decide to top-rope or boulder, you’ll need rock climbing shoes and a chalk bag. The shoes are crucial for proper technique and movement while the chalk keeps your hands dry and grip secure. Rock climbing shoes are meant to be snug; generally one size below the sneakers you wear. Keep in mind that climbing shoes should not be worn anywhere but for climbing. Their extra snug fit emphasizes this point and generally makes them uncomfortable to walk around in. Also, you will stretch out the shoes and ruin the grippy soles if you wear them for non-climbing activities. 

If you are top-rope climbing, you will also need a belaying harness to be properly tied in and secured to the rope. You can take a belay class to learn how to belay a partner, and then you can switch climbs with a friend. To belay, you’ll need a carabiner and a belay device. Many climbing companies sell beginner-friendly packages with harnesses and belay equipment together.

If you are climbing outdoors, you should always wear a helmet to protect your head in the event of a fall or a rock tumbling down from above you. It’s also common to be so focused on your climbing that you forget to look up and climb right into a rock sticking out of the wall. It has certainly happened to me! Other outdoor equipment involves crash pads for bouldering, as mentioned above, a first aid kit, sunscreen, and maybe fingerless gloves if it’s a cold day.

Indoor Rock Climbing

If you want to get started at a gym, most have classes on rock climbing basics. Most also have rental gear available, so you don’t need to buy everything up front before trying rock climbing. You can also head to the gym and start bouldering right away; no help needed. Watch other people do the routes and even ask for “beta” if you need advice on how to get up.

If you’re interested in trying top rope climbing but don’t yet have a belay partner – no need to worry! Many gyms have several auto-belays. These devices clip into your harness and function just like a human belayer, allowing you to test out top-rope climbing as a beginner.

You can easily search for local climbing gyms in your area online, or take a look at this gym directory on Mountain Project to find a place to visit.

Outdoor Rock Climbing

In order to get started with climbing outdoors, you need a guide or, as mentioned above, a qualified friend. The most surefire way to have a fun and safe adventure is with a guided rock climbing tour, which will take you rock climbing in Colorado Springs at a popular local spot. On a guided trip, you’ll learn climbing techniques and safety and have a chance to try different climbs. 

If you want to get into rock climbing via a more DIY style, you’ll need to find a friend who has the necessary gear and know-how to set up climbs. You’ll also want to research the different climbs available in your area to find the best sites for outdoor bouldering or top rope spots with anchor points.

Photo by Ben Kitching on Unsplash

Rock Climbing Basics

The best way to learn how to rock climb is to get on a route and give it a try. It’s easier to learn rock climbing techniques once you experience the grips and movements. Rock climbing also involves using your forearms, wrists, and hands in ways that most people haven’t developed through other athletics, so it takes time to build these muscles.

My favorite advice for beginner rock climbers is to remember to use their legs and hips. Beginners often overuse their arms and tire quickly. Using all limbs available will help your endurance and give you a good leg workout. My general rule is to make sure I move my legs just as much as I move my arms. There are enough holds on a beginner indoor climbing route to climb a route almost like a ladder.

Similarly, if you find yourself in a tough spot, pivot your feet and move your hips. These small adjustments can get you more reach and flexibility to find that next hold. Keeping your hips closer to the wall also brings your center of gravity closer to minimize the strain on your arms.

Now that you know how to get into rock climbing, I hope you’ll give it a try! Even people who are nervous of heights can overcome this fear by learning belay safety or bouldering. Outdoor rock climbing is a truly unique way to experience nature, and the views from the top of a climb are like nothing else. Enjoy!

Where to See Wildflowers in Colorado Springs

Surrounding the cities of the Colorado foothills are mountain vistas erupting from long stretches of prairie. The sight in itself is astonishing, but it gets even better in the spring. When wildflowers come out to bloom and show their colors after a long winter tucked away, the mountains light up with a vibrance unseen since the year prior. 

Of course, it’s one of the best times of the year to get outside. This list of wildflower hikes in Colorado Springs is a start towards a longer journey of finding every last petal of every last flower and taking in its beauty. And the best part is that you don’t have to look far when seeking out where to see wildflowers in Colorado Springs. With a camera and identification book in hand, it’s time to set out on the trails and see what’s out there.

Garden of the Gods Park

Come springtime, Garden of the Gods has shoots of color popping up in every direction you look. It’s one of the best places to go throughout the entire year, so of course, it makes the list of where to see wildflowers in Colorado Springs. 

This region is perfect for day hiking in Colorado. There are guided walks throughout the day, and you can book hiking tours that will allow you to get a full experience and understanding of flora and fauna along the way. 

The Palmer, Buckskin-Charley, Niobrara, and Bretag Trail loop is an easy four-mile loop throughout the park where you can tour several of the park’s most outstanding features. If you want to get out for some outstanding sights but only have a couple of hours, this is one of the best picks.

Indian paintbrush covers the landscape here along with multiple varieties of wildflowers – such as Colorado blue columbine and bluebells – making it a diverse color scape that can impress anyone who passes through.

Red Rock Canyon Open Space

Located right on the limits of Colorado Springs, Red Rock Canyon Open Space offers another quick getaway to see some of the most spectacular wildflowers the area has to offer. It’s an easy place to get to and has miles of trails to offer. 

Any combination of the various trails can make a great loop to explore and see a variety of different sights like beautiful rock faces to climb and open fields that just recently lost their snow. You may spot some Arrowleaf balsamroot or Rocky Mountain bee plant amongst the Indian paintbrush and other delicate flowers.

Photo by Kevin Bree on Unsplash

North Cheyenne Cañon Park

Here’s another gem that sits so close to the city but makes you feel like you’ve driven hours to find wilderness. The North Cheyenne Cañon Park is a short ten-minute drive from the heart of Colorado Springs and has wildflowers aplenty to offer anyone who comes looking. 

This park is full of granite cliffs and waterfalls, providing a luscious environment for flowers to grow and thrive. The park is 1,000-feet deep in the granite canyon, following the creek the entire way. The water draws an array of birds and wildlife that makes this park unique. 

The Daniels Pass Trail system is a newer part of the park where you can go deep into the woods and find flowers that have stayed hidden for many years without trails to blaze the way. The Mount Muscoco and the Mount Cutler trails are also great options for getting a higher vantage point and seeing the landscape from a new perspective.

Pikes Peak

Pikes Peak may define the area surrounding Colorado Springs. It was what gold miners looked to when they first made their way west, and today it’s one of the most popular 14ers climbed in the state. Pikes Peak is an easy way to get up high and see wildflowers for miles on end as well as right in front of you on the trail. 

The Elk Park trail will take you along open meadows and a beautiful creek that provides an ample environment for wildflowers of all different types. As you move up the mountain, the flora changes with elevation, which can give you the chance to see an even wider variety of flowers on a single trail. 

Here you’ll find Columbia monkshood, Indian paintbrush, orange Agoseris, mountain bluebells, arctic yellow violet, darkthroat shooting star, and the list goes on. Be sure to bring a wildflower identification guide in order to find as many as possible because this is the spot to tick off a lot of boxes in the hunt to discover them all. 

This is likely the only trail where you’ll find a good amount of snow alongside the wildflowers. It can provide a stark contrast that is unlike many other regions in the area and draws visitors from all around.

Photo by Alexis Gethin on Unsplash

Ute Valley Park

Mere minutes north of downtown Colorado Springs is Ute Valley Park. This hidden gem is surrounded by humanity but can still make you feel as if you’ve left the city. All along the trails of this 538-acre park, you can find a blast of color from the many wildflowers in the area. 

Within the park, you’ll likely see some Mariposa lily blooms, prickly pear cacti, and faerie trumpets that are common in the area. While this park might not offer massive mountains to climb, it’s a fantastic representation of what the area is truly like – all within the city limits.

Tips for Hiking on Muddy Terrain

Spring hiking in Colorado Springs, or just about anywhere in Colorado, is synonymous with mud hiking. Many of us ask the question, can you hike in the mud? The answer is a resounding yes, but there are a lot of particular tips for hiking in the mud that comes in handy to help any user get the most out of their time on the trail. 

Just because the trails are muddy doesn’t mean you have to stay at home and settle into couch life. Getting out is entirely possible! Learning how to manage mud season takes some adjustment time, but it gives you a whole new world of places to hike in the springtime. Mud season isn’t going to stop showing up, so it’s time to adapt. 

Photo by Caspar Rae on Unsplash

Pick the right trail

The best move for hiking in the mud is to do a hefty amount of research and preparation. Some trails will stay wamps throughout mud season, and others may be in better condition than others. If you pick the right trail, you may not even encounter much mud on the hike. 

To pick the right trail, head online and look into certain trail conditions. Some trails will be better positioned to drain quicker or dry out faster from the sun. South-facing trails, for example, get a huge amount of sun and will be much more likely to provide a solid, less muddy, trail surface. 

The internet is another great resource for discovering trail conditions in the spring. Many hikers head out and report back to different social media groups, where they will describe what the trail looks like throughout the season. You’ll likely find others have gone out and checked before you have even considered going out, so use the information they’ve provided to save yourself some time. 

Head out early

As the temperatures rise, ice turns to mud. If you can, getting out on the trails earlier in the morning means that the mud is likely to be a bit more firm and stable to hike on. Further on in the day, you’ll find yourself trekking through deeper and softer mud. 

Heading out early also gives you a jump on the crowds of people that are all trying to get outside after a long winter. Trails tend to deteriorate throughout the day as use increases. If you get out early, you’ll find the trail in the most pristine condition that it will be on that day.

Choose to get muddy

One of the best, but hardest to follow, tips for hiking in mud is to “make the trail deeper, not wider.” This concept generally means hiking straight through the mud rather than trying to walk around it off of the trail. While this is best for the trail, it’s hard to commit to getting yourself covered in mud that can often come up and over your boots. 

Taking care of trails often means not putting yourself first. In mud season, it means accepting the mud and owning it. You’re most likely going to get muddy anyway, so commit and get really muddy. Bring some plastic bags that you can throw your boots into when you’re finished with the hike, and the car upholstery will be grateful. 

Since getting muddy is just about the only option on the menu, it’s good to learn how to clean hiking boots well. Hiking in mud season means cleaning boots more often; otherwise, the mud will work its way deep into the boots and potentially ruin them. It’s a simple process but takes a bit of time to do once the hike is over. 

Protect your feet

Cleaning your boots is one way of protecting your feet in the long term. It’s equally important to prepare for the hike, as it is to prepare for cleaning up after the hike. 

Mud is likely going to make its way to your feet. Even the most waterproof boots can struggle up against some seriously thick mud, so you need to be prepared for the likelihood of getting wet feet. In mud season, it’s necessary to bring along a couple of extra pairs of socks to throw on throughout the hike or at the end and an extra pair of clean shoes to drive home in.

If the trail is completely obliterated and covered in soupy mud, bringing boot liners is a good option for protection. Boot liners are simply plastic bags that go between your boots and socks as a completely waterproof barrier. They aren’t comfortable, but they’re effective. 

Wet feet can be more than uncomfortable; they can be dangerous and painful if they stay wet long enough. Go prepared and knowledgeable about what to do when your feet get wet on the trail or at least have a quick exit to the car. 

Bring the right gear

On top of simple plastic bags, a couple of other pieces of gear will help make hiking in the mud more accessible. 

For starters, gaiters are a great addition to hiking in the mud and are perfect for spring hiking in Colorado Springs, as you may encounter some snow along the way. Gaiters are like sleeves for your ankles that strap over your boots and fasten around your calf. They function to keep anything from getting inside your boots, even when you get above the top of the boot. 

Gaiters will help you to keep anything from getting inside your boots, but they won’t help you when the mud makes you slide around like walking on ice. This is where a solid set of trekking poles comes in handy. 

Bringing trekking poles will give you a better sense of balance in the mud. You can take great care without them, but the moment your feet slip, you’ll look like a frosted chocolate cake rather than a happy hiker. Trekking poles add more contact points with the ground and improve your balance.