How to Keep Your Feet Warm While Hiking

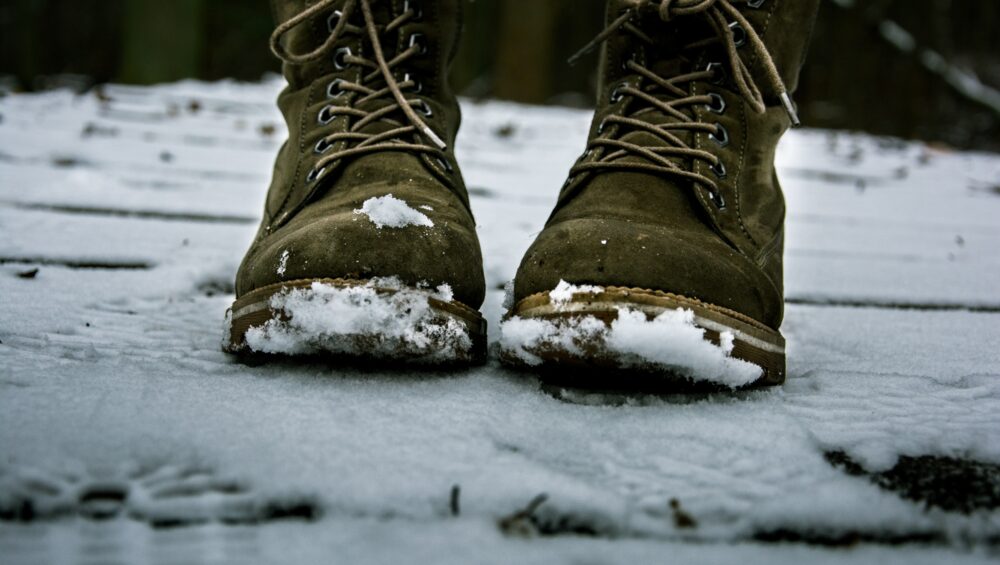
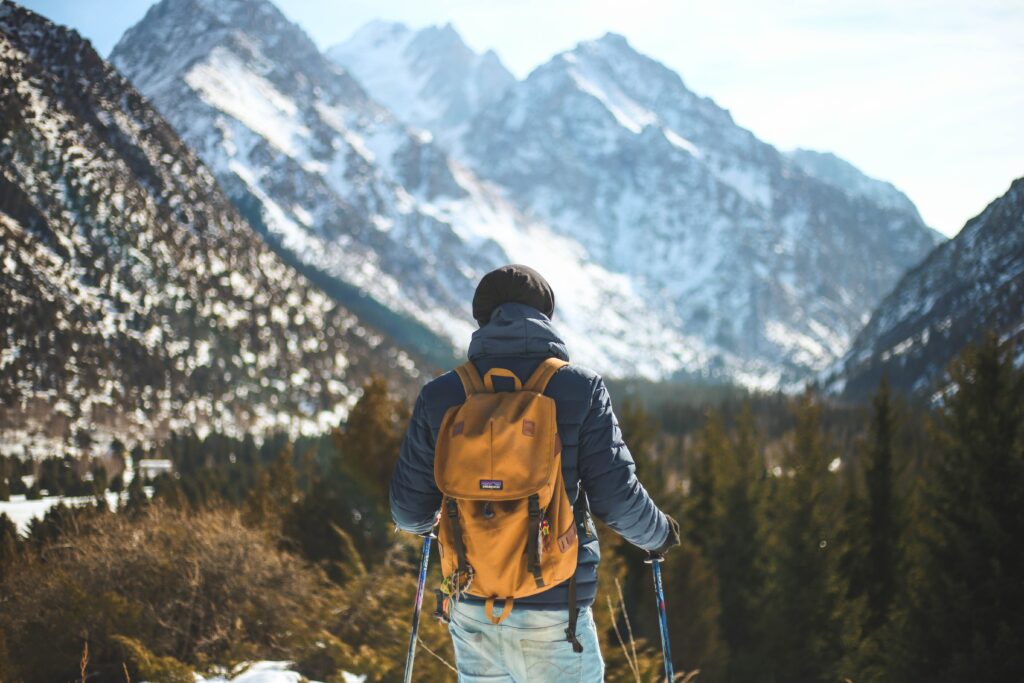
If you are hoping to hit the trails this winter, you will need to know how to keep your feet warm while hiking. With treacherous temperatures and feet of snowfall not uncommon in the area, warm boots and warm socks are essential pieces of hiking gear here in Colorado. 


We’ve got some of the best fall hikes near Colorado Springs, so let’s dive into the proper gear for your feet and tips for keeping warm so you can get out there and enjoy.

Photo by Oziel Gómez on Unsplash

Gear Necessities for Staying Warm on a Hike

Sock Strategy for Cold-Weather Hiking

In order to keep your feet happy and warm on a hike, you need to wear multiple layers and consider all factors. The first and most important way to keep your feet warm is to keep them dry. Therefore, a moisture-wicking base layer needs to be the first thing you put on your feet. These thin moisture-wicking socks will keep your feet dry no matter how sweaty they get. 

The second layer is insulation. You can wear thick wool socks, which come in different weights (lightweight, midweight, or heavyweight) depending on how cold you are anticipating temperatures will go. If you own insulated hiking boots, these can be worn with just a thinner lightweight wool sock. 

When you are purchasing insulating socks for hiking, there are a few things to keep in mind. In terms of comfort, you want to find socks that fit a little looser. This will help them fit well over your moisture-wicking layer and make sure that your feet are not being squeezed at all. In terms of value, investing in quality socks will definitely make your life easier in the long run. Wool socks tend to be expensive, but they are the best option here as cotton holds moisture and does not insulate as well for the same thickness. 

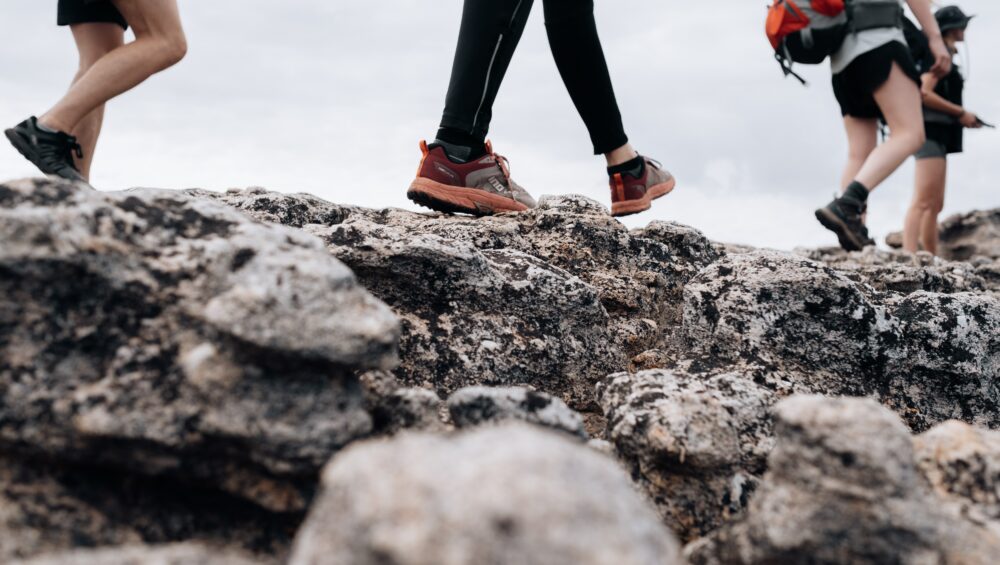
The Best Boots for Cold-Weather Hiking

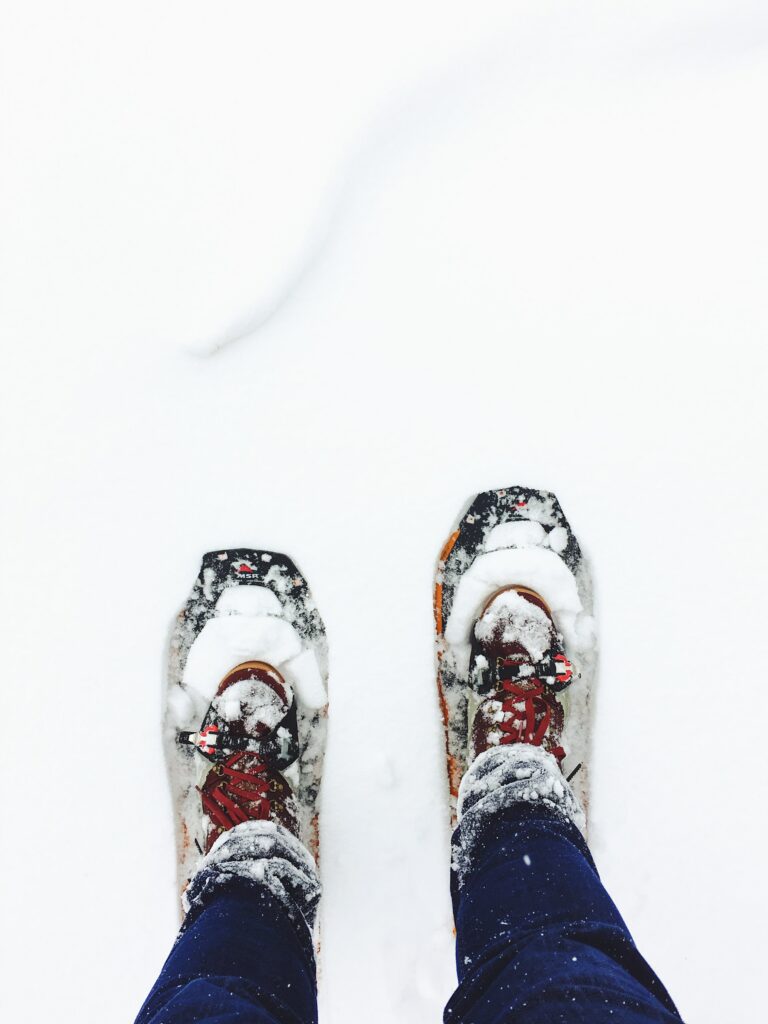
The final layer is the boot, and its main job is protection. A good hiking boot protects you from all sorts of injuries, rolling an ankle, stepping on something sharp, and hopefully, preventing frostbite. As noted, insulated hiking boots are a great option for folks who often hike in colder weather or find themselves standing around a lot while on a hike. 

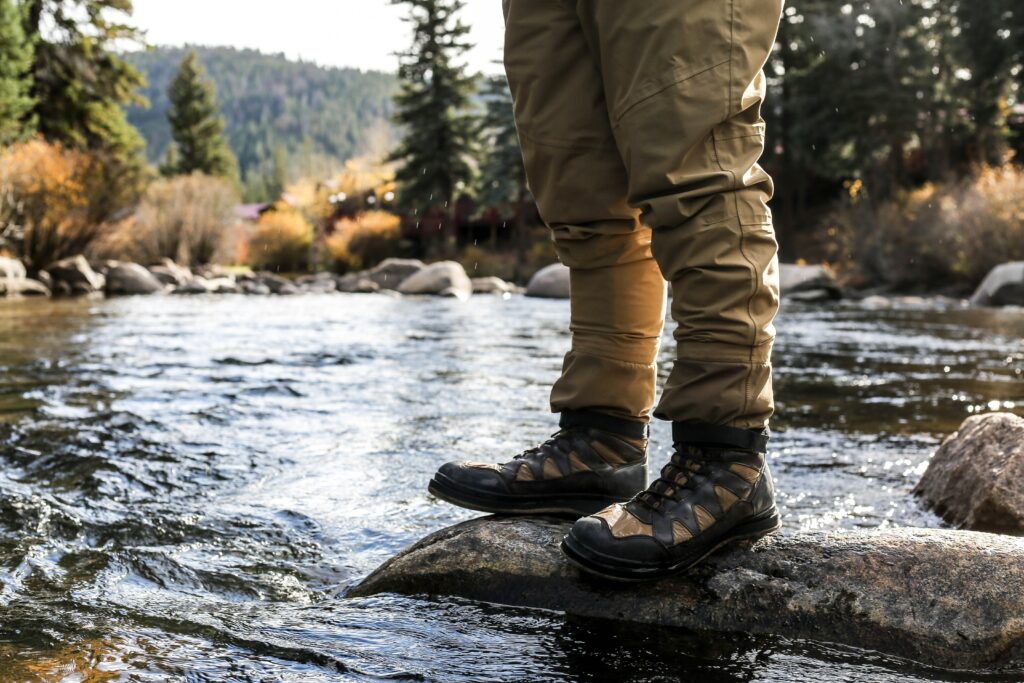
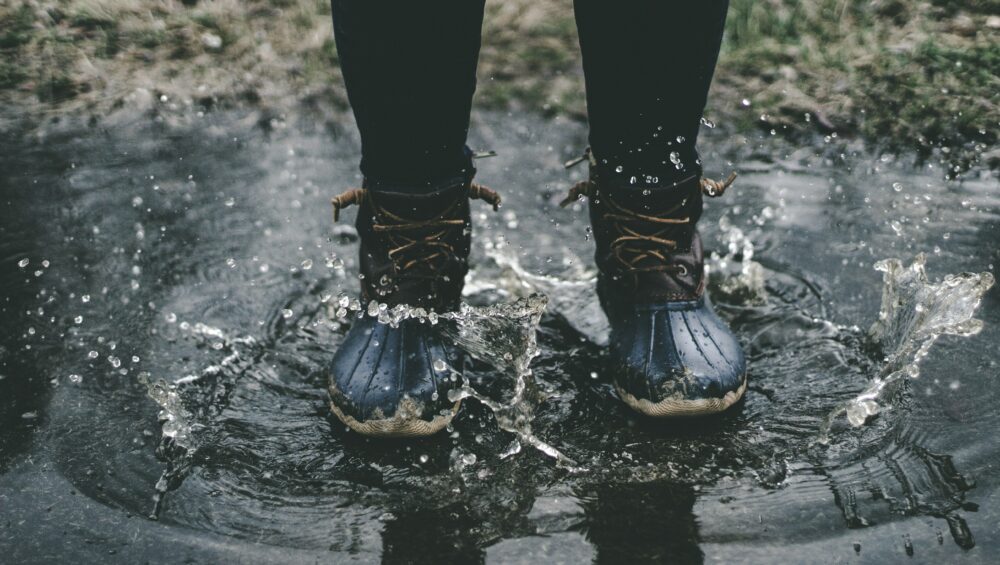
Another must for Colorado hikers is waterproof hiking boots. Many people do not like their boots to be waterproof because it limits breathability. However, if you are hiking in winter or changing elevation substantially, there is a good chance you will come across snow. There is nothing worse than getting your boots wet, from rainy weather or a water crossing, when you are on a hike. If your feet do not have time to dry, you will be risking frostbite, blisters, and surely general discomfort. Even having snow land on your boot can be dangerous, as your body heat will melt it and allow the water to seep in through the tongue. On a very cold day, you could watch your boots freeze up, thus ending your hike.

You may wonder how to fit multiple pairs of thick socks in your hiking boots. When hiking in cold weather, you need to size up on boots. This will allow room for the socks without compressing your feet. You should aim to be able to wiggle your toes in the boots. If you do go for insulated hiking boots, the sizing will understandably vary as well, so it is helpful to go to a physical store to figure out what size will work for you. 

Tips and Tricks for Keeping Your Feet Warm While Hiking

Be Prepared: Watch the Weather

Before you head out on your cold-weather hike, be sure to check the weather and trail conditions. It is easy to learn how to check trail conditions for hiking safety, and it will save you a disappointing and potentially dangerous hike. 

What to Pack to Keep Your Feet Warm

In addition to the warm socks and warm hiking boots already discussed, there are a few specific items that should go in your daypack for your feet. It is always a good practice to have a first aid kit, a blister kit, and in winter weather, chemical warmers for your hands and feet. These will allow you to warm back up in an emergency. You could also consider getting thermal insoles to redirect your body heat back up if you do not have insulated boots. Finally, you should always pack an extra pair of socks: you never know when you will need them, and at the very least, putting on clean socks at the end of the day will be a great reward for your hard work.

Don’t Put Your Boots On Too Early


It is always good to have a second pair of shoes, in case of emergency and for comfort in the car or at the campsite. When you are getting ready for your hike, changing into your boots should be one of the last things you do. This way, your feet will not get sweaty in those waterproof boots before you even get going. 

Don’t Lace Your Hiking Boots Too Tight

The reason that it is so important to have enough wiggle room in your shoes, literally, is because compressing your feet can lead to frostbite. When you are cold, the blood vessels closest to the skin and out in your limbs constrict in order to keep your core at the proper temperature. If you were to tie your shoes too tight, you are only further cutting off blood flow. This will make your feet feel colder sooner, and it can worsen symptoms of frostbite. 

Keep Your Core Warm

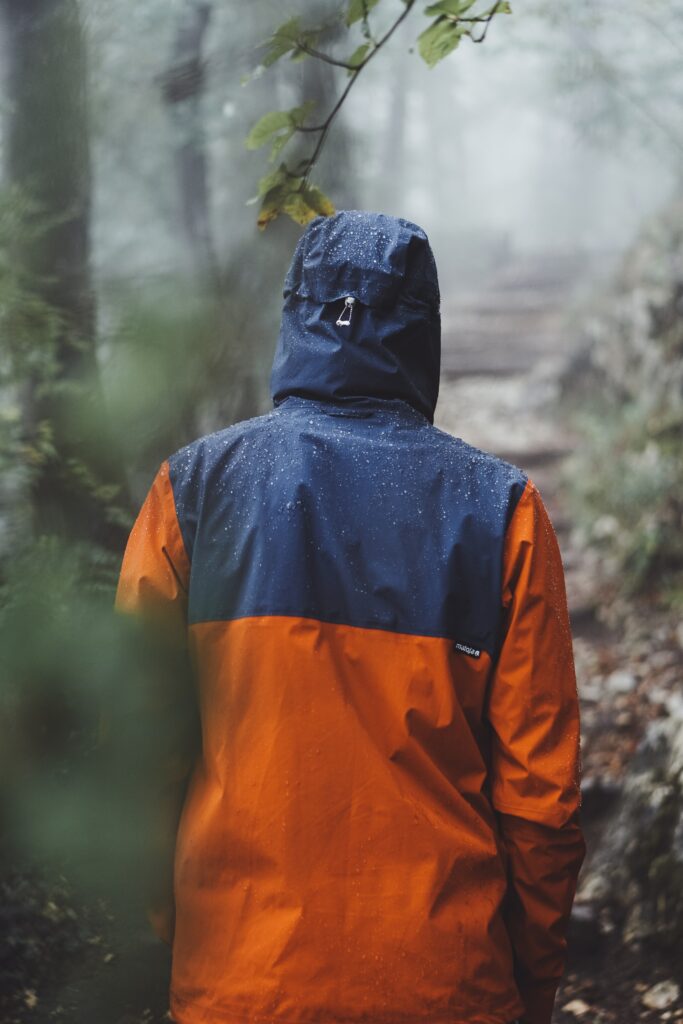
This feels obvious, but because your body prioritizes core temperature, your feet will be the first to get cold if you aren’t dressed warmly enough. Therefore, one of the best ways to ensure your feet stay warm while hiking is to make sure the rest of you stays warm, too.  

Get Your Feet off the Ground

The cold, hard ground is going to be one of the coldest places you can step. Even in the snow, the reflection of the sun’s rays makes the ground slightly warmer. When you take a water break or rest on your hike, try to stand on a rock or a tree trunk instead of the ground below. You will find the ground saps the heat from your idle feet faster than anything else.

Always Be Willing to Turn Around

One of the best winter hiking tips (that I believe is applicable year-round) is to always be willing to turn around. If you feel yourself getting too cold, if the trail conditions have changed, or if the weather is taking a turn for the worse, you should head back. The risk of frostbite or other injuries is not worth it.

Photo by Greg Rakozy on Unsplash

How to Warm Your Feet Back Up After Hiking

Get Dry

As keeping your feet dry is one of the most important tips for staying warm, it should be obvious that drying your feet off would be the first step for warming back up if your feet do get cold while hiking. Let your feet air dry for twenty minutes before putting warm socks on. This will make sure your skin is thoroughly dry to prevent blisters. This is especially true if you got your feet wet from something more than sweat, say wading through a river or hiking in a rainstorm.

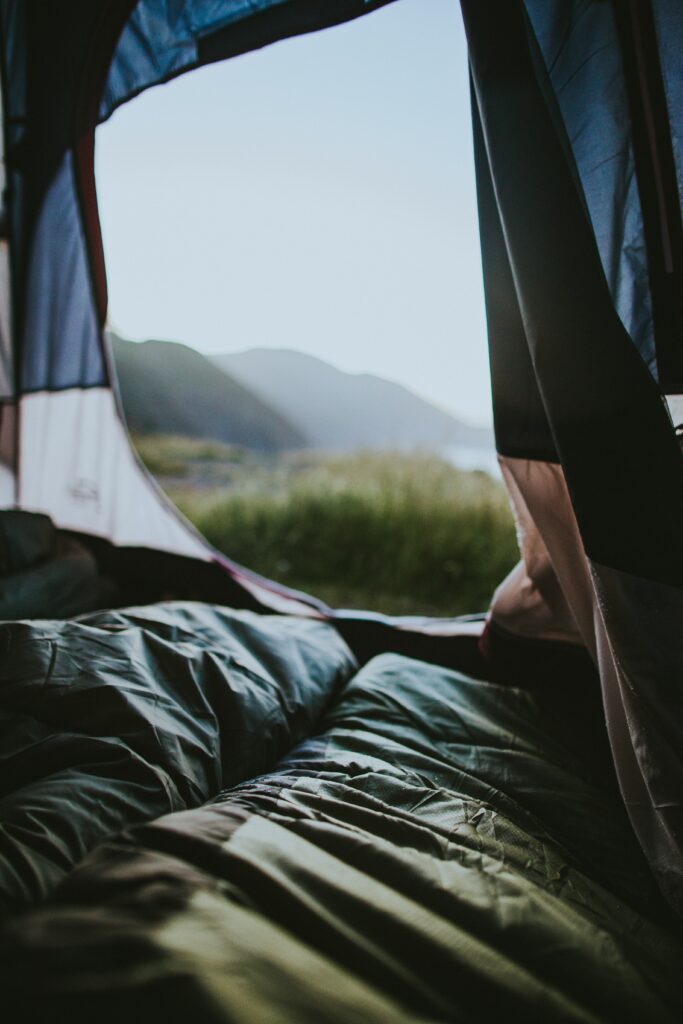
It can be hard to let your feet dry out properly if it is cold outside. You can dry them off with a towel and then cover them loosely in a blanket or sit inside your tent. This will give them a little space to dry off without getting too cold in the process. 

Go Slow

One thing people often do is try to warm up too quickly. It is tempting to jump in a hot bath when you are cold, but if your toes are cold to the bone, it is not a good idea to try to warm up too quickly. If you’ve done it before, you know it is very painful. The transition from very cold to even tepid can be painful and actually harmful to your vascular system, sending cold blood to the heart.

Rather than shock your system with a quick transition, you can reacclimate to the warmth slowly. If you are camping and building a fire, take a seat far away and get closer as you warm up. Let your feet tell you if you get too close too fast. If you want to warm up with water, make sure you start with colder water and warm it up slowly with your feet.

Skin-to-Skin Contact

The best way to warm up cold feet is with skin-to-skin contact. Use your hands or thighs (sitting cross-legged) to warm your ankles and feet. If your skin is truly frozen, you should not massage or rub it as you can break the skin, but just hold it there to let heat transfer. Or, even better, if there is someone with you who can help, warm breath and skin-to-skin contact with someone else’s warmer body areas like the torso, thighs, and armpits are quick ways to safely warm skin.

If you are looking for some fun and rewarding hiking destinations this season, check out our Guided Hikes near Colorado Springs. You will get expert advice from a certified guide and plenty more real-world experience hiking in the great outdoors in colder weather. 

How to Clean Your Sleeping Bag

A sleeping bag is a vital piece of equipment for anyone who ventures into the outdoors, especially since it’s part of the essential gear you need for camping. But it can also be a spendy investment. Maintaining, storing, and washing your sleeping bag is essential to get the most use out of it. We’ve compiled all the information you need below to help you clean your sleeping bag. 

Photo by Felix M. Dorn on Unsplash

General Care

Sleeping bags should not need washing for many years when properly tended to. The best way to prolong the time between washes is to take good care of your sleeping bag in the first place. Some tips to help maintain cleanliness include:

  • You get what you put in: Keep a clean pair of clothes to sleep in. Try to keep yourself clean as well. That means removing oil, dirt, sunscreen, and bug spray that can permeate into the bag. The cleaner the items are in the bag (you), the greater likelihood your sleeping bag will stay clean too.
  • Liner: A sleeping bag liner is a single-layer enclosed sheet you sleep in inside your bag. The liner serves as a barrier between your body and the bag. It should be easy to remove and should be washed regularly. Liners are slipped inside a bag, not attached.
  • Off the floor: Keeping your bag off of the ground will help keep dirt, pine needles, and other debris out and off of your bag. This does not include your sleeping pad which serves as a barrier between your bag and the ground.
  • Dry it out: Lay your sleeping bag to dry the day after every use. Our bodies produce moisture that gets trapped in our bags from our breathing, sweat, or the environment’s humidity. When camping, try to find a dry spot on a tarp or maybe over a clean log and give the material a chance to dry and breathe. Laying out your sleeping bag prevents mold from forming in your bag.

Be Gentle

Treat your bag with care. Take your time with zippers, gently put the sleeping bag away, and mind where you place them. Most bags are best stored loosely in a well-vented bag or hanging environment. Compression stuff sacs are helpful for compact travel but are not recommended for long-term storage as they compress the material and wear down the fill. Over time, this compression ultimately impacts your bag’s warmth and comfort. Additionally, tight storage can trap smells and moisture, leaving you with a pleasant experience the next time you use it!

Washing

The first factor to consider when cleaning your sleeping bag is how much of your sleeping bag needs cleaning. The second factor to consider is whether you have a down or synthetic bag. The third is whether you have access to a machine wash or if you will need to hand wash. Consider a total wash if you notice a general browning color, overall grime, or an overall smell. For smaller messes or stains, simple spot treatment of the impacted area is fast and effective. 

Spot Cleaning

Often, only a few areas of a sleeping bag need cleaning. To spot clean, use a gentle soap mixed with water and lightly brush or rub the dirty area with the cleaning solution. Do your best to keep the cleaning solution on the exterior material only and not saturate the bag’s fill. Once you have spent some time cleaning, wipe the spot with a wet cloth and leave it to dry.

Photo by Ivana Cajina on Unsplash

Full Wash

Most new sleeping bags come with wash instructions which you can find on the tag. This is the best method to follow when cleaning your bag. If there are no instructions, consider the following techniques and remember that no matter the form, cleaning your sleeping bag takes time and patience:

Machine Wash

  • Device: The best way to machine wash a sleeping bag is to use a front-loading washing machine. Do not use a top loader, as the bag may become damaged and tangled around the center bar. If you do not have access to such as machine, consider going to a laundromat.
  • Soap: If you are machine washing a down sleeping bag, use special soap that is friendly on down material. If your fill is synthetic, you can use a regular detergent, but a technical gear-specific detergent will be best. Nikwax makes different detergents for both down and synthetic fill.
  • Means: Some suggest fully unzipping your bag before loading it into the washing machine, so the upper doesn’t pull apart or catch in the wash. Another option is to turn your bag inside out with the zipper fully closed. Wash your sleeping bag in warm water on a gentle cycle. The sleeping bag may need two or more rinse cycles. It is ready to dry if the bag is wet but not holding large amounts of water. Then be sure to gently squeeze any excess moisture out of the bag as you remove it from the wash.
  • Drying: Use a large dryer if possible; the more room in the dryer, the better the fill can expand when drying. Synthetics will often dry faster. Bags with down fill may take several drying cycles. Set the dryer to tumble on a low heat setting. Consider using tennis balls or other dryer aids to break up condensed pockets of fill towards the end of the cycle or when it is mostly dry.

Hand Wash

  • Device: Fill your bathtub or a similarly large tub with warm or cool water.
  • Soap: Use the same material-specific soap listed above and read the instructions for the recommended amount. When hand washing, it can be more difficult to rinse the soap out, so starting with a smaller amount than recommended may be beneficial, and slowly adding more as you go.
  • Means: Lay the bag in the water and gently rub and massage the bag. Next, soak the bag for around thirty minutes or until it is fully saturated. Rinse your bag with clean water (you may do this multiple times) until the soap is out. Before hanging to dry, gently squeeze excess water out of the bag. It can be helpful to work from one end to the other squeezing section by section.
  • Drying: Follow the directions above. If a dryer is unavailable, lay the sleeping bag on a clean surface or hang it up to dry. Use a location out of direct sunlight and with low humidity. Once it has started to dry, you may need to manually unclump or fluff the fill in your bag to ensure it dries thoroughly.

Final Thoughts

Have a new sleeping bag that you are excited to test out? Autumn is the ideal time to hike and then cozy up in your sleeping bag under the stars! For some spectacular colors and views, check out the best fall hikes near Colorado Springs. While it is safe to hike alone, if you are looking for some expertise, guided hikes through Broadmoor Outfitters are a perfect way to learn about and get familiar with a new area or trail.

How to Check Trail Conditions for Hiking in Colorado

Because our state can have such extreme and diverse weather, it is essential to do some research before you go hiking in Colorado. You should always be aware of weather, trail conditions, and wildlife before you leave for a hike, in part so you can pack accordingly.


There are so many stunning hiking options around the state. If you don’t know where to go, be sure to check out our Colorado Springs trail guide. Once you have a hike in mind, this article provides all the best resources for where to check Colorado trail conditions in order to be properly prepared for your hike.

Photo by Backroad Packers on Unsplash

Trail Condition Resources

All Trails

This amazing community-driven resource has everything you need to ensure a great day on the trail. It is personally one of my favorites on this list because it makes it easy to find variations of trails. This is particularly helpful if you are looking for a shorter mileage or less strenuous option. You can search for accessible trails (for wheelchairs, strollers, etc), parks that allow dogs, mountain biking trails and more. Listed information about trails includes mileage, elevation, reviews, difficulty level, parking information, and pictures.

This is a great resource for figuring out the proper trail for what you want out of the hike as well as staying informed along the way. As you hike, the app shows waypoints and elevation changes and tracks your metrics. You can review the hike, save your favorites, and share helpful tips with others. The app is particularly helpful for popular trails that other users are commenting on regularly. You can read recent reviews for relevant updates on the Colorado trail conditions and also check the weather and UV index for the day.

National Park Service

If you are looking to hike a trail within a national park, you can check the National Park Service’s website for everything you need. They list trail closures, conditions, and other important safety notices regarding wildlife and weather. Trail availability can change rapidly, whether from a storm, maintenance work, or high risk of fire. It is helpful to check the park’s website for updates day-of. This way, you can plan your hike and route around any closures or potentially dangerous areas.

One other especially important factor when visiting national parks is parking and permits. Depending on the time of year, parking can fill up fast. Once you know what hiking trail you want to explore, you can find trailheads and the closest parking lots. Grab the necessary permits or parking lot reservations in order to save time on the drive-in and help your day go smoothly.

Colorado Trail Explorer

Similar to All Trails, Colorado Trail Explorer is a comprehensive resource for exploring the outdoors in Colorado. You can find routes for hiking, horseback riding, skiing, ATV riding and more. Their filtering function also includes so much more than just dog-friendly and wheelchair-accessible options. You can search for special interests like geology or mining or things you’d like to see like wildflowers or waterfalls. 

Once you’ve identified a trail, the website pulls in Google Maps for directions and Weather.gov for forecasts. My favorite feature, though, is the custom ability to see the different sections of the hike. Rather than simply listing the mileage and elevation change, you can look at it step-by-step and see how each leg of the hike will test you. They even have a measure tool that allows you to check out a custom length of the trail. This is very useful if the different sections they list are not specific enough for you. From grade to elevation to mileage, you will get a good sense of the trail’s difficulty before you even get out of the car. 

The crowdsourced trip reports allow you to get updates on trail conditions, crowding, bathroom availability, and insect presence. Once you get the app and download the trail for offline access, you can keep notes on your experiences and track your progress in real-time. There are also fun challenges like identifying wildflowers and noting scenic lookouts to keep you engaged with all the beauty of Colorado’s trails. If you are an outdoor enthusiast, this resource is a fun and informative way to stay updated on Colorado trail conditions and track all your progress hiking around the state.

Colorado Trail Foundation

The 567-mile Colorado Trail between Denver and Durango is an accomplishment of massive proportions. Efforts to build the trail started in 1974 and took over ten years. It is a unique adventure that travels through six wilderness areas, eight mountain ranges, five major river systems, and some of the best views the Rockies have to offer. All up, the trail climbs nearly 90,000 vertical feet, but you don’t have to do it all at once. The trail is divided into 28 segments plus an additional 5-segment, 80-mile trail variation called Collegiate West.

If you are looking to hike any part of the Colorado Trail, the guidebook is strongly recommended. It includes mile-by-mile trail descriptions, driving directions and access points, mileage and elevation stats, and even information on towns to resupply if you do the whole trail at once. The website is also a great resource for information on packing, finding natural water sources along the trail, and preparing for the high elevation. There is a lot of research and preparation necessary before hitting the Colorado Trail. However, with the help of the Foundation, it has been completed in full by nearly 5,000 people.

Photo by Taylor Brandon on Unsplash

How to Interpret Trail Conditions

It is not enough to just check on trail conditions and make sure the trail is still open. There can be some crucial information in these updates that will help you pack well and be properly prepared for your day. If there is a trail closure, you can check out All Trails or Colorado Trail Explorer to find variations or nearby trails with similar stats.

Common information about trail conditions can include obstacles and downed trees, muddy or snowy sections, and standing water. In the case of wet trails, you will want to wear waterproof hiking boots (or boot liners). Additionally, pack extra socks, and read up on some tips for hiking in mud. If you know you will encounter obstacles on your hike, hiking poles can be helpful for extra stability, and gloves will protect your hands from rough tree bark or scrapes from branches.

Other conditions may include loose soil, exposed tree roots, or damage from a mudslide or flash flood. These conditions tell you to be cautious and watch where you step. Wearing your best hiking boots with good grip will help you overcome a damaged trail.

Other Resources to Check

In addition to looking for updates on trail conditions, there are a few other things to research in order to be fully prepared for a hike. First, checking the weather reports for the day will help you pack and dress properly. You should also know about weather changes when hiking to a higher elevation or hiking between different climatic zones.

Next, be sure to check the park or county’s website for guidance on permits and parking. Some parks may require permits for backcountry hiking, in order to limit hikers and protect the landscape. Many places especially around Colorado Springs have limited parking lots and use reserved tickets to control overcrowding. Be sure to look into these aspects of your day hike as well so you do not show up unprepared and miss out on your adventure.

No matter where you go, it is always important to be aware of Leave No Trace guidelines in order to be a good steward of the land. There are plenty of resources available to learn about how best to pack out trash and get rid of waste so you can protect the trails for future generations.

Finally, I like to prepare for hikes by checking information on local wildlife and the flora of the area. I find this information heightens the experience because I am able to identify and appreciate the nature around me more. It can also be important to be aware of wildlife near hiking areas. For example, if bears have been spotted from the trail, make sure you are aware of bear safety tips and don’t go on the hike during their peak hours. You can prepare by learning what wildlife you might encounter and reading up on how to watch wildlife safely

Final Thoughts

Colorado has some of the best hiking in the country. It includes over 5,600 miles of hiking trails according to Colorado Trail Explorer. No matter what type of view or how strenuous a hike you are looking for, you can surely find an exciting and awe-inspiring hiking trail near you. If you are just getting started on your hiking journey, consider going on a Guided Hiking tour in order to become familiar with best practices and helpful techniques while on the trail. Hiking with experienced friends or a professional is the best way to start hiking and get comfortable with packing and preparing for a hike in Colorado.

Hiking Boots vs. Trail Runners – Which Do You Need?

It’s a constant debate among hikers. Are hiking boots or trail runners better for exploring the backcountry? As professional hiking guides, we’ve heard this question countless times, and now it’s time to list the pros and cons of each option so you can make the best choice for your future adventure. 

So, let’s take a close look at trailer runners vs. hiking boots and what each option brings to the trail. But first, let’s define these two types of footwear. 

What Are Hiking Boots?

Hiking boots are sturdy footwear that can take on everything the trail can throw at you. They typically deploy heavy-duty materials (such as leather) with a proven track record of holding up against harsh trail conditions season after season. Hiking boot soles tend to be stiff and supportive, while the upper can be waterproof or not – depending on your preference.

Boots either sit above the ankle, providing improved support and protection, or below the ankle. The low-cut option can also be referred to as a hiking shoe. But boot or shoe, this dedicated hiking footwear shares the same material and construction.

The last defining characteristic of hiking boots is that they are often noticeably heavier than your average street shoe or runner. This point brings us to trail runners.

Photo by Joanna Nix-Walkup on Unsplash

What Are Trail Runners?

As their name implies, trail runners are designed for runners tackling any terrain that’s not pavement. It could be dirt trails, mud, gravel, rock, or any combination of these options. Since they’re designed for running, trail runners have a flexible and light design to facilitate moving fast and fluidly. Since they’re lighter, trail runners use less robust materials than dedicated hiking boots and offer less cushioning. But their naturally light movement and lower rigidity tend to make up for these drawbacks.

Now that we know the basics of hiking boots and trail runners let’s dive into each one’s benefits and drawbacks for hiking.

Hiking Boots – Benefits and Drawbacks

Benefits

Durability

Hiking boots are the burly tank of the hiking trail. Their heavy design is robust, long-lasting, and offers a great deal of support. Specifically, the heavier boot materials, such as leather, synthetics, and nubuck, are incredibly resistant to everything the trail can throw at you. They’ll hold up season after season (with proper care).

Support

Hiking Boots are also noticeably stiffer than your average footwear, thanks to their midsoles (the middle layer embedded in the sole of the boot). It may initially seem and feel counterintuitive to opt for stiffer footwear, but this design provides more protection and stability when you’re hiking for hours across rocky or uneven terrain.

Additionally, hiking boots offer significant ankle support. The lacing system typically extends above the ankle. This allows you to wrap your ankles in a stiff, supportive shell that significantly improves your stability on the trail. Such ankle support is absolutely crucial for hikers with a history of ankle issues or those tackling very loose or uneven terrain.

Warmth

The thick materials and increased coverage that hiking boots offer also improve warmth retention on chilly hikes. They can block a sharp wind and slow down how quickly heat escapes from your foot area. Combine these benefits with a thick sock, and burly waterproof hiking boots can get you through most 3-season hiking conditions. However, remember that regular mid-winter hiking in sub-freezing temperatures may require a winter-specific boot.

Drawbacks

Weight and Bulk

All the benefits and features that contribute to hiking boots’ benefits combine to form one glaring drawback – weight. Hiking boots are noticeably heavy on the trail – although recent technology advancements are helping – and can sometimes feel ungainly and bulky while hiking.

This bulkiness is often highlighted on longer hikes when your energy starts to dip, and all that added weight on your feet may feel ponderous.

Stiff Materials

While stiffer soles and materials help with hiking stability, they can also detract from your overall comfort on the trail. The uncompromising nature of tough hiking boot material often doesn’t automatically yield to accommodate your foot.

This leads to the common “break-in” period, where you wear your boots on several preliminary hikes before the material very subtly starts to conform to your foot size. Still, the material is stiff, and what may be comfortable at the beginning of a hike may not be hours later when your feet have swelled slightly from the hike.

Photo by Taylor Grote on Unsplash

Trail Runners – Benefits and Drawbacks

Trail runners are almost the exact opposite of hiking boots. Let’s take a close look at what sets them apart in the world of hiking, and where their benefits and drawbacks lie. As we progress through this section, keep in mind that trail runners are – as their name implies – designed first and foremost for running. However, they’ve recently gained an intense following in the hiking community for their comfortable and lightweight design.

Benefits

Lightweight

First off, they place a premium on lightweight materials. The shoes are designed to move light and fast, and every upper material choice reflects this goal. Therefore, trail runners don’t hold you back while hiking and make each step feel light and natural. 

This natural feel is further enhanced by trail runners’ flexible design, which we’ll discuss next. 

Flexible

The bottom sole and midsole (if it has one) on a trail runner feature lightweight and flexible material choices. This flexibility gives these shoes a very natural feel. Every step is fluid and unrestricted, making this footwear option feel much more comfortable than its heavier boot counterparts. 

Breathability

Exceptionally lightweight material choices also facilitate a wonderfully breathable design. Trail runners are often designed to shed heat and moisture very quickly. The result is footwear that helps keep your feet cool and comfortable when you’re working hard and also dry quickly when they get wet – either from a quick downpour or a sweaty hike. 

A note on weatherproofing: Many trail runners are available in a waterproof option. These options won’t be as breathable as their non-waterproof counterparts but offer improved resistance to bad weather. However, keep in mind that the thin and lightweight materials don’t retain the waterproofing treatment as long as full-sized hiking boots. 

Comfort 

As we’ve touched on while discussing flexibility, trail runners are exceptionally comfortable. The light and soft material easily conform to your feet to mitigate almost all rubbing, chaffing, and stiffness. The result is vastly improved comfort that has no break-in period. This point also tends to make trail runners an ideal option for hikers with exceptionally large or wide feet, as many trail runners (such as the Altra Brand) focus on naturally wide designs for optimum comfort.

Drawbacks 

Lower Durability 

The focus on lightweight materials means trail runners aren’t as durable as heavy-duty hiking boots. They’ll often wear down more quickly, and the thin upper material is more susceptible to scrapes or tears. Everyone’s expereince will vary, but we often see trail runners lasting for just one or two seasons of heavy-duty use before materials begin to fail.

Less Support 

Trail runners typically offer minimal support. Their low cut means no ankle support, while less cushioning in the sole leads to a rougher ride than hiking boots. Many trail runner shoes will include a rock plate – a hard plastic insert – in the sole to help lessen the impact of rocks underfoot. But nevertheless, trail runners undoubtedly offer much less support than a burly hiking boot. 

Bringing It Together

We’ve certainly covered plenty of information regarding both trail runners and hiking boots. So let’s bring all the benefits together to see where each option shines in the backcountry.

Trail Runner BenefitsHiking Boot Benefits
– Lightweight– Highly Durable
– Flexible– Supportive
– Natural Step– Excellent weatherproofing
– Breathable– Warm
– Quick Drying– Increased Cushioning

How to Choose Between Hiking Boot and Trail Runners

So which is best, hiking boots or trail runners? Well, the decision comes down to your preferences and what you expect from your footwear. To help you make that decision, let’s consider a few specific questions that dramatically influence which option is for you.

Do your ankles or arch require support in order to hike comfortably? Many hikers need additional support in these areas to prevent a rolled ankle or arch pain. Additionally, a previous injury may also necessitate increased support to avoid flare-ups. If this sounds like your situation, hiking boots may be the best option. Alternatively, do your feet ache in stiff or rigid shoes, or do you always get blisters from your toes rubbing against the inside material of stiff shoes? In this case, trail runners’ soft and flexible comfort will likely be a good choice.

You can see where we’re going with these questions. Think about what will make your feet happy. Everyone’s priorities and comfort levels are different, so consider what works for your feet, the terrain you’re expecting to encounter, and what you expect your footwear to provide out on the trail. Fill in these blanks, and you’ll be well on your way to finding the perfect shoes for your next hiking adventure.

Best Fall Hikes Near Colorado Springs

Crisp air, cozy fleeces, and stunning aspen colors make for some of the best hiking conditions. Autumn in Colorado is stunning, and fall hiking near Colorado Springs is not something you want to miss! Oh, and did we mention the jaw-dropping mountain views?

The landscapes near Colorado Springs offer something for everyone. Between the aspen and pine forests, soothing creeks, and glistening mountain tops, it is hard to know where to start. Below you will find all the information you need on some of the best fall hikes near Colorado Springs.

A Quick Note

While generally safe, hiking does have potential risks: animal encounters, weather, and terrain. To set yourself up for success, always bring a pack and be prepared with food, water, layers, and other essentials. For more tips on getting prepared, check out how to pack for a day hike in Colorado.

Because bears are native to our beautiful state, bear safety is a factor to consider while preparing for and enjoying a hike here near Colorado Springs. Be sure to learn and follow NPS Animal Viewing guidelines and suggestions in order to enjoy wildlife sightings safely. When done safely, wildlife encounters can be a true highlight of the Colorado hiking experience!

expansive field with mountains and family walking on trail
Photo by Holly Mandarich on Unsplash

Preachers Hollow

Location: Mueller State Park
Distance: 20-25 minute drive, 15 miles from downtown Colorado Springs
Parking: Mueller State Park Visitors Center, 21045 Hwy S. Divide, CO
Permits: Colorado State Park Pass required per vehicle or you can purchase a day pass
Stats: 2.1-mile loop, 462 ft of elevation gain, easy
Note: Dogs are not allowed in the park

If you are looking for a fun beginner hike, look no further than Preachers Hollow. This loop offers a friendly multi-use trail with minimal elevation gain. Additionally, the loop style ensures that you will be exploring new terrain the whole route! You’ll find yourself wandering through canopies of aspens that open up to meadows with gorgeous views of the mountains in the distance. If you find yourself looking for a longer day, there are many other worthy trails in this park to explore.

The Palmer, Buckskin-Charley, Niobrara, and Bretag Trail Loop

Location: Garden of the Gods
Distance: 15-20 minute drive, 7 miles from downtown Colorado Springs
Parking: 1805 N. 30th St, Colorado Springs, CO; Park in the North Lot
Permits: Open to all hikers, no permit required
Stats: 4 miles round trip, 449 ft of elevation gain, easy

Hiking in the Garden of the Gods is a must-do when visiting Colorado Springs. The terrain in Garden of the Gods is open with little shade, so in the cooler temperatures, fall is the perfect time to hike this popular park. On this loop, hikers pass all of the unique rock formations in the park. There may also be opportunities to spot local wildlife or rock climbers scaling the rock. This park has tons of fun activities for people of all ages, and this trail is an accessible way to explore all the park’s best features.

Photo by Justin Hu on Unsplash

The Crags Trail

Location: 615 Teller Co Rd 62, Divide, CO
Distance: 50-60 minute drive, 34 miles from downtown
Parking: The Crags Trailhead, 615 Teller Co Rd 62, Divide, CO
Permits: Open to all hikers, no permit required
Stats: 4.8 miles round trip, 820 ft of gain, easy/moderate difficulty

Glistening granite features are a highlight of this trail. Before you get there, you will meander through aspens on a well-maintained trail. The trail then opens up to meadows and eventually, you will reach the top of the Crags Trails and enjoy stunning views of Pikes Peak. This hike also offers the opportunity to see the unique and twisted Bristlecone Pines native to the area.

Seven Bridges Trail

Location: North Cheyenne Cañon Park
Distance: 20-25 minute drive, 7.6 miles from downtown
Parking: Seven Bridges Trailhead, N Cheyenne Cañon Rd, Colorado Springs, CO
Permits: Open to all hikers, no permit required
Stats: 3.7 miles round-trip, 912 ft of gain, moderate difficulty

Aptly named for its defining features, Seven Bridges Trail swerves its way across North Cheyenne Creek via seven bridges. Not only do hikers enjoy the babbling of the creek underfoot, but this trail also offers fall hikers a golden aspen grove near the seventh bridge.  The end of the trail has beautiful views of the creek, valley, and Colorado Springs below. This is a moderate hike with good protection from the elements, making it a good choice in breezy weather.

Mount Buckhorn Peak

Location: North Cheyenne Cañon Park
Distance: 25-30 minute drive, 8.2 miles from downtown
Parking: Starsmore Discovery Center, 2120 S Cheyenne Cañon Rd, Colorado Springs, CO
Permits: Open to all hikers, no permit required
Stats: 3.9 miles round trip, 859 ft of gain, moderate difficulty

While views from any mountain peak are magical and inspiring, nothing compares to the 360-degree views from atop this one. At an elevation of 8,380 ft, Mount Buckhorn will satisfy every mountain lover’s dreams. It is a little harder to get to, but definitely worth it. This is an out-and-back trail through thick forests ending atop a peak filled with budging boulders. The views from the top are spectacular year-round, but especially with the fall foliage, making this one of the best fall hikes near Colorado Springs.

rocky steps through forest hiking trail
Photo by Isaac Smith on Unsplash

Columbine Trail

Location: North Cheyenne Cañon Park
Distance: 15-20 minute drive, 6 miles from downtown
Parking: Starsmore Discovery Center, 2120 S Cheyenne Cañon Rd, Colorado Springs CO
Permits: Open to all hikers, no permit required
Stats: 7.6 miles round trip, 1,607 ft of gain, moderate/hard difficulty

The Columbine Trial is a great hike close to town that offers stunning views, opportunities to see tons of flora and fauna, and flexibility for different hiking abilities. This trail has three different starting points, lower, middle, and upper trailheads, which allow you to customize the hike length depending on how much time you have. No matter where you start, you will follow the creek up the canyon and be treated to the sounds of birds and views of the surrounding mountains. 

Colorado Springs is a perfect destination for fall hikers. With easy access to a multitude of trails and nature areas, adventure awaits hikers of all skill levels. If you are new to hiking, Broadmoor Outfitters offers Guided Hikes so you can be sure you will see some of the best hiking trails in Colorado Springs. There’s no better time than autumn in Colorado, so lace up your boots and get out there!

Where to See Wildlife Near Colorado Springs

Heading out on a hike in beautiful Colorado? Our state includes incredible wildlife, many of which live right here in Colorado Springs. With the stunning Rocky Mountains in our backyard, there are so many opportunities to spot interesting and stunning wildlife when you are out enjoying nature. 

If you are an animal lover, an amateur wildlife photographer, or just looking for some unique hiking spots, we’ve got you covered. We will get into the many species that call Colorful Colorado home, how to identify the animals you might encounter, and the very best places to see wildlife near Colorado Springs. 

Before we get into it, it is important to note that you should always give wild animals space, at least 25 yards, unless the park specifies otherwise, and at least 100 yards for predators. If you are wondering about solo hiking safety, learn best practices, including staying on designated paths and telling a friend before you go.

Photo by Jéan Béller on Unsplash

American Bison

While many people confuse buffalo and bison, they are in fact not the same animal. For those of us in North America, we are most likely seeing bison. Bison have wooly sweaters with shorter hair after their shoulders and small, pointy horns that curve up like the letter ‘J.’ While they were previously near extinction, many conservation efforts, including some here in Colorado, have helped create a healthy recovery to a stable population.

If you are hoping to catch sight of these majestic beasts, there are a few different conservation areas nearby in Denver. The Rocky Mountain Arsenal National Wildlife Refuge in Commerce City is a great day trip idea for Colorado Springs residents. It is home to over 330 species, including almost all on this list. The Buffalo Herd Nature Preserve in Golden and Daniels Park near Sedalia are two other local hiking areas that are some of the best places to spot bison in Colorado. 

Black Bears

Colorado has a large black bear population living all over the state, making them some of the most prevalent wildlife near Colorado Springs. It is not advisable to search for black bears, but you should be aware that they are most populous in Rocky Mountain National Park and southern Colorado near the San Luis Valley. Black bears typically live in brush and forested areas, which allows them to forage for their omnivorous diet of berries, nuts, and grasses. As they hibernate between November and May, you are most likely to see a black bear in the summer.

Please take the time to learn about important black bear safety protocols in case you happen to see one. Black bears do not attack humans without reason, so if you see one, you can likely back away slowly and be okay. Just be careful not to get too close, get between them and their cubs, or run away as they will chase you. 

Elk

The Rocky Mountain Elk is a member of the deer family and a popular animal to see when out in nature. It is always a surreal experience to find a big male elk with its recognizable antlers just grazing next to the hiking trail. A hundred years ago, elk were nearly extinct due to the popularity of hunting them. However, they have made a great recovery, and now the state abounds with them. 

Elk mostly eat grass and find it in meadows in the winter and higher on the mountain in the summer. The absolute best place to see this wildlife near Colorado Springs is in Rocky Mountain National Park. They are iconic to the area to the point that Estes Park has an annual Elk Fest the first weekend of October. It’s free, too, so if you are looking to find elk, that’s where to go.

Photo by Byron Johnson on Unsplash

Bighorn Sheep

Rocky Mountain bighorn sheep are one of four native species in the U.S. but the only one here in Colorado. The males, also known as rams, have those iconic curly horns used for fighting. The female ewes have thinner and shorter horns that arc backward. 

These intrepid mountain climbers are often present at high elevations in the summer and lower elevation pastures in the colder months. Therefore, depending on the time of year, you may be more likely to find a native bighorn sheep in the canyons or the mountains. If you are looking to spot some of these bovines, you can check out the Bierstadt Trailhead at Guanella Pass near Georgetown, Rocky Mountain National Park up in Estes Park, and the Waterton Canyon Trail at the Denver Audubon Nature Center.

Gray Wolves

Gray wolves are native to Colorado, but sadly there are not many in the wild. The population suffered in the past century, along with other species on this list, as their prey, like elk and bison, had drastic population losses due to hunting. When the wolves had fewer food resources and turned to cattle, they were vilified by farmers and killed off in government-sponsored initiatives.

Today, the population has made a rebound thanks to being on the endangered species list. You may not find them on a hike near Colorado Springs, but you can visit with some wolves very close by at the Colorado Wolf and Wildlife Center in Divide.

Photo by Pete Nuij on Unsplash

Mountain Lions

The mountain lion is one native species that is very hard to find in nature. They tend to be difficult to spot for a number of reasons. These reasons include generally stealthy behavior and natural camouflage coloring. Mountain lions live in densely wooded areas around the foothills and hunt game such as deer and elk.

Mountain lions have many names – cougar, puma, panther, and catamount – but they are all the same species. It is not advisable to seek out a mountain lion, as attacks can happen when they feel threatened. Like other big cats, they are best left with plenty of space. 

Final Thoughts

Before you hit the road for your wildlife search, make sure you are properly prepared by reviewing how to pack for a day hike. Don’t forget to bring binoculars and extra camera batteries or a portable charging pack for your phone. If you are looking for a little extra help finding the best hiking spots near Colorado Springs, consider getting started with a guided hike.

Cycling Events Near Colorado Springs this Fall 2022

If you are looking forward to hopping on your bike this fall, you’re going to want to check out these awesome cycling events near Colorado Springs. Colorado is known for its gorgeous landscape, and the fall is the absolute best time to take advantage and explore the state’s natural beauty. 

Within a couple hours of Colorado Springs, you can find tons of fun and exciting opportunities to ride with other cycling enthusiasts. There are plenty of courses available for beginnings, youngsters, and competitive riders alike. Here are just a few of the best Colorado cycling events you can enjoy this fall in 2022. 

CU Boulder Buffalo Bicycle Classic

When: Sunday, September 11, 2022

Where: Boulder, CO

Register Here

This historical ride is celebrating its 20th year this September, and now is a great time for you to try it out. There are nine different courses for riders of all ages and abilities, ranging from 14 to 100 miles, and all riders are welcome, even those with e-bikers and trailers. The longer routes head west to the foothills of the Rockies and take you to Nederland, then up to Allenspark. If you haven’t been cycling in Boulder, it is a beautiful place!

Aside from how fun the courses look, this cycling event is also the largest scholarship fundraising event in Colorado. Registration and donations support local “scholars” – Colorado residents attending CU Boulder. At less than two hours driving from Colorado Springs, this cycling event is a great opportunity to challenge yourself.

Pikes Peak APEX 

When: Thursday, September 22, 2022

Where: Colorado Springs, CO

Register Here

This epic cycling event is something you do not want to miss. It is a four-day mountain biking challenge with a total of $25,000 in prize money. The course is, on average, about 30 miles and 3,000 feet elevation per day and takes you cycling through all the must-see locations near Colorado Springs. You will get to explore Gold Camp Road, Palmer Park, Pikes Peak, Cheyenne Cañon, Royal Gorge Park (including biking over the Bridge!), and so much more. It is not too challenging on technical biking abilities, though it will certainly challenge your endurance. If you have checked out the Pikes Peak Cog Up Bike Down tour, then you might have some idea of what to expect.

There are also two options for folks looking for something a little less intense. You can sign up to cycle for just one day – either Thursday or Sunday – and complete the route without worrying about the competition. This option is perfect for beginner cyclists looking to get started in more formal events as it follows USA Cycling regulations and will give you a great feel for the spirit of the competition. If you are considering signing up, don’t wait: because of permit and preservation limitations, there are only 370 slots available, so get yours today.

Photo by Axel Brunst on Unsplash

Denver Century Ride 

When: Saturday, September 24, 2022

Where: Denver, CO

Register Here

This Colorado cycling event is a really unique opportunity. All of the courses are urban and take you through the streets of Denver. Not only is this a really cool way to explore the city, but also it will get you used to street cycling and show you all the ways the bike-safe streets of Denver connect. If you are considering commuting to work or cycling more in urban areas, this is a great way to get started and learn how to stay safe as a biker on the road.

The routes are 25 to 100 miles long and open to riders of all ages on all types of bikes: tandem, e-bikes, trailers, and more. The shorter routes take you through downtown, City Park, and the Denver Botanical Garden for what is surely a quaint, scenic ride. The longer rides will give you a tour through the greater Denver area, all the way down to Chatfield State Park and up to Golden. This supportive cycling event is a fun way to see Denver and get comfortable with cycling on urban roads. 

Gravel Locos 

When: Saturday, October 1, 2022

Where: Pueblo, CO

Register Here

The Gravel Locos cycling events happening on October 1 are epic. There are four race options, the shortest (La Pequeña) being a non-competitive 30-mile course and the longest (La Loca) a ridiculous 170-mile race with a 13,242-ft elevation gain. The three competitive, timed races will give you the chance to compete against some high-profile cyclists and see how you match up. 

Just an hour south of Colorado Springs, this event is a great day trip during a consistently beautiful time of year. You will enjoy a picturesque ride through Pueblo and the front range of the Rockies. One nice plus is that the ride is for a good cause: the event is supporting the Red Creek Volunteer Fire and Rescue to help them expand their firehouse.

The ‘Rad Dirt Fest

When: Saturday, October 8, 2022

Where: Trinidad, CO

Register Here

In a beautiful part of Southern Colorado, just two hours south of Colorado Springs, you can enjoy one of three invigorating cycling events. These races are wonderfully scenic, as you will bike past the Spanish Peaks, mesas, and plateaus and surely see some interesting wildlife. The roads are maintained but gravel and dirt, so it is definitely a different feel than biking on paved city streets.

The course options are The Frijole, at 38 miles, the Anteloop at 99 miles, and the longest Stubborn Delores at a killer 166-mile race with an 11,213-ft elevation gain. The longer two races will take you west from Trinidad toward the Spanish Peaks Wildlife Area and San Isabel National Forest. The races may be tough, but the views will surely make it worth it. 

Final Thoughts

There are so many fantastic cycling events near Colorado Springs, not just in the fall but year-round. If you are thinking about getting into cycling or mountain biking and are not sure where to start, you can check out a guided mountain biking tour. This will allow you to see if you like it, learn some helpful safety tips and techniques, and learn more about Colorado’s cycling community.

image of rock climbing gear

Rock Climbing Gear – A Beginner’s Guide

Rock climbing has had an explosion of growth over the last couple of decades. The unique sport offers excitement, a challenge for all abilities, and different ways to explore and play in both indoor and outdoor spaces. Sometimes a new sport can be intimidating: the gear, systems, and language can be a lot to learn. If you are uncertain about what comes first, it can be helpful to research and learn more about how to get into rock climbing

As a beginner rock climber, consider familiarizing yourself with the sport through a guided rock climbing tour. Guided excursions come with all the gear you will need and allow you to get comfortable with proper climbing gear use. If you have never climbed before or want to upgrade from rental gear, this rock climbing gear list has all the beginner climbing essentials you need to start your journey into the vertical world.

Rock Climbing Shoes

Rock climbing shoes are an important part of climbing. The special rubber sole and snug shape allow you to grip the rock, offer protection for your feet, and give you the ability to place your feet on small holds. There are various shoes for all styles of climbing, and climbing shoes can be organized into the following categories: neutral “flat” sole, moderate “slightly downturned” sole, aggressive “very downturned” sole. Many shoes also offer options of “slip-on,” laced, or velcro closures.

As a beginner, you should go with more neutral shoes as they tend to be the most comfortable and least expensive. Downturned, aggressive shoes are tight, uncomfortable, and typically reserved for more technical terrain. When you are just getting started, comfort is key as you get used to wearing these new shoes. Climbing shoes should be snug, but not so tight that they cause pain. Due to the fit, you should not walk in the shoes or wear them if you are not climbing.

Some examples of beginner rock climbing shoes include:

Black Diamond Momentum, La Sportiva Tarantulace, Mad Rock Drifter

Rock Climbing Harness

Just like climbing shoes, a harness is an essential piece of protective rock climbing gear for any rock climbing with ropes. All harnesses come with basic features of holes for your waist and legs, gear loops, and a belay loop. There are many differences between harnesses such as adjustable leg loops, weight, material, and fit. These features become more important if you choose to specialize in a style of climbing down the road.

For a beginner rock climbing harness, look for an “all-around” harness that is comfortable and affordable. Fit will be one of the most important factors when buying your first harness. Make sure it has a snug fit around your upper legs and waist. Some people prefer the ease of non-adjustable leg loops but if you are looking to get used to the fit and feel of a harness, the ability to adjust your leg loops can be helpful.

Some examples of all-around rock climbing harnesses include:

Black Diamond Momentum, CAMP Energy, Petzl LUNA 

Chalk & Chalk Bag

Whether bouldering or top-rope climbing, chalk can be a game changer while climbing, especially if it is hot or humid. Chalk comes in a variety of forms: block, loose, and liquid. An easy way to start is by purchasing a “chalk ball,” which is a small cloth pouch filled with loose chalk. You chalk up simply by grabbing the chalk ball and easily refill the ball when it gets low with separately purchased loose chalk. 

It’s not a great idea to just dump loose chalk into your bag without a ball, and in fact prohibited at some gyms, as it is messy, wasteful, and annoying for your belayer to have chalk dropped on them when you use it mid-climb. Liquid chalk is preferred by some but not as common for top-rope climbing. Also, “eco” chalks, most often reserved for outdoor climbing, vary in color to match the rock.

Most chalk bags are pretty small with a closure mechanism and a waist loop. A bouldering-specific chalk bag or “buckets” will be larger, without a waist strap, and often come with a brush. If you are new to climbing, an affordable waist belt chalk bag with a chalk ball inside should be all you need. Chalk bags come in all sorts of colors, designs, patterns, and shapes so have fun. You can’t go wrong with this piece of rock climbing gear!

Belay Device

If you want to rope climb, belaying will be necessary. You will need a locking carabiner and a belay device. Again, there is a multitude of devices to choose from. Belay devices often come in the following broad categories: tube style, semi-assisted braking, auto-locking, and figure 8 (not commonly used). The most traditional and entry-level option is a “tube style” device such as an ATC. Most climbers learn to belay with an ATC and then switch to an assisted or auto-braking device. No matter which device you choose, be sure to seek instruction on how to use the device safely and appropriately.

Some examples of common belay devices:

Black Diamond ATC- XP, Edelrid Mega Jul, Petzl GRIGRI

Helmets for Outdoor Rock Climbing

While helmets are not commonly used inside, they are a must-have piece of rock climbing gear for any outdoor climbing. This important piece of gear protects you from anything that may fall from above – or protect you from the ground in the event that you fall. You will want to look for a designated rock climbing helmet as they are designed to protect your head from specific injuries that could be encountered in the sport.

There are generally two types: hard shell and shell-foamed helmets. Hardshell helmets are generally more affordable and more durable, making them great for beginners. Shelled foam helmets tend to be more expensive and have less longevity but are more breathable and lightweight. As with most types of gear, fit and comfort are top priorities when selecting your gear. 

Some examples of rock climbing helmets include:

Black Diamond Half Dome, CAMP Armor, Petzel BOREO

Final Thoughts

There is so much more to know about the sport of climbing aside from the rock climbing gear, but it is all worth it to take the time and learn. Rock climbing is one of the most invigorating and satisfying challenges. For an introductory experience, try a guided rock climbing tour. Once you have your own rock climbing gear, the technique and knowledge, and some confidence, be sure to check out the best beginner rock climbing in Colorado Springs and enjoy the views from new heights!

E-Bike Classes – What to Know

Did you know that there are different laws that apply to the various classes of electric bikes? Did you know that e-bikes are now grouped into three classes? Depending on what state you live in and what type of e-bike you have, you may have to follow one rule or another in order to avoid a citation. We’ll help you figure out your e-bike’s class and understand what important rules apply to your riding.

What’s Going on with E-Bike Classes?

When e-bikes first became popular, there were no laws governing how they could be used. What speed limit should apply? Can you ride an e-bike in designated bike-only spaces? Some states applied laws to e-bikes as if they were mopeds or other motor vehicles, enacting confusing licensing and equipment regulations that made no sense.


In 2015, California adopted a 3-Class approach to regulating e-bike use, where different laws apply based on the type of e-bike. So far 35 other states have followed suit with this standardized PeopleForBikes model law. The remaining states have laws regulating e-bikes as well, with some considering e-bikes to be motor vehicles and some regulating them as bicycles.

Photo by Himiway Bikes on Unsplash

A Primer on E-Bike Mechanics

Before we get into the specific classes of e-bikes, there are a couple of quick details about e-bikes you need to know. The point of an electric bicycle is that it uses a motor to turn the bike wheels so you don’t have to pedal, either as hard or at all. There are two ways that e-bikes can achieve this: pedal assistance and throttle. 

Pedal assistance means that the bike monitors the level of work you are putting in and responds in kind by providing power to the motor. This allows you to get further and go faster without as much work as a traditional bicycle. However, the motor will not turn on or stay on if you are not pedaling. 

In contrast, a throttle allows the e-bike motor to turn on even if you are not pedaling. Typically located on the handlebar, this device is similar to an electric scooter or a motorcycle. This distinction is important for the different classes of e-bikes, and you will see why below.  

What Are the Three E-Bike Classes?

The three classes of e-bikes are very straightforward, and it will not be hard for you to figure out which type of e-bike you own. You can either review these descriptions or do a quick search in your e-bike’s user manual. 

Class 1

Class 1 e-bikes provide only pedal assistance. This assistance stops once the bike has reached 20 miles per hour (mph). These are most likely to be regulated like traditional bicycles, as they have the lowest capability. Without a throttle, the user must keep pedaling in order to activate the motor and continue getting assistance. Keep in mind, though, as with all classes of e-bikes, it is possible to exceed the 20 mph limit by pedaling or when going down a hill.

Class 2

Class 2 e-bikes have a throttle-operated motor. This makes it possible to ride without pedaling at all. Similar to Class 1 e-bikes, the motor stops providing assistance at 20 mph; however, you can still pedal to achieve higher speeds.

Class 3

Similar to Class 1 e-bikes, Class 3 e-bikes provide pedal assistance. But unlike other classes, they have a pedal assistance limit of 28 mph. Depending on the state, some Class 3 e-bikes also are allowed to have a throttle (usable up to 20 mph), whereas some states ban Class 3 throttles altogether. 

If you are not sure which class your e-bike fits in, you can easily find out with a quick Google search of your e-bike brand and model or by reading over your bike’s user manual. Once you know what type of e-bike you have, you can move on to learning more about the specific rules governing your e-bike usage.

Photo by Himiway Bikes on Unsplash

What Are the Rules for the Three E-bike Classes?

We will go over the model laws provided by PeopleForBikes since this has been widely accepted and applies to two-thirds of states. However, these will only give you an idea of the main regulations since many states have additional laws on top of these. Therefore, regardless of where you live, double-check your state and local laws. Also keep an eye out for additional regulations for, say, biking in your neighborhood parks. 

The major issues that the e-bike regulations cover relate to access (to bike lanes, parks, etc) and usage (wearing helmets, age restrictions, etc). Some states have further restrictions on the classes of e-bikes. For example, California does not allow Class 3 e-bikes to have throttles. Meanwhile, Colorado and Washington do not allow e-bikes to have electric motors above 750 watts, effectively limiting speed. You should learn more about the restrictions in your state before investing in an e-bike of your own.

Class 1

Generally closest to traditional bicycles, Class 1 e-bikes have the fewest restrictions. They typically can be ridden wherever traditional bikes are allowed. This includes bike lanes on roads and bike paths in parks. Most states do not have regulations for Class 1 riders specifically, though people under 16 are required in many states to wear helmets while riding any class of bicycle or electric bike.

Class 2

Class 2 e-bikes are typically regulated the same as Class 1 e-bikes. However, some states have more regulations because of the addition of the throttle. This is a safety issue because the throttle can continue to power the motor without user input, making it more dangerous for riders and passersby alike. Regarding usage on mountain biking trails, for example, Class 2 e-bikes may be banned altogether from singletrack and downhill-only mountain biking trails. 

Class 3

The most highly regulated, Class 3 e-bikes are generally not allowed on bike trails or multi-use trails. This is another safety concern because of the maximum pedal assistance speed of 28 mph, which has been deemed too fast for multi-use trails in many states. Most states do allow Class 3 e-bikes to be used on roads and trails open to motorized public use (for ATVs and other off-road vehicles). 

Photo by Himiway Bikes on Unsplash

State-Specific Restrictions

Some states also restrict Class 3 e-bike riders to people over 16 years old and require all users, regardless of age, to wear helmets on these e-bikes. You should consult your state and local laws to make sure you do not unknowingly break any that apply to your class of e-bike.

You can find your state’s guidelines by searching your state government website for e-bike regulations. Keep in mind that almost every state gives local governments the authority to add restrictions if they want. So don’t forget to check the guidelines for your city or town. Finally, if you are planning an e-biking trip to a park or forest, you should look up the trail guidelines before you go. 

Rules of the Road

No matter what state you live in or what class of e-bike you have, there are certain common courtesies and best practices you should follow. First and foremost, please always wear a helmet when riding a bicycle or e-bike of any class. Even if it is not a legal requirement, it is a minimal effort that can save your life in the event of a crash. 

E-bike riders should also keep in mind that speed limits and other driving laws still apply to them. If you are riding on a road, say in a residential area, there is a good chance your e-bike has the ability to exceed the posted speed limit. Despite being on an electric bicycle, it is possible to get a speeding ticket, citation, or fine, so obey the law. 

The Sidewalk Question

Bicyclists should avoid biking on sidewalks, as it is dangerous to pedestrians. Instead, use designated bike lanes where available or share the road with cars where legal. When riding an e-bike on a road, be sure to behave like a car and follow the rules of traffic. Stop at stop signs and red lights, and always give pedestrians in the crosswalk the right of way. This is especially true for e-bikes as they can go faster than traditional bicycles and therefore cause more potential injury in a collision.

Right of way is an important rule to know as an e-bike rider. What’s more, this rule applies to both the road and the trail. On multi-use trails, bicyclists must yield to hikers and people on horseback. As horses and other pack animals can get startled by the noises e-bikes make, it is important to give them space and let them pass you before continuing your ride. Finally, downhill riders should yield to uphill riders (since pedaling uphill is obviously harder).

Final Thoughts

Once you know all the state and local rules for your particular e-bike class, you can enjoy your ride, and rest assured that you will not violate any obscure laws. E-biking is a fun and effective way to commute to work, conquer a longer ride, or summit a steeper trail. If you are considering buying an e-bike and wondering if e-bikes are worth it, there are certainly many advantages to consider. You can also take a test ride on an exciting e-bike tour near Colorado Springs to learn more about the techniques and rules for riding an electric bike.

Tips for Hiking in Rain

Are you headed out for a hike and worried about the weather? It’s important to always be prepared for any conditions, so we’ve got some tips for hiking in rain. First, make sure you know how to pack for a day hike in general, and then we’ll discuss specific gear for hiking in rain and other considerations for staying safe and dry.

Image by Drew Tadd from Pixabay 

Do Your Research

First things first, always check weather reports before you head out. There is a difference between a drizzle and a thunderstorm, both in terms of comfort and safety. If there are severe weather warnings or if your hike includes a potential flashflood area like a canyon, consider postponing your trip. Either way, be sure to tell a friend about your planned whereabouts in case the weather becomes hazardous. Lastly, pack the ten essentials to be prepared for every situation.

Pack a Hot Drink

When packing for a day hike, you should always bring plenty of water and snacks. When packing for a rainy day hike, you may want to add a nice warm beverage to the mix. You can prepare a thermos ahead of time and leave it in the car for when you finish the hike. If you are backpacking for a couple of days, drink mixes like hot cocoa can be a real treat to warm you up. 

Wear the Right Rain Gear

As is best practice for every hiking trip, you should wear moisture-wicking inner layers. Dry-fit shirts and wool socks will keep you dry even when you sweat or get caught in the rain. These proper layers insulate body heat, help prevent blisters, and can be the difference between a safe rainy hike and a dangerous wet one. 

Rain Jacket

For outer layers, a waterproof rain jacket is a must. Something light that fits in a day pack is a smart choice to avoid bulk in good weather. The most important thing to note is the distinction between water-resistant and waterproof materials. A water-resistant jacket might stay dry if you spill your drink or walk through a sprinkler. However, it is not suitable for hiking in the rain. After a while, the material gets bogged down with water and can become extremely uncomfortable. To avoid being cold, wet, and miserable, a certified waterproof raincoat is an absolute necessity.

Rain Pants and Proper Footwear

Waterproof pants and hiking shoes are the two other essential pieces to stay dry on a rainy day. Waterproof boots are my go-to even on clear days. If I happen to step in a puddle or hop a small stream, my feet stay dry. The one downside with waterproof shoes is that they are not breathable. If rain does get in, it will be extremely hard to get them dry, and you will find yourself walking in puddles the rest of the day. The main concern with wet feet is blisters. When skin gets wet, it is more susceptible to breaking and forming blisters. This is why waterproof pants and shoes (that don’t have a gap at the ankle) are the best way to keep dry.

Two other helpful pieces of gear are a towel and an extra pair of socks. You may choose to leave these in the car to dry off when you return. Having a towel for wet hair and drying off wet skin is really helpful, and there is nothing as comforting as putting on warm, dry socks after a wet hike.

Photo by Andy Køgl on Unsplash

Waterproof Your Gear

Next, unless your day pack is truly waterproof, you will want to make sure the stuff inside is well protected. Your phone, cash, food, and other personal items can be kept dry by putting them in dry bags or plastic baggies. A waterproof phone case will help make sure you always have access to navigation tools and emergency services.

If you are backpacking for a couple of days, rather than just on a day hike, you will especially want to ensure your sleeping bag, clothes, and toilet paper do not get wet. One great way to keep all your gear dry at once is with garbage bags. Rather than put each item individually in small plastic bags, you can line your entire pack with a garbage bag and then pack everything like normal. As long as you secure the bag shut and get the water off before you open it, you should be able to keep your important belongings free from the rain. 

Know Safety Protocols

There are a few important rules to keep in mind for hiking in dangerous weather conditions. First, assume everything will be slippery. Rocks, wooden steps, mossy tree roots: everything is easy to slip on when wet. Be sure to keep your eyes on the trail and tread carefully.

If you find yourself caught in a thunderstorm, seek shelter, head to lower elevation, avoid the tallest trees, and avoid open meadows. If you are with a group, you should spread out to reduce the number of injuries in the event that there is a lightening strike.

Finally, if you were planning on crossing a stream on your hike, remember that it will be larger in the rain. You should always have an established path with branches or rocks to hold onto for safety. Added water means added current, so be extra careful not to get your feet swept out from under you. Check the National Park Serivce advice for river crossings for more information.

Dry Out After a Wet Hike

If you head home after your day of hiking in the rain, you can throw your clothes right in the wash. If you’re out for a couple of days, hang everything to dry. Put your hiking shoes in the sun or near a fire (not too close!). It is easy for mold to develop in gear that does not dry properly, so dry out your boots to extend their life. 

Photo by Yann Allegre on Unsplash

Consider a Guided Hike

One great way to avoid the hassle and confusion of preparing for hiking in the rain is to book a guided hike. You can learn so much from professional hiking guides on how to prepare and navigate a rainy hike, and you’ll also benefit from someone bringing along those essential first aid supplies.

If you are feeling dispirited that the rain ruined your hiking trip, know that it is very possible to have a great time in any weather. With a little preparation and the right gear for hiking in rain, you can ensure a comfortable experience with Mother Nature’s wetter side. Be sure to check out the Colorado Springs trail guide to find your next great adventure, and enjoy your time outdoors!