Are E-Bikes Worth It?

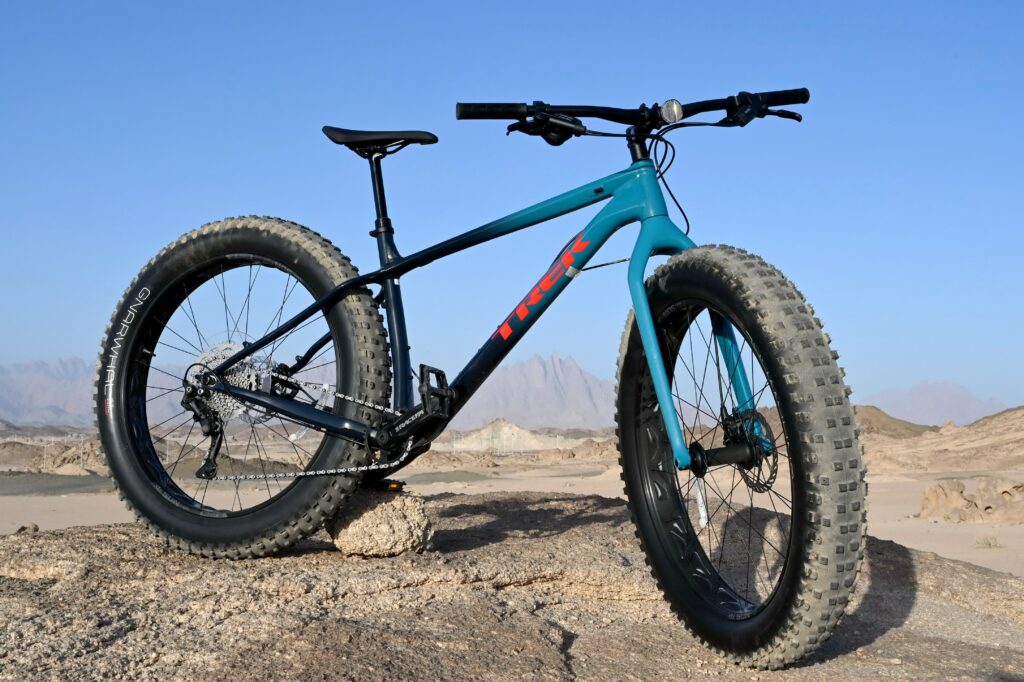
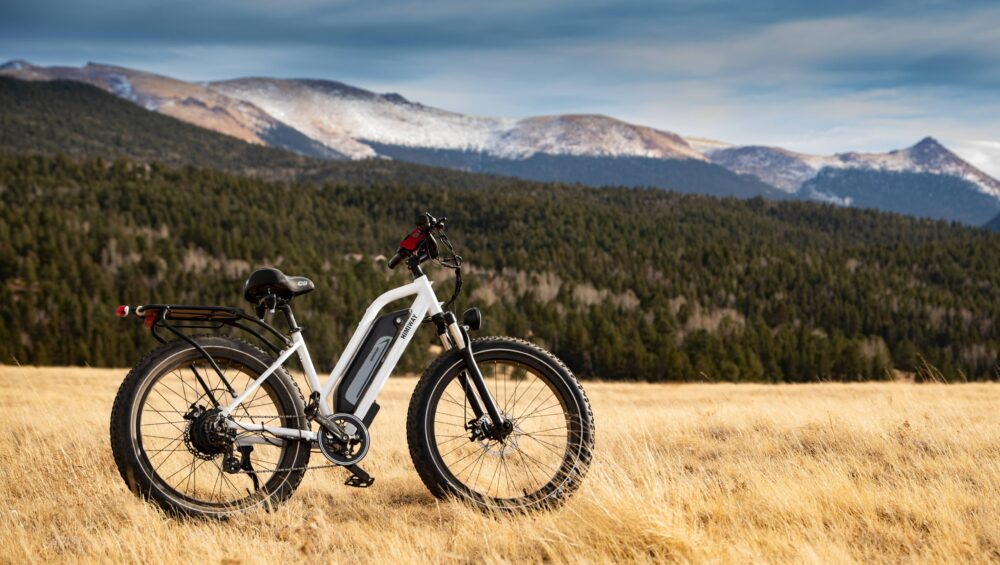
Electric mountain bikes are taking the trail riding world by storm. These popular bikes provide incredible power and speed and allow longer rides, harder workouts, and greener commutes.

However, the high cost compared to analog bikes has many riders wondering if electric mountain bikes are really worth it.

Here are the pros and cons of electric bikes so you can decide for yourself.

Advantages of e-bikes

For Speed Lovers

The most obvious advantage of an electric mountain bike is the power that doesn’t come from your legs. Unlike analog mountain bikes, e-bikes boost your riding to give you more speed. This can reduce the time it takes to get uphill and increase your speed on the trail. If you are an adrenaline junkie or love trying tricks, this extra speed can be a game-changer. 

Explore New Trails

The other benefit of more speed is that you can go further. With less work for more range, you can enjoy a longer ride to places you couldn’t previously visit. The added power will also help you through tough sections that used to require a dismount. If you want to unlock more trails and explore new territory, an e-bike is a great way to get there.

A Sturdy Ride

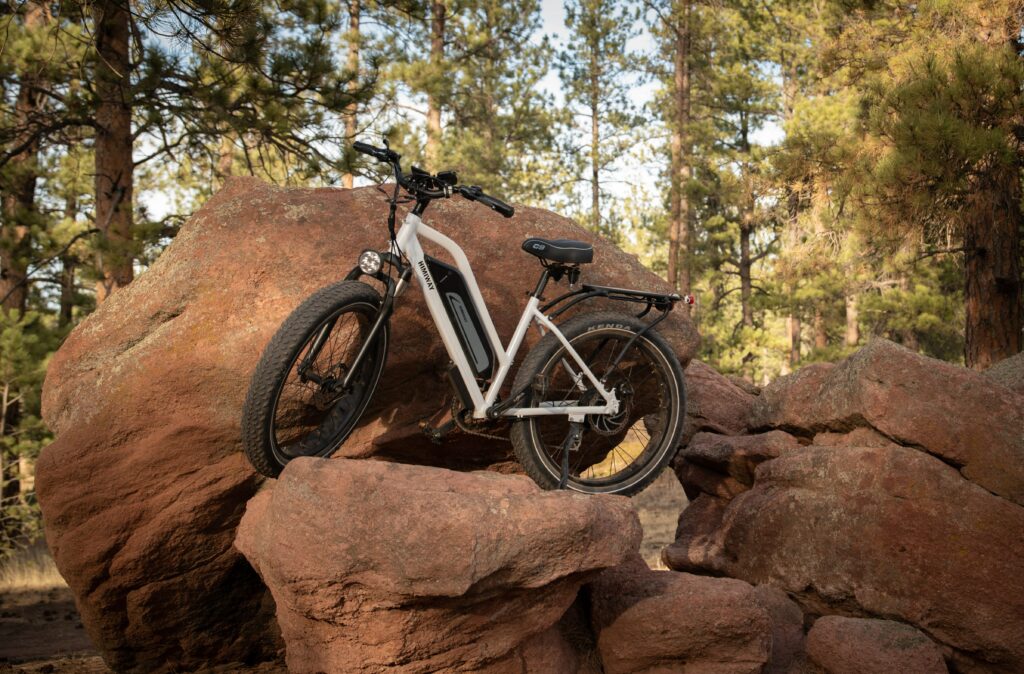
The power output of the electric mountain bike is also helpful for stability and capability. With added weight from batteries and more, e-bikes are significantly heavier than standard mountain bikes. This weight is located near the bottom of the bike’s frame, creating a low center of gravity that you’ll love. With added stability, you can enjoy easier and more predictable handling from your bike. This can bring a sense of safety for newer riders, which will give you more confidence to explore and enjoy the ride.

In addition to feeling more comfortable on the bike, you can also expect to be more capable on the trail. There are certain obstacles and maneuvers that not even the best mountain bikers can manage. With an electric mountain bike, though, you can have more power to clear some of those tough technical problems. It still might be hard, but at least an e-bike can keep you on the pedals. On the other hand, the heavier the bike, the tougher sharp turns will be. However, this isn’t necessarily a downside because there are lightweight e-bikes you should check out if you want to stay flexible on the trail.

An Endurance Workout

If you are afraid that you’ll get a worse workout from an electric bike, remember that you’ll go further. Yes, if you were to do the same route and use an e-bike, you would be working out less. But that’s not a fair comparison. With an e-bike, you’ll bike further, climb higher, and go faster. The result is that you will need less strength and more endurance. This provides a different workout, one that you can mix into your current routine. Plus, if you still want that leg burn, you can always minimize the power assist from the e-bike. 
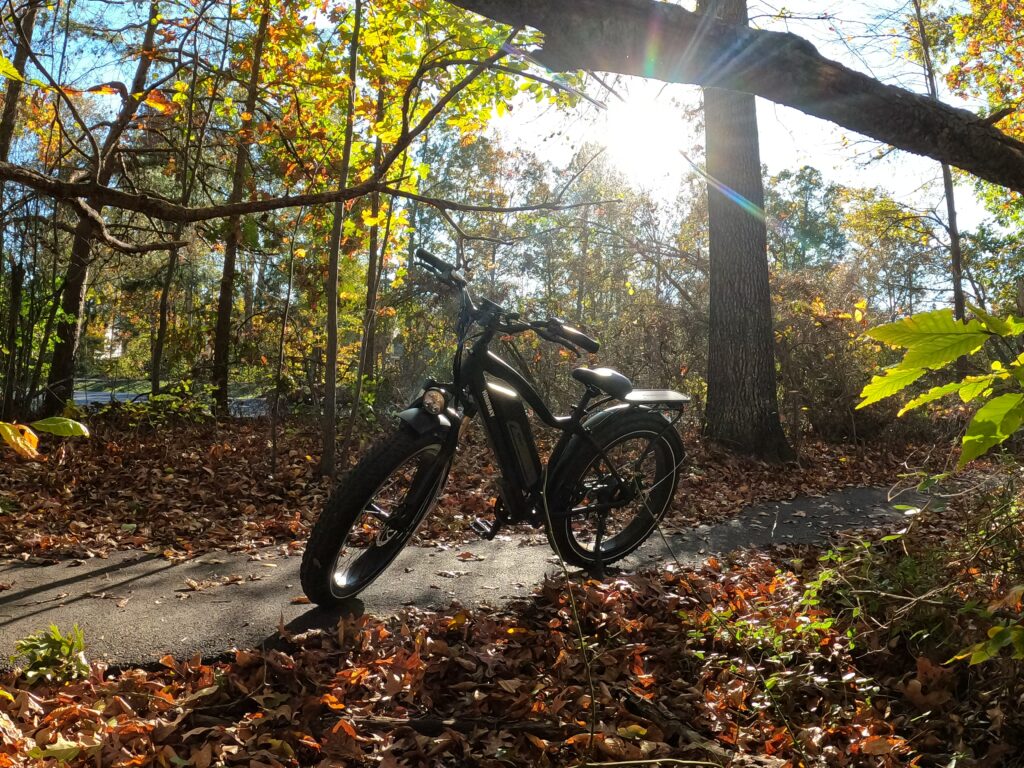
A Better Commute

One of the biggest advantages of e-bikes is how versatile they are. The bike’s assistance can make a ten-mile ride feel like five. This means that the bike commute to work you could never manage is suddenly within reach. If you’ve been looking to ditch your car for errands and local trips, an electric bike is a perfect way to do so.

Not only are they easier to park, but e-bikes take less than a dollar a day to charge. That’s substantially cheaper than gas and better for the planet, too. When you consider the cost of an e-bike, you have to factor in this amazing versatility. It is more expensive than an analog bike but so much cheaper than a car. Using an e-bike for your commute will keep you active and help save the planet.

Potential downsides of e-bikes

You may find that you enjoy the difficulty of mountain biking and the effort required to get uphill. E-bikes are a great way to minimize the uphill effort and get you to the fun parts faster. But if you love that struggle, you may not find electric mountain bikes worth it. 

There is an additional cost to going electric, both because e-bikes are more expensive upfront and because their maintenance is more expensive than analog mountain bikes. More parts mean more opportunity for something to break or get damaged on the trail. You also need to charge the bike, but these costs are very low.

If you think you might use your e-bike for commuting or enjoying longer rides, these costs are definitely worth it. The initial expense will be mitigated by what you will save on gas money, and you will get extra hours of entertainment compared to riding your old mountain bike.

The Best Ways to Test Ride

If you’re not sure if an electric mountain bike is right for you, the best thing to do is try one out in real life. Rentals and tours are great ways to accomplish this. With a day rental, you can explore on your own, visit trails you know and love, and have the opportunity to try an e-bike before you buy one.

For those of you who need a little more guidance, a tour is the perfect way to discover if an electric mountain bike is right for you. An e-bike tour allows you to learn from professionals, get advice on your technique, and build confidence in your riding ability. You’ll understand how e-bikes differ from standard mountain bikes and how to best take advantage of their power. Look no further than Colorado Springs e-bike tours for your chance to check out an e-bike while enjoying the beauty of The Springs!

So, Is It Worth It?

Whether an e-bike is worth the cost depends on your values. If you particularly enjoy the challenge of biking uphill, an e-bike might not appeal to you. For the rest of us, electric mountain bikes are exciting additions to the world of trail riding. E-bikes offer riders more speed, more power, and more adventure. Plus, people looking for an eco-friendly daily commute can certainly enjoy the investment of an e-bike. Check one out for yourself on a tour and experience the thrill of electric mountain biking!

Rock Climbing Safety for Outdoor Climbing

No matter your skill level or knowledge base, rock climbing is an inherently dangerous sport. Yes, risk can be minimized but never eliminated. 

That’s why establishing a base of knowledge and know-how when it comes to outdoor climbing is imperative to help you have the safest outdoor climbing experience possible. 

It is better to be more prepared and well equipped to handle any situation when it comes to outdoor climbing. If you’re new to climbing, the safest way to get outside is to hire a guide or take an instructional course to teach you the ropes.

Photo by Jon Hieb on Unsplash

Dangers of outdoor rock climbing 

What’s more is that most rock climbing accidents and deaths are due to human error of some kind, not a gear failure. That means that most of the dangers involved in outdoor climbing are under our control, and we can do our due diligence to prevent them. 

Things like 

  • knowing how to use your safety gear properly, 
  • learning how to land safely when bouldering,
  • doing your safety checks,
  • being aware of climbing and weather conditions, and
  • climbing within your skill level is somewhat within your control as a climber. 

There are always natural risks, such as falling rocks, sudden weather changes (common in the mountains), or gear failure that can cause severe injury or even death. 

But rock climbers are far more likely to experience a minor injury versus a serious injury in their climbing career. These will be things like scraped knees or elbows from the rock wall or maybe a sprained ankle from landing on the edge of a crash pad. 

Most of these minor injuries tend to be reported by sport climbers, trad climbers, or boulderers. So, if you are venturing into outdoor climbing in pursuit of top-roping, your risk has already decreased because you won’t be lead climbing or bouldering.

Minimize risk when climbing outdoors with these safety tips

Severe injuries and minor injuries can be minimized with the proper knowledge and attention. Here are our top tips to improve your level of outdoor climbing safety. 

1. Climb within your ability level

It is great to get outside and push grades, but this should be done in a controlled manner. It is one thing to go out to the crag and push grades with a group of experienced climbers, and it is something else to jump from lead climbing in a gym to trad climbing a multi-pitch. 

We aren’t saying that you should never challenge yourself when climbing outdoors, but be aware of your physical boundaries and technical knowledge. 

In some cases, you may be strong enough to climb something, but you may lack the technical knowledge (i.e., how to build a trad anchor or clean a sport anchor) to do it safely. To overcome these barriers, enroll in an instructional class on anchor building, climbing technique, or climb with more experienced people. 

You can also hire a personal trainer to help you build up your climbing endurance if you’re preparing for a big climb and want to be physically prepared. 

2. Have the proper safety equipment (and know how to use it!)

You need to know the gear necessary to complete a climb safely when you head outside. This knowledge can be found on online resources like Mountain Project or guidebooks for the area you plan to climb. These resources also provide you with approach information, and if you use online platforms, they may also provide weather updates.

Knowing what you need before you go can save you a lot of time, trouble, and potentially an accident. Just having the safety gear will only get you so far, though. You need to know how to use it too!

If you’ve climbed in a gym before, you likely already know how to wear your harness and tie a few knots. But do you know how to clip draws when sport climbing to avoid back clipping or z-clipping?

Can you build a toprope anchor using your own gear?

Do you know how to place solid gear?

You need to ask yourself these types of questions when you are investing in gear and when you are heading outside to climb. There are several resources to learn how to do these things, such as articles online, videos, books, courses, and friends. 

Simply taking the time to practice these skills under the supervision of someone who already knows the ins and outs of climbing safety will help you feel more confident when climbing outdoors, and it will be much safer when you go on your own. 

Other safety gear to always use outdoors: helmets.

Helmets should ALWAYS be worn by both the climber and belayer.

3. Understand belay systems and knots

A big part of knowing how to use your safety gear is knowing how to belay correctly and tie your knots. On top of that, always do safety checks for your climber and belayer. Even if you are experienced as a climber, a safety check can save your life. We are all human, and humans make mistakes. Double-checking helps us catch those mistakes before it is too late.

Lead belaying and toprope belaying differ, so know how to do both if you plan to climb in both styles. 

There are a few ways to tie into your harness as the climber. The most common way is to use the figure-eight follow-through knot. Know how to tie this knot with proficiency and perform checks on your partner. 

Other knots should be learned and practiced for anchor building, self-rescue, and other climbing skills. 

Knowing how to tie knots is essential. Take the time to learn about anchor systems and how to clean anchors. While sport climbing tends to be less technical than trad climbing, plenty of accidents occur when cleaning anchors due to a lack of knowledge and know-how. 

4. Have experience or climb with someone who does 

If you read the above tips and were thoroughly confused, then the best tip to apply is this one: climb with someone more experienced so they can teach you best practices for outdoor climbing safety. 

You don’t necessarily need to book a guided trip with a professional or enroll in an instructional course if you have a knowledgeable friend. Still, the benefit of booking with a certified climbing guide is that they’re professionally trained. 

They’ve not only done these things themselves, but they’ve gone through classes to learn best practices and how to teach rock climbing safety to people of all skill levels.

In the end, while some risk in rock climbing is left up to nature, a lot of it is up to you. With the proper education, practice, and safety equipment, you can minimize some risks.

Not sure if you’re ready to climb outside on your own yet? Hire a guide!

Best Places to See the Fall Colors in Colorado Springs

The fall transforms Colorado into a gold-rich state once again. The colors of the aspens flow through like liquid gold, rushing in and out quickly, so you need to know exactly where to see fall colors in Colorado. 

It’s time to cozy up and tackle the brisk Autumn air to let your eyes soak up Colorado Springs at one of its finest moments. These trails will take you to some popular, easy-access views and some hard-to-reach, hidden gems in and around Colorado Springs. 

Best places to see the Fall colors in Colorado Springs

Photo by Devonshire on Unsplash

1. Pikes Peak

One of Colorado Springs’ local Fourteeners brings a wide variety of options for those looking to get one of the best fall colors tours Colorado has to offer. At 14,115 feet of elevation, you are looking down on thousands of acres of national forest. The bird’s eye view lets you grab a completely different perspective from walking down on the ground.

It’s a view that everyone should take the time to see in their lifetime and one that everyone can. You can take the easiest route of driving to the top for a short day or hop on the Barr Trail for a 25-mile trek that will genuinely make you work for the views. The most challenging part of Pikes Peak is determining how you want to experience the mountain. 

Another option for the more adventurous is to hop on a bicycle and give your legs a real workout. Don’t worry. There are plenty of places to stop and catch your breath while enjoying the view. 

Check out our newest Cog Up, Bike Down Tour that shuttles you to the top of Pike Peak and turns the bike ride into a downhill cruise. 

2. Pikes Peak Greenway

In the fall, Pikes Peak Greenway gets a little less green and a whole lot more golden. 

Urban trails offer easy access and many options with how far you want to go and for how long. Plus, you can walk down to one of your favorite restaurants while still getting the feeling of an Autumn hike. 

The Pikes Peak Greenway runs through Colorado Springs. It’s mostly paved, sometimes gravelly, and is a well-maintained trail that connects several other local trails. Most bikes and all feet can take you around town to see how the fall colors transform Colorado Springs. 

The Greenway gives you easy access to loads of the local parks in Colorado Springs. This is the perfect choice for a walk around town that can end in a picnic overlooking beautiful fall colors. Stop off at Monument Valley Park, Boddington Park, or America the Beautiful Park for a great spot to sit and spend the day with a thermos full of warm drinks and a bag of delicious goodies. 

3. Cripple Creek

Just outside of Colorado Springs lies Cripple Creek, a small mining town that sits in a nest of aspen groves shining brightly in the fall. 

You can cruise towards town in several ways that allow you to experience the countryside differently. In town, you can hop onto the Cripple Creek and Narrow Gauge Railroad for a slow crawl through the forests you have been looking at from afar. 

Just make sure to get there in time; the railroad only runs until October each year. 

4. Mount Esther Trail

Just northwest of Colorado Springs sits a relatively small mountain dubbed Mount Esther. While the peak is “only” 9,505 feet above sea level, the climb to get there will test your endurance. 

The Mount Esther trail is 4.2 miles round trip. Trust us, it is worth the energy and the short, but steep climb. 

The treasure at the top of the trail is a golden meadow that reflects all of the colors of Colorado’s autumn season. If you push forward just a bit further, you will find yourself at the Crystal Creek Reservoir. Here, the colors are reflected off the glassy waters, bringing even more color to your world. 

5. Gold Camp Road

While there are loads of great drives in the area, some can be a bit more adventurous than others. Not all roads are smoothly paved yet, and those that aren’t let you get to some of the less traveled, more unique spaces of the Pikes Peak Region. 

If you’re equipped with a 4×4 or an AWD vehicle, be sure to check out Gold Camp Road, as it is where to see fall colors in Colorado with a bit of bump and spicy adventure. 

The name does a pretty good job of encompassing what the drive is going to get you. The rugged drive takes you through tunnels and corridors of aspens that puts you amongst some of the brightest fall colors the area has to offer. 

6. Best Fall Colors Tour in Colorado Springs 

If you’re looking to add in a bit of adrenaline to help warm you up on a brisk autumn day, a zipline tour is one of the best ways to see the fall colors of Colorado Springs. This option gives you a unique view that is constantly changing as you fly through the air. 

This zipline tour will engrain the memories of fall colors into your mind in a way that is hard to find doing anything else. 

An 1800 foot zipline gives you the chance to take in sweeping views of the colors while feeling the breeze across your body. A 1500 foot line takes you over a 150-foot deep canyon, really giving you a unique view of the forests below you.

Paintballing Safety Tips

Paintball is a fun and exciting team sport. It requires strategy and cooperation, and it certainly gets players physically active. However, it can also be dangerous, and that’s why it’s important to learn and follow basic safety rules. In this guide, we’ll go over the key paintball safety tips you need to know before getting on the field. Once you’ve read through this list, you’ll be ready to enjoy the best paintball Colorado Springs has to offer.

1: Always Wear Eye Protection

Safety goggles are an absolute must when paintballing. Getting hit with a paintball on your skin can be a little painful, but it won’t cause a severe injury. Especially if you are wearing padding, you’ll just end up with a little bump or red area. A paintball to the eye, however, can cause very serious injury. This is why safety goggles are the number one paintball safety tip. A full-face shield, which includes protection for your eyes and breathing holes for your nose and mouth, is even better. But either way, the primary paintball safety rule is to keep them on at all times.

If you need to adjust your eye protection, you will have to exit the field of play or go to a designated “safe zone” if there is one. Do not take your goggles off anywhere else, even if you think you are hidden. 

If you have your own goggles, be aware that the lenses need to be replaced according to the manufacturer’s guidelines, and you should never play with cracked or old lenses. Also, be sure only to use dedicated goggles cleaner, as other products could be corrosive to the lenses and wear them down.

Image by Evan Cornman from Pixabay

2: Look Where You Shoot & Do Not Hit Anyone Without Eye Protection

It is very important to make sure that you are not “firing blind.” Beginner paintballers tend to close their eyes when shooting. This is totally natural! However, you will be allowed to practice firing at a marker before the competition starts so you can get used to the feeling. 

You always need to look where your marker is aiming before you shoot. First, make sure that you are within the field of play. Then be sure that the person you are aiming at, and everyone else around, is wearing proper protective equipment. Next, check that the person you are aiming at does not have their hands up. (As you will read below, this means that they are already out and exiting the playing field.) Finally, make sure you are aiming at the person’s torso, not their face.

If anyone does not have goggles on, your marker should be pointed down at the ground! Do not shoot even if the person without eye protection is on the side and not where you are aiming. Paintball markers are not the most precise shots, and someone could easily run in front of your target at the last second. This is why if you see someone without goggles on, you need to lower your paintball marker until they exit the field of play.

3. Give a Player the Opportunity to Surrender & Be a Good Sport

One common paintball safety practice is the idea of surrendering. If a player is close to you, within twenty feet when outdoors, you should give them the chance to surrender before shooting them. Getting hit by a paintball at such close range can be quite painful, so it is sportsmanlike to announce yourself and not actually shoot the person. You can yell “Surrender” or “You’re out” to tell the person that you got them, even though you aren’t firing your marker.

On this same note, if someone has snuck up on you and lets you surrender, do it. It would be poor sportsmanship to run away and say you are still in the game because you didn’t get hit. Trust us when we say that you do not want to get hit at such close range. When someone lets you surrender, put your hands up and exit the field.

4. Do Not Shoot Anything but Your Target

If you need to practice shooting, you will have access to a practice range and targets. Otherwise, you should only shoot at other players or targets in the field of play. Do not shoot at any wildlife, passing cars, or structures outside of the playing area. 

For one thing, it may be illegal, but it is also dangerous. You could hurt someone, and the paint in paintballs can leave behind a stain. Shooting when you are not supposed to is an easy way to end your day early by getting kicked out. Be respectful of your surroundings and only shoot at designated targets.

Photo by Pengyi zhang on Unsplash

5. Always Use a Barrel Sock and the Safety

There are two features of a marker that both make for essential paintball safety tips. First, a barrel sock is exactly what it sounds like: a sock that goes over the head of your marker’s barrel. This blocks paintballs from exiting the barrel if the marker accidentally discharges. Leave the barrel sock on until play is about to begin, and put it back on the barrel immediately once you exit the field.

The second is the safety, which you toggle on or off to be able to shoot. Anytime you are not on an active playing field, your safety should be in the ‘on’ position. This will make it impossible to pull the trigger, thus preventing you from accidentally discharging the marker.

6. Exit with Your Hands Up

When you are ready to exit the playing field (because you were hit, surrendered, or just need a break), you must announce yourself. To make it clear to other players that you are leaving, you should yell “out” and raise your hands and your paintball marker above your head. 

Be sure to walk off the field of play quickly and directly. If you are looking around at other players or zigzagging through obstacles, other players might mistakenly shoot you. Keep your hands up the whole time and keep your goggles on. 

Once you are out of the playing zone, you should first turn the marker’s safety on and put the barrel sock back on. Once your marker is protected, then you can take your goggles off, relax, and watch the rest of the game.

Photo by Vince Fleming on Unsplash

7. Take Cover to Rest and Reload

The best way to avoid getting hit is to ensure you don’t spend too much time in the open. Here are a couple key paintball tips for finding good positions on the field. First, if you can see in all directions, it means you are visible in all directions. And second, just because you can’t see someone doesn’t mean they can’t see you. It just means they are better hidden than you are. 

You want to keep yourself hidden, but not overly so. After all, if you stay in one spot all day, you’ll never hit anyone. Moving among protected areas is actually safer, too, as your opponents are doing the same to find you. You should run between trees or shelters, also called bunkers, and rest only when you are in a protected spot.

When you need to reload, find a safe spot, get low, and keep your back to a wall. You may be tempted to fire a shot to make sure your marker works, but be warned that the sound will give away your position!

8. Do Not Attempt to Fix a Paintball Marker Yourself

If your marker is jammed or having an issue, do not try to make any modifications on your own. You should bring it to staff or experts to fix it for you. Attempting any maintenance can be very dangerous for you and other players.

For one thing, markers may still have a charge after the CO2 canister has been removed. The proper way to take off a CO2 canister is to fire the marker (with no paintballs in it) as you remove the tank in order to release built-up air as you go. However, if you are renting a marker for the day, this is not even something you will have to worry about. You should leave the canister alone completely and tell staff if something is wrong.

Similarly, a paintball marker that you rent will come ready with proper settings. For outdoor challenges, markers should be set to around 300 feet per second (fps). Some ranges might require a slightly lower velocity, like 285 fps. Whatever it is, do not make any modifications to the marker.

Image by Christoph Schütz from Pixabay

9. Stretch & Drink Lots of Water

Paintballing requires a lot of physical activity. With all that running around, it’s important to stretch beforehand like you would for any other sport. Make sure you stay hydrated and listen to your body if you get too hot or tired. A paintball competition could last for a couple of hours, depending on the type of play and the number of players. Take a break when you need it so you can head back on the field strong and ready.

10: Have Fun!

Paintballing is an awesome outdoor activity to enjoy with a group of friends. With just a little preparation and practice, you can start an invigorating new sport that lasts for hours at a time. These tips will help ensure your paintball challenge is fun, safe, and injury-free. Now get out there and enjoy the game!

How to Start Mountain Biking

Are you looking to add some excitement to your cycling? Mountain biking is an awesome exercise, adventure, and challenge all in one. The trail can be intimidating to beginners, but you’ve come to the right place to learn how to start mountain biking. If you know how to ride a bike, you’ve got all the fundamentals you need.

In this beginner’s guide to mountain biking, we’ve got everything else you should know before hitting the trail.

Photo by Joanne Reed from Pexels

What is Mountain Biking?

First and foremost, you should know some fundamental differences between road cycling and mountain biking. This is because mountain biking involves biking over uneven terrain, like rocks and tree roots, creating a need for a very different type of bike than those used for road cycling.

Unlike road bikes, mountain bikes have wider tires with improved grip and suspension frames to provide a smoother ride over bumpy terrain. You can imagine how a rigid frame wouldn’t fare well on a mountain biking trail, so the suspension is key to a comfortable ride. Mountain biking frames also allow riders to sit taller to have better visibility of the trail. 

Finally, it’s best to use platform pedals on a mountain bike, which means you don’t clip in. Most important for beginners, you should be prepared to fall or jump off the bike at any time when going down a trail for the first time as you can pick up speed incredibly fast. Strapping into your pedals can actually be more dangerous on a mountain bike.

Gear Needed for Mountain Biking

The Essentials

Obviously, you’ll need a mountain bike. As noted above, you should make sure your bike has partial or full suspension for the most comfortable ride. Some mountain bikers use rigid bikes, as they use less energy for climbing the mountain. However, this beginner’s guide to mountain biking recommends at least partial suspension to absorb some of those bumps on the trail. This will keep you safer and more comfortable as you get used to the difference between road cycling and mountain biking.

The other essential items for getting started mountain biking are protective equipment. As a beginner, you should expect to fall, and protecting yourself will save you from a rough descent that ends early and in pain. A helmet is an absolute must while mountain biking, as there are plenty of hazards, you could hit your head on if you fall. Unlike road biking, mountain biking helmets are full face, with visors to protect your eyes from tree branches and debris. Elbow and knee pads are other important pieces of gear to keep you safe on the trail.

What to Wear on a Mountain Biking Trail

Dress according to the weather to stay comfortable and safe on the trail. It’s best to wear a dry-fit shirt that will wick away moisture and keep you dry. Mountain biking shorts with chamois padding (aka butt pads) are key for absorbing some bumps and reducing saddle fatigue.

Similarly, gloves are essential for keeping your hands and wrists comfortable all day long. Mountain biking with bare hands can cause blisters, and when you fall, you could cut yourself. Gloves will protect your palms and offer a little padding and warmth. 

Finally, a comfortable pair of light boots are the best alternative to mountain biking shoes if you’re learning how to start mountain biking. You want something with a stiff sole for stronger pedaling, breathable material to keep your feet dry, and a grippy textured bottom for good contact with the pedals. Another alternative is skate shoes, though these tend to be less breathable. High-rise shoes are also helpful to protect your feet and ankles in the event of a fall.

Packing Smart for a Mountain Biking Trip

There are many things you should pack on a mountain biking trip, and this is where there is a big difference between mountain bike rentals vs tours for beginners. When you rent a bike, you’ll just get a mountain bike and a helmet. On a mountain biking tour for beginners, you’ll have a guide who will pack all the essential gear and help ensure you have a great day.

The most important bit of gear is a map! If you’re heading out without a guide, please don’t forget a hard copy of your directions. It’s important to not rely on electronics on the trail: there likely won’t be cell service, your battery could die on an unexpectedly long day, or a hard fall could break your phone. Know the trail and the day’s plan before heading out, and always bring emergency gear in case you get lost. 

Next, a small first aid kit is essential for a beginner mountain biking trip since we all fall when we’re learning. As far as getting your bike back in shape after a crash, there are a few things you’ll need. You should always carry a spare tube or two and a bike pump. Unlike biking on the road, potential tire busters are all around on a mountain biking trail. Knowing how to replace a tire and having the gear you need will keep you prepared and safe on the trail.

A bike multi-tool is another must, especially for longer rides. Even with suspension frames, mountain biking is a bumpy ride, and it’s normal to need to make small adjustments or fixes over the course of the day. A bike multi-tool with the right size hex wrenches for your bike will make a huge difference in your trip’s success.

Finally, when you pack food and water for your day on the trail, go ahead and pack extra. It’s easy to get a little lost or delayed due to a mechanical issue. Expect a mountain biking trip to last longer than an equivalent road cycling trip, and pack accordingly. If you have one, a hydration pack is a great way to make sure you’ve got enough water for a long day. We promise: it’s worth the extra weight to have the energy and hydration needed to finish strong.

Photo by Chris Henry on Unsplash

Mountain Biking Tips and Techniques

Get a guide

Finding a tour that specifically offers mountain biking for beginners is a great first step. You’ll get in-person professional advice on how to start mountain biking, and you’ll start down an easier trail that is suitable for beginners.

Stretch Well and Don’t Tense Up

When going over obstacles on the trail, it’s important to stay loose and let the bike ride free. Hover your butt over the seat, so you don’t feel every bump, and keep your elbows high and your knees out so you can go with the flow.

Stay Balanced 

A big difference between road and mountain biking is the need to shift your weight around to stay on the bike. On a flat road, you can pretty much sit back and relax. On a mountain bike, you need to make constant small adjustments – side to side and front to back – to maintain your center of gravity and not tip over. It’s sort of like riding a bull, hopefully with less bucking.

Keep a Steady Pace

One thing that will help you manage rough terrain is maintaining an even speed with your brakes and gears. Big obstacles are frightening, and it makes sense that you’ll want to slam on the brakes sometimes. But that’s a good way to go over the handlebars (via the front brakes) or fishtail and skid out (on the back brake). 

Gentle use of the brakes will help you keep an even speed and give your bike the momentum it needs to get over bumps without too much work on your part. You can also move between gears in response to terrain changes that you see down the line. Paying attention and shifting early will make your life easier and help you keep your momentum. 

Chin Up, Eyes Down

Paying attention while on the trail is key. Road cycling offers consistent, smooth terrain, and you have time to look around, enjoy the scenery, and even change the song on your phone. As a beginner mountain biker, you need to stay vigilant by watching the trail in front of you. Look past obstacles and focus your eyes on where you want the bike to go. This will help you naturally bike around danger without needing to think too much about it. 

Proper biking posture will also keep you focused and safe. Mountain bike frames keep riders in a more upward stance for a reason. You want to keep your head up, looking down the trail at future terrain. This will give you time to prepare and react to potential obstacles. Just like driving, focus your attention a few seconds down the trail and use both your central and peripheral vision. This way, you can see the whole trail, including problem areas and safer alternate routes.

Have Fun!

Now that you know what to wear and pack and how to start mountain biking, you’re ready for your first trail experience. We hope you are feeling confident and excited to explore this rugged alternative to road biking. Thanks for checking out this beginner’s guide to mountain biking.

Have a safe and amazing time on a mountain biking for beginners guided tour!

Hiking Pikes Peak in Colorado Springs

There are countless reasons to visit Colorado, and the plethora of world-class outdoor recreational activities is near the top of that list. Whether you are drawn to the skiing, fat biking, ice climbing of the winter season or the hiking, climbing, and fishing of the summer, The Centennial State has something for everyone.

No matter where they are coming from, many visitors to Colorado have the dream of standing on top of one of the state’s fourteeners – the fifty-eight mountain summits standing over 14,000 feet above sea level. Towering just twelve miles west of downtown Colorado Springs is Pikes Peak, one of the most sought after these peaks.

If you plan to visit Pikes Peak, reaching its summit should make your must-do list. Lucky for you, there are a variety of ways to do so. The Manitou and Pikes Peak Railway is the world’s highest cog railroad and will bring you right to the summit. Alternatively, you could also drive your vehicle to the top using the Pikes Peak Highway.  

However, for the more ambitious, there truly is no better way to enjoy this beautiful mountain than with a Pikes Peak hike. To hike Pikes Peak is to deeply immerse yourself in nature and embrace the challenge of earning a fourteener summit under your own power. If this sounds like a worthy endeavor, you have a couple of options available to you, and this guide to hiking Pikes Peak is here to help. 

Photo by Joe Dudeck on Unsplash

Pikes Peak hike on the Crags Trail

Length: 14.5 miles round trip

Trail Difficulty: Moderate

Elevation Gain: 4,400 feet

Best Seasons: June to October

Map: The Crags Trail

Directions: Take US 24 west from Colorado Springs to Divide, where you turn south on Colorado Hwy 67 for approximately 4 miles. After passing Mueller State Park, turn left on Forest Service Road 383. 

The Crags Trail is the easier hike to the summit of Pikes Peak, covering a shorter distance and less elevation than the Barr Trail described below. Despite being easier, it sees less foot traffic and generally offers hikers a little more solitude on the trail. The views from the trail of the Continental Divide, once above the treeline, cannot be beaten. 

After leaving the trailhead (about 1/10th of a mile into your hike), you will hit Fourmile Creek, where you will need to turn right and cross a bridge to get onto trail #664A. Hike through the forest for a little while before eventually hitting a series of switchbacks that will deposit you above treeline.

From here, the real climbing begins as you approach a mountain saddle at 12,750 feet and Devil’s Playground just beyond, with the route and summit finally coming into view. Cross the Pikes Peak Highway before beginning the final 2-mile slog up a boulder field to the summit. The final push requires hikers to keep a close eye out for cairns marking the path of least resistance to the top.

Parts of this route can see snow late into spring. So, the best time to hike is in early summer to late fall. The summer months offer excellent wildlife viewing, whereas fall is breathtaking in its own right with brisk mountain air and the changing colors of the leaves.  

Hike Pikes Peak on the Barr Trail

Length: 25 miles round trip

Trail Difficulty: Advanced

Elevation Gain: 7,434 feet

Best Seasons: June to October

Map: The Barr Trail

Directions: Take US 24 east into Manitou Springs and take a left at the circle to get onto Ruxton Ave. Travel on Ruxton Avenue until the very end. Then, turn right up a steep pitch and into the trailhead parking lot. Have a credit card ready to pay for parking, and arrive early to secure a parking spot. 

The most popular and most demanding route to the summit of Pikes Peak is via the Barr Trail. The trailhead sits at 6,700’ in Manitou Springs, and it takes a whopping 13 miles and nearly 7,500’ to reach the top! If you are up to the challenge, it is worth every bead of sweat.    

In the first six miles, there is almost 4,000 feet in elevation gain. The first three of those miles being the steepest. Along the way, you will see a sign denoting the Fremont Experimental Forest. Use the single-track trail and avoid the temptation to hop onto the wider path to your left. 

At just over 10,000 feet, you will reach Barr Camp and a pseudo-halfway point for the climb. If you intend to divide your trip into two days, this is a great place to spend the night. Barr Camp has hostel cabins, lean-tos, and tent camping, but it is very popular and reservations are necessary. If you intend to make this into a multi-day affair, pack the right equipment and plan accordingly.

From Barr Camp, you will enjoy a mellow stroll for a couple of miles before hitting a set of switchbacks akin to those that you encountered from the trailhead. Just above 12,000’, you will find an a-frame which is a first-come, first-served shelter for anyone to use. Soon after this checkpoint, you will encounter a sign proclaiming that there are only three more miles to the summit. At this sign, take a sharp right turn and begin the steep, high elevation switchbacks on uneven terrain until you proudly stand atop the 14,115-foot summit of Pikes Peak.

Photo by Joshua Forbes on Unsplash

Tips for your Pikes Peak Hike

Altitude

If you are visiting from a lower elevation or sea level, take Colorado altitude seriously. Allow yourself plenty of time to acclimatize before your climb. Do some warmup hikes to get your body used to the elevation, and move slowly! 

Weather

High country weather changes quickly and often, and your trip planning should account for this. Bring plenty of clothing layers that can address your needs in both very cold and very hot temperatures, as well as the common afternoon rain shower.

If there are any signs of lightning or an encroaching thunderstorm, do not push for the summit. Leave early in the morning. Depending on your pace and fitness, you’ll avoid both midday heat and afternoon storms. 

Hydration

The importance of drinking plenty of water cannot be overstated. Your body will be dealing with physical exertion and altitude, and staying hydrated is key to mitigating the potential adverse effects of both. There is no potable water on Pikes Peak, so be sure to bring a purifying system to refill your bottles along the way. 

Food

No matter how you choose to hike Pikes Peak, you will be putting in a considerable amount of effort. Your body will need the energy to keep up! High protein snacks like bars or jerky are excellent snacks, but also pack a lunch for halfway through the day. Sugary snacks are great for the quick jolt when you need them, but do not rely on sugar to get you to the top. 

Anytime you approach objectives in the mountains, it is crucial to do so with a realistic mindset. If hiking Pikes Peak seems a bit out of reach this visit, enjoy a trip to the summit on the cog railroad or Pikes Peak Highway. Everyone on top gets to enjoy the same sweeping Rocky Mountain panorama, no matter how they got there!

There are plenty of other opportunities nearby to scratch your hiking itch, including with a professional guide with our guided hiking tours in Colorado Springs. From nature walks to summit bids, we guarantee that there is a hike on Colorado’s Front Range for every adventurer. No matter where you choose to explore, the Rocky Mountains are sure to impress. 

Colorado Springs Attractions You Don’t Want to Miss

When you’re going on vacation (or even a staycation), you want to make the most of your time. You didn’t take time off work, set up dog sitters, and play Tetris with your luggage in the back of the car to visit a bunch of attractions that you ended up not enjoying. You want to get what you came for and experience the most exciting things to do in Colorado Springs – the ones that you have to do in order to say you’ve truly been to Colorado Springs. 

But with the overwhelming number of brochures at rest stops and online advertisements begging for your attention, how do you decide which places to visit?

To explore Colorado Springs the way it deserves, you should focus on a few key elements: getting in nature, gaining knowledge about both ancient and recent history, and spending time relaxing to soak it all in. We’ve compiled a complete list of places you must visit in Colorado Springs with all of those points in mind. This guide will give you some direction in your travels as you’re looking for things to do in Colorado Springs. 

Cog Up/Bike Down Pikes Peak Adventure

If you’re looking for an exciting way to summit the second most-visited peak in the world – Pikes Peak in Colorado Springs, CO – then this Broadmoor Outfitters adventure is for you. 

First, you’ll catch a ride up ‘America’s Mountain’ on the world’s highest cog railway – The Broadmoor Manitou and Pikes Peak Cog Railway. Then, you’ll ride a custom-built cruiser bicycle the whole 19.5 miles back down the mountain!

Image by VIT DUCKEN from Pixabay

This adventure is one of the most unique things to do in Colorado Springs. The Cog Up/Bike Down Adventure is suitable for anyone ten or older at any fitness level. Broadmoor Outfitters provides all the safety gear, including full-face helmets, high visibility vests, and gloves. The pace is set by a Broadmoor guide who will lead the way for the duration of the ride, and you’ll feel safe knowing a sweep van will follow the group to pick up anyone who ends their ride early. Remember, you’ll need to book this adventure at least two days in advance to secure your spot!

Woods Course Zipline

Ziplining is where exhilaration meets exploration! Hiking and biking are excellent ways to explore Colorado Springs, but ziplining is incredibly cool as you get a bird’s-eye view of the landscape! You’ll be 150 feet from the ground, sailing through ponderosa pine forests, gliding over the gorgeous Midnight Falls, and soaring through Colorado’s Rocky Mountains on this Broadmoor Outfitters adventure.

Image by Dragan Tomić from Pixabay

The Woods Course Zipline is suitable for beginners, but Broadmoor Outfitters also offers other, more advanced ziplining tours for people looking for a big thrill.

Explore Garden of the Gods

Garden of the Gods was named by Rufus Cable when he stood atop Pikes Peak, saw the glorious rock formation, and declared the area “…a fit place for the gods to assemble.” 


The Garden of the Gods Visitor and Nature Center is a paradise and one of the most popular Colorado Springs attractions. You’ve got plenty of options for how to explore these 300-foot tall sandstone rock formations; there truly is something for everyone! There are activities for explorers at all fitness levels, including but not limited to hiking, rock climbing, and Jeep and Segway tours.

Photo by Jude Infantini on Unsplash

Western Museum of Mining and Industry

To bring your adventurous Colorado Springs vacation full circle, we recommend getting some historical context of the area by visiting the Western Museum of Mining & Industry. This museum offers 27 acres of exhibits, each containing over 4,000 artifacts from the 19th and 20th centuries. 

As you wander the campus, you’ll also get to see the Reynolds Ranch House – an Edwardian Lake-style ranch home that is included on the State Register of Historic Properties. This isn’t an ordinary museum; exhibits are set up both indoors and outdoors and feature restored steam engines and mining equipment, as well as a fully operational Stamp Mill and Blacksmithing Demo Shop. You’ll learn about the environmental impact of mining on wildlife and local plants and see the Mine Reclamation exhibit, which shows visitors the process of turning abandoned mines into useful land.

Manitou Cliff Dwellings

From 1200 B.C. to 1300 A.D, Native Americans known as Anasazi lived within natural and, eventually, constructed settlements high in the cliffs of canyon walls. In the Colorado Springs area, the ancient Anasazi cliff dwellings are located at the foot of what we now call Pikes Peak. The Manitou Cliff Dwellings are open to the public for self-guided tours. 


As you wander among the rooms carved within the vertical canyon walls, it’s only natural to wonder, “How in the world did they (the Anasazi) get up here?” That mystery, along with the settlements’ astonishing beauty, makes the Manitou Cliff Dwellings a popular attraction in Colorado Springs. Check out the FAQ section of the Manitou Cliff Dwellings Museum website to learn more about how to visit this architectural wonder.

Photo by Cupcake Media on Unsplash

Organic Spa at Broadmoor Resort

This luxurious partially organic Spa at Broadmoor Resort is featured in the Forbes Travel Guide. It’s certainly one of the best Colorado Springs attractions for those looking for a bit of pampering. 

This spa is the perfect way to relax after a full day of adventuring in Colorado Springs! Before your desired spa treatment, you’ll sit quietly in the Mountain View Room, overlooking the lush Broadmoor Golf Course greens. In the background, a stunning scene of Colorado’s Rocky Mountains invites you to pause, unwind, and relax. 

Overview

This breathtaking Rocky Mountains sanctuary is an inviting destination for both solo travelers and families. There are plenty of Colorado Springs tours and attractions that appeal to adventurers of all ages, history buffs, and people looking to unwind in the majesty of the Rocky Mountains. Remember to make reservations for all these things to do in Colorado Springs well in advance, and most importantly: have fun!

Beginners Guide to Archery

Have you ever dreamt of riding horseback, firing arrows off to pin apples to the trees behind your target? 

You’re not alone in the fantasy of becoming Legolas, Robin Hood, or the Green Arrow. We all watch these movies and shows and imagine what it would be like to have the skills that these legends have developed over time. 

One wildly misleading part of these archery depictions is the lack of intense training over years and years that one needs to become a professional. There was someone training baby Legolas and giving him archery tips as he missed his target repeatedly. We all have to start somewhere. 

Archery is a great sport to get into as a beginner. There isn’t a huge initial investment, it’s easily accessible, and you don’t need a ton of gear to try it out. There are shooting ranges all around that will gladly let you explore the bow and arrow, even as a beginning archer. While the internet and other resources around you are filled with a wealth of archery tips, we’re going to dive into the best way to get started on your new journey.

So, nock your arrow, take sight, and let’s see what targets we can hit.

Broadmoor Outfitter’s Beginners Guide to Archery

Photo by Sadie Esch-Laurent on Unsplash

Bows

It can’t be said enough that archery is a simple sport at its roots. There aren’t too many moving parts, and you don’t have complicated technology. It’s a tool that people have been using for thousands of years, way before we relied on smartphones to do everything for us.

Now, you can easily Google, “What is archery?” and have your answer in an instant. Still, the bow takes time to practice, learn, and truly master. Fortunately, archery for beginners is much more simple than mastering it. 

You can’t practice archery without is the bow. This may be common knowledge, and you may be sitting there saying, “Duh, of course, you need a bow,” but there’s a little more to it. There are several styles of bow, and each has pros and cons.

So, to get you started on the right foot, here are the two basic designs of bows.

1. Recurve

A recurve bow is the simpler of the two bow styles. In essence, this bow style utilizes the curve of fiberglass, or sometimes wood, limbs to provide power to your shot. These limbs are attached to a handle that houses the arrow rest, where you will be looking while aiming.

A single bowstring attaches these two arms and curves them against their natural direction, amping up the potential force. All of this power goes into the arrow as soon as you pull back the bowstring and take aim. 

A recurve bow looks more like a traditional Robin Hood style bow and is probably what you will want to try using on your first time shooting. They aren’t complicated, they give you a good idea of how to control a bow under pressure. Plus, they are much cheaper than their counterparts.

Recurve bows are typically a relatively low draw weight that won’t make your arms shake uncontrollably while pulling back the first time. If you’re looking to do some more complex or powerful shooting, you can look towards other bow styles. 

2. Compound

A compound bow is an ingenious invention that allows the shooter to hold aim without putting too much strain on their arms and shoulders. This was accomplished by engineers in the 1970s, using cams to relieve the pressure once the string is fully drawn. The bow itself is a bit more complicated, looks much more modern and high-tech, but is perfect for anyone who goes hunting and patiently waits at a full draw for the right moment to fire. 

There are more traditional bows, like the longbow that you may imagine an elf carrying into war. There are bows specially designed to be fired from horseback and bows with all the bells and whistles for Olympic archers, but we’re talking about archery for beginners here.

One of the best archery tips we can give you is to start easy, don’t grab a bow that will be too high of draw weight. You will most likely end up not enjoying the sport because it’s too difficult to come near a target while straining to draw the bow. 

Photo by Laura Crowe on Unsplash

Arrows

While there are many styles of arrows for hunting and target practice, the best idea for starting up is to buy a cheap archery target and some target arrows that are relatively affordable. A lot of these are going to be aluminum or carbon, which are great materials for beginners. 

Learning how to re-fletch your arrows is another invaluable tool. The little feathers, called fletchings, are going to pop off over time. It’s an easy fix with the right glue and tools, and it’s worth getting to know how to do your own maintenance. This will save you money in the long run and keep you shooting for longer. 

Shooting Sequence

As this is a beginner’s guide to archery, having the gear isn’t enough. Learning how to shoot is essential.

You’ve acquired the bow and the arrows, and hopefully, you’ve found some other safety equipment such as an armguard or finger guard. Now you’re ready to shoot! The entire shooting sequence gets down to fine, delicate details when working on becoming a master.

For now, though, we’ll glance over the basics of an archery shooting sequence:

  1. Find a safe area where everyone is clear of down range, mentally prepare, and it’s time to take your stance. 
  2. With your feet shoulder-width apart, extend your bow arm towards your target. 
  3. Nock your arrow on the bowstring and place it in the arrow rest with the index feather (normally the odd colored fletching) pointed away from you. 
  4. Placing one finger above the arrow and two below, draw the bow back and bring your hand to the corner of your smile, all while keeping your elbow high. 
  5. With both eyes open, take aim down the shaft of the arrow towards your target. 
  6. Take a deep breath in, and slowly exhale.
  7. On your exhale, release.
  8. Celebrate.

Okay, maybe you won’t be celebrating the first shot, but keep at it. Learning archery is a process, and it requires a lot of patience and practice. Keep working on your form and pay attention to the little details. 

Where to Practice

Since archery can be pretty dangerous, one of the safest ways to start is with a guided introduction to archery.

When beginner archery in Colorado is done right, it is a fun family activity that everyone can master. Set up a small target range at home if you have the outdoor space. If you don’t, find the closest archery range. The range is a great place to meet fellow archers who can share archery tips and are willing to build community through the sport. 

Soon, you won’t need the beginner’s guide. Nocking an arrow and pinning five into the bullseye in a row will feel natural. Keep on practicing, and remember, we were all beginners at some point. 

Top 5 Outdoor Tours in Colorado Springs, CO

Colorado Springs, located an hour south of Denver, CO, attracts many outdoor enthusiasts, families, and thrill-seekers to explore and play in its rugged wilderness each year. The city sits at the eastern foot of the Rocky Mountains and is home to some of the state’s most iconic sights, such as the Garden of the Gods. The area is ripe with opportunities for outdoor adventure. So ripe that when planning your excursion, you may be wondering which Colorado Springs outdoor tours to experience.

Luckily, there is no shortage of premium tours in the area to match its diverse opportunities for outdoor recreation. Outdoor tours are a unique way to experience wild places and activities through the eyes of a seasoned guide. Regardless of one’s experience level, partaking in a guided tour is a gratifying and fun experience. On a tour, you can expect to learn a new skill, meet new people, and gain firsthand knowledge that you will carry with you long after it ends. 

So whether you’re planning your first or thirty-first trip, check out these Top 5 Outdoor Tours in Colorado Springs, CO.

Image by Dragan Tomić from Pixabay

Guided Hiking Tours

Guided hikes are an enriching and memorable way to explore new trails beyond simply following signs, maps, or apps. Based out of Colorado Springs, Broadmoor Outfitters provides top-of-the-line guided hikes on the city’s most iconic trails. Visitors of all ages can explore Colorado Springs’s breathtaking mountains in small groups of up to 12 people.

For those who would like to learn about the Rocky Mountains’ flora and fauna while immersed in it first-hand, Broadmoor Outfitters also offers the option to have a naturalist as your guide! Tours take place daily at 9:30 am and 1:30 pm and last about 3 hours, with the opportunity to extend the hike’s duration when booking a reservation. Visitors are encouraged to let the staff know the kind of hiking they’d like to experience so that the guides can curate an itinerary aligned with each group’s wishes. This tour has something to offer for anyone looking to explore the Rockies on foot, regardless of if you’re a solo traveler or a family of four.

The Broadmoor Hunt

If a mild hike that combines problem-solving and a bit of history sounds like a blast, then look no further than the exciting and one-of-a-kind Broadmoor Hunt. The Broadmoor hunt is not your typical outdoor tour but instead a thrilling app-based scavenger hunt. During the hunt, individuals will put on their metaphorical Indiana Jones hat to learn about the historic Broadmoor Hotel while solving problems as they explore the hotel grounds and surrounding landscape.

This tour is open to individuals of all ages but is the perfect fun outing for families with children looking to stretch their minds (and imaginations). The tour runs daily from 10 am to 3 pm and lasts 1.5 to 2 hours. Broadmoor Outfitters also offers a corporate version of the scavenger hunt for businesses looking to strengthen teamwork among coworkers.

https://pixabay.com/photos/pikes-peak-mountain-1269035/
Image by Beverly Lussier from Pixabay

E-Bike Tours 

If the idea of cruising down scenic roads with the wind in your hair and mountains to your left and right sounds like a dream, but steep inclines and never-ending hills sound like a nightmare, then Colorado Springs E-Bike Tours are a perfect happy medium. E-bikes are gaining popularity as a fun and accessible way to experience the thrill of conventional bike tours with ease and speed.

This tour takes attendees on a 5-mile ride through the Garden of the Gods on Trek Rail 7 E-Bikes. The 3-hour tour runs daily at 9:30 am and 1:30 pm and is open to individuals over the age of 10. As a heads-up for any mountain bikers (or purists) reading this article, you can also find epic guided mountain bike tours in Colorado Springs.

Stand Up Paddle Boarding Tours

Our Stand Up Paddle Boarding Tours in Colorado Springs are the perfect option for individuals looking for an aquatic adventure despite being 1,200 miles from the nearest coastline. Stand Up Paddle Boarding developed as a relaxing and fun sister sport to surfing in landlocked areas. During this 2.5 hour tour, individuals of all ages will glide atop Colorado Springs Lake as the Rocky Mountain ridgeline reflects along the water’s edge. Seasoned SUPers know that the sport can have a big learning curve, which is why joining a tour your first time is essential for learning proper technique and form.

Tour guides will teach attendees foundational skills, such as paddle strokes, footwork, self-rescue, and how to get on the paddleboard (which is more challenging than one might think). Tours run daily in groups of 8 at 9:30 am and 1:30 pm. The tour is open to all ages, but individuals who love sports that involve balance and coordination and being on the water will likely enjoy this tour the most.

Image by Gero Birkenmaier from Pixabay

Fins Course Zip Line Tour

Last but certainly not least,  Fins Course Zip Line Tour is the perfect option for adventurous souls looking to experience Colorado Springs from the sky. You will zip through the crisp blue Colorado sky, surrounded by high peaks, and soar over Seven Falls Canyon as the waterfall roars below. This tour is not for the faint of heart. The Fins Course Zip Line consists of a staggering five zip lines, 250 to 1800 ft long that reach heights of 500ft, two rope bridges, and a 180 ft assisted rappel.

Due to its technical nature, this tour is rated intermediate to advanced and is only open for individuals aged 10-80. Tours run hourly each day from 9:30 am to 3:30 pm and last a total of 3-4 hours. So if you’ve ever looked up at the sky and wondered what the mountains looked like from the perspective of the birds flying overhead, this tour is your chance to finally find out. 

This list only covers the Top 5 Outdoor Tours in Colorado Springs, so make sure to check out all of the other outdoor tour offerings in Colorado Springs to find the experience that is right for you.

Safety Tips for Hiking in Colorado

We’ve all heard horror stories about accidents happening in the wilderness. Most of us are familiar with the novel and film “Into the Wild,” which recounts Christopher McCandless’s beautifully tragic and fatal story that takes place in the depths of the Alaskan wilderness. We’re painfully aware of notable accidents because they make for great television. However, the reality is, these tragedies are actually few and far between; there are exponentially more “successful” outings than tragic ones. The key to avoiding accidents altogether, and mitigating risks when they occur (because nature is nature, after all), is being prepared and knowledgeable before hiking in Colorado

These safety tips will cover important points you need to remember when exploring Colorado. So read on, and they’ll prepare you so that your stress is minimized and fun is maximized.

Image by Jonáš Sanislo from Pixabay

Share Your Plan

Planning and communicating that plan are both key components of hiking safety. You should never head out for hiking in Colorado (or anywhere!) without first telling someone. Whether you’re planning to hike for only one hour, overnight, or a couple of weeks, let someone know the ins and outs of your trip. For example, tell the person when you’ll be leaving and returning, where your car will be parked, and which trail(s) you’re planning to be on. Furthermore, let that person know if you change your route or any aspect of your plan. That way, if you get lost and need to be found, people will know where to look.

Be Prepared For Bad Weather

Two words: no cotton. Even if there’s no rain in the forecast, weather can change fast in Colorado. If you’re hiking during the day and get sweaty and are still in the wilderness when temps drop at night, you don’t want to be stuck in a wet, cold cotton shirt. From head to toe (or hat to socks), all of your hiking clothing should be made out of a moisture-wicking fabric such as wool or any synthetic fabric blend that’s marketed as quick dry. Bring a raincoat, an extra shirt in case of a sudden temperature drop or rainstorm, and an extra pair of moisture-wicking socks. Wear good-fitting, broken-in hiking boots that provide ankle support. Lather on the sunscreen even if it’s cloudy. 

Look over the National Lightning Safety Institute’s resource on lightning safety protocols. Better yet, print it out to have with you in case you need it.

Image by StockSnap from Pixabay 

Bring Water and Snacks 

A good rule of thumb is to bring one liter of water for every hour you plan to be hiking. This is a great standard, and it’s also wise to pack a trustworthy water filtration system such as a Katadyn or Life straw, in case you are in the wilderness longer than you planned.  Bring snacks, too, as hiking burns a lot of calories. High-calorie foods like peanut butter, candy bars, granola, beef jerky, and trail mix are all great and easy options. Don’t just toss your food wrappers on the ground, however. Follow all Leave No Trace practices out of respect for nature, wildlife, and future generations of hikers to come. 

Keep it Realistic

We know how thrilling it can be to push ourselves and have new experiences, but staying safe, smart, and within our personal limits is the number one hiking tip we can offer. Plan your trip according to your experience. For example, if you’ve never been camping overnight, it’s probably not a good idea to head out on a week-long camping trip in the backcountry. If you’re not experienced at reading maps, stick to a well-marked trail, or even stay in cell phone range so you can use your phone’s GPS in case you get turned around. Finally, unless you’re in great shape, don’t embark on a ten-mile hiking trip as your first adventure.

If you would feel more comfortable hiking with a professional wilderness guide who knows the lay of the land, then stick to these Colorado Springs hiking tours for beginners.

Image by Inna Sherman from Pixabay

Stay Updated

Know what’s going on in the area you’re planning to hike. There will often be signs at the more popular trailheads informing hikers of recent wildlife sightings and how to behave if you encounter a bear, mountain lion, or coyote. Don’t worry – these animals are usually more afraid of you than you are of them! Check out Colorado Parks and Wildlife’s page on handling conflict with wildlife to stay safe and prepared.

In addition to staying updated about the wildlife, also acquaint yourself with general trail rules and alerts. For example, a gust of wind can make a simple campfire spread out of control during exceptionally dry periods. If you plan on having a campfire, use this comprehensive, up-to-date list of current fire bans in Colorado counties to avoid any fines, or worse, wildfires.

Our best recommendation is to visit the park website that manages the trail you’ll be hiking before heading out. There, you’ll learn about current trail conditions and potential hazards.

Bring a First Aid Kit

It’s wise to have an intentionally stocked first aid kit when you head out on any length of hiking trip. The American Hiking Society is a great resource for hiking tips, including how to stock your first aid kit. Depending on how much time you plan to spend hiking, you may also consider taking a Wilderness First Aid course, where you’ll learn how to handle accidents such as broken bones and allergic reactions. 

Bringing it Together

Hiking is a great way to get exercise, spend quality time with family, and enjoy Colorado’s stunning scenery. It’s important to do so safely, however. Even though accidents are rare and mostly avoidable, the chances of them occurring increase dramatically if you’re unprepared. So, use these hiking safety tips while you’re hiking in Colorado to stay safe and stress-free. Remember to tell someone your plans, prepare for bad weather, stay hydrated, learn about Colorado’s wildlife, and pack a first aid kit. If you’re prepared, you’ll have nothing to worry about!

Remember that you can always join us for guided hiking in Colorado Springs and enjoy all the knowledge and experience that our team has to offer!