How to prepare to Conquer Colorado’s Highest Peaks: A In-Depth Guide to High-Altitude Hiking

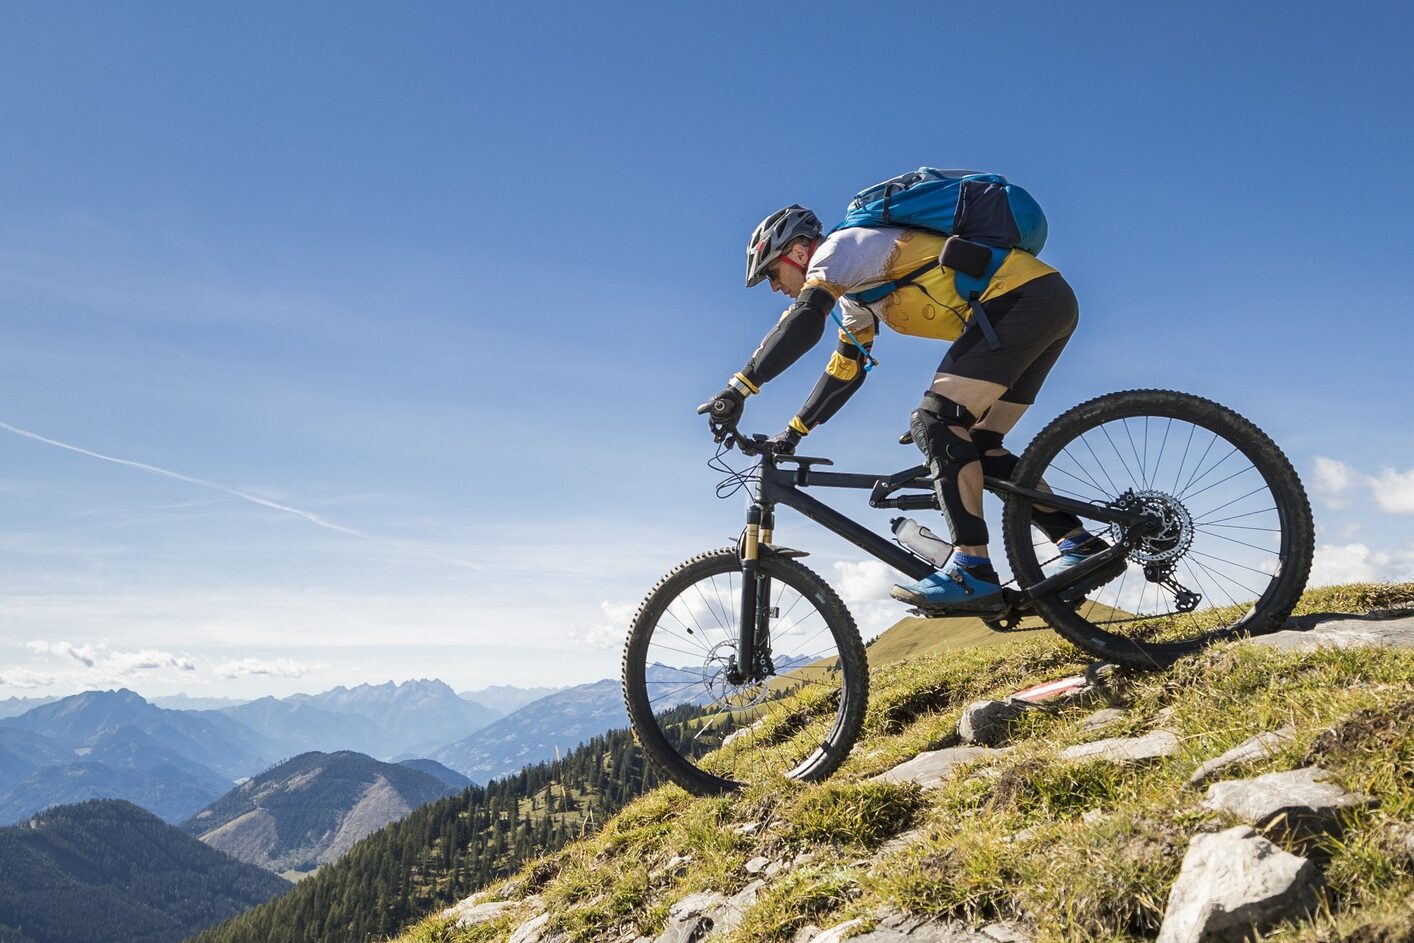
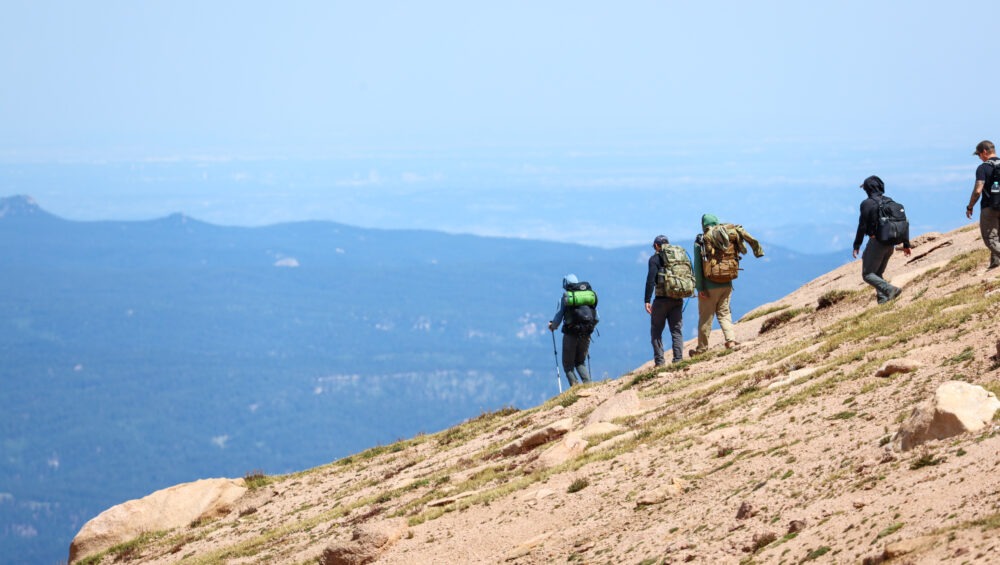
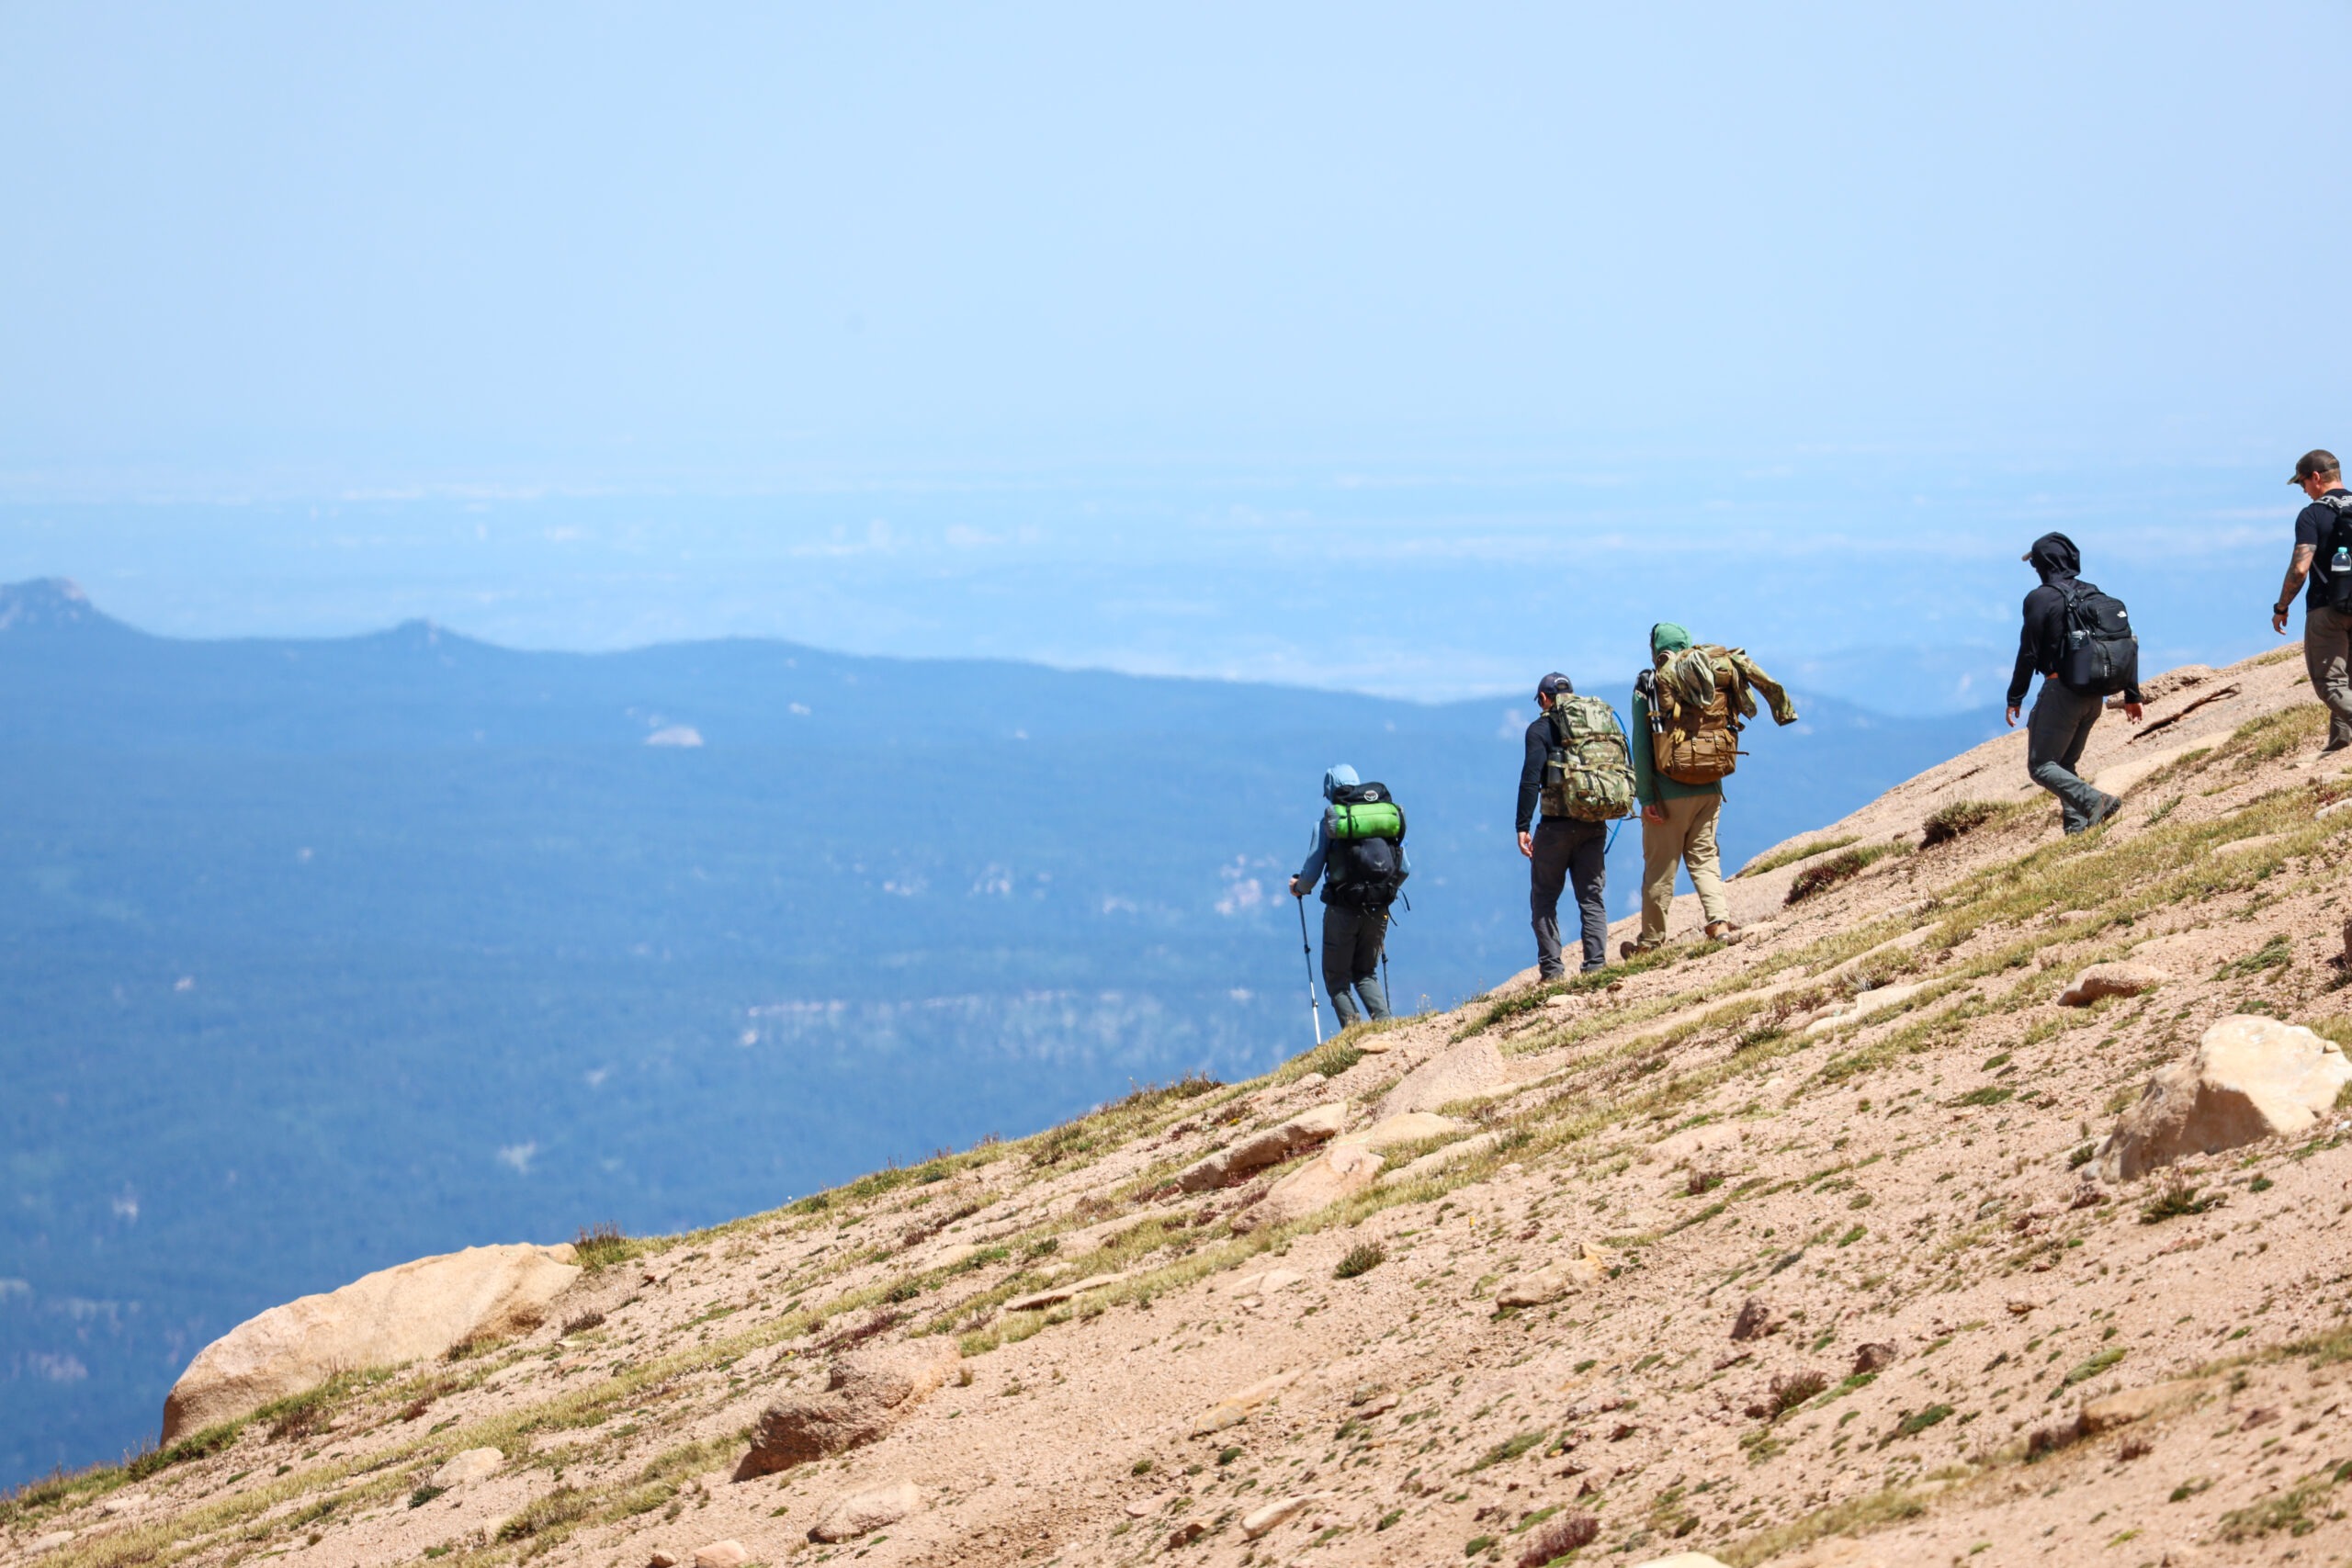
Hiking Colorado’s 14ers, or peaks exceeding 14,000 feet, is an adventure that beckons to hikers and thrill-seekers worldwide. With vistas that seem to stretch on forever, the lure of Colorado’s mountains is undeniable. But taking on these high-altitude hikes is no simple feat. The lower oxygen levels, colder temperatures, and often unpredictable weather can make these trails especially challenging, even for experienced hikers. However, by understanding these unique conditions and preparing effectively, you can make the most of your high-altitude hiking adventure.

In this guide, we’ll delve into the challenges of high-altitude hiking, explore essential tips for safety, and provide an in-depth look at how to prepare for some of Colorado’s most famous peaks.

Understanding High-Altitude Hiking Challenges

Before lacing up your boots and heading up a 14er, it’s important to grasp what high-altitude hiking entails. As you ascend, the air pressure decreases, which means there’s less oxygen available with every breath you take. This can lead to increased heart rates, faster breathing, and ultimately, fatigue. The symptoms of altitude sickness—such as headaches, nausea, dizziness, and shortness of breath—can also manifest as you climb higher.

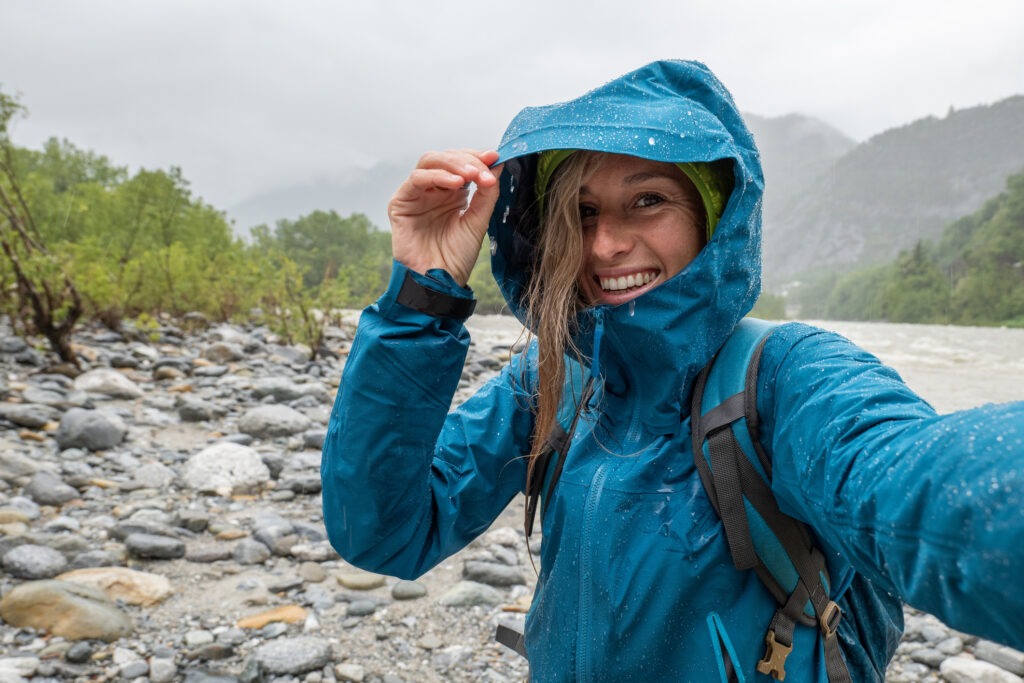
In addition to the thinner air, high-altitude areas often have unpredictable weather. A sunny morning can quickly give way to sudden storms, with rain, sleet, or even snow. Temperatures also tend to drop the higher you go, with the potential for extreme wind chills near the summit. All these factors mean that preparation is not only beneficial but essential for a safe and successful hike.

Altitude Sickness and Its Effects

Altitude sickness, also known as acute mountain sickness (AMS), can strike at elevations as low as 8,000 feet. It affects each person differently, regardless of physical fitness or previous hiking experience. The symptoms can range from mild to severe and, in extreme cases, can escalate into more serious conditions like High-Altitude Pulmonary Edema (HAPE) or High-Altitude Cerebral Edema (HACE), which require immediate descent and medical attention. It’s vital to listen to your body and know when it’s time to turn back.

The Importance of Weather Awareness

Weather at high altitudes is often unpredictable. Lightning storms can form quickly on sunny afternoons, making the ascent treacherous. Having a solid understanding of the forecast and planning your hike around it can mean the difference between a beautiful day on the summit and a hazardous experience. In Colorado, mornings tend to be the calmest and clearest, so starting your hike early can help you avoid the afternoon storms that are common during the summer months.

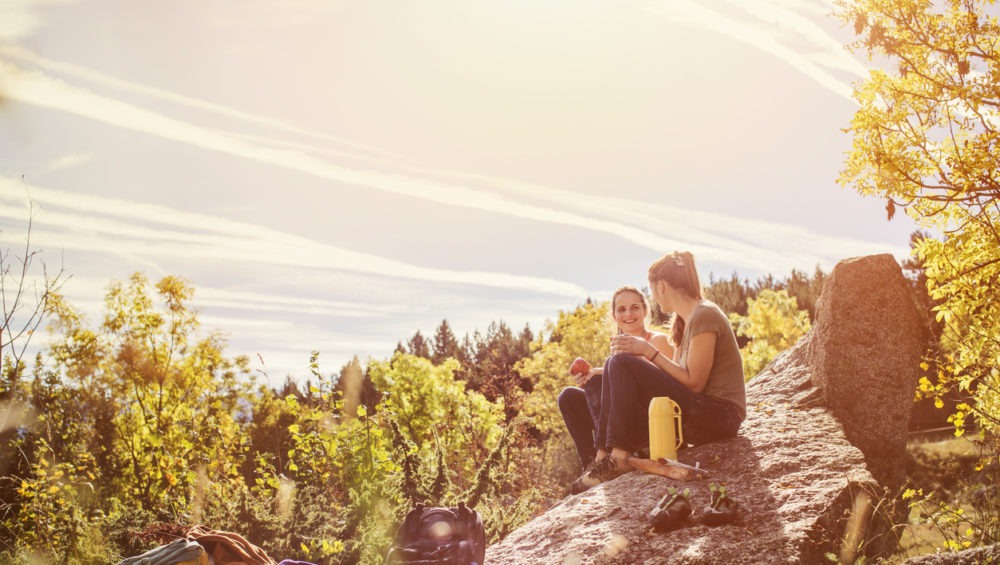
Essential Tips for Safe High-Altitude Hiking

With these challenges in mind, here are some essential tips for tackling high-altitude hikes safely and making the most of your journey:

Tip 1: Stay Hydrated

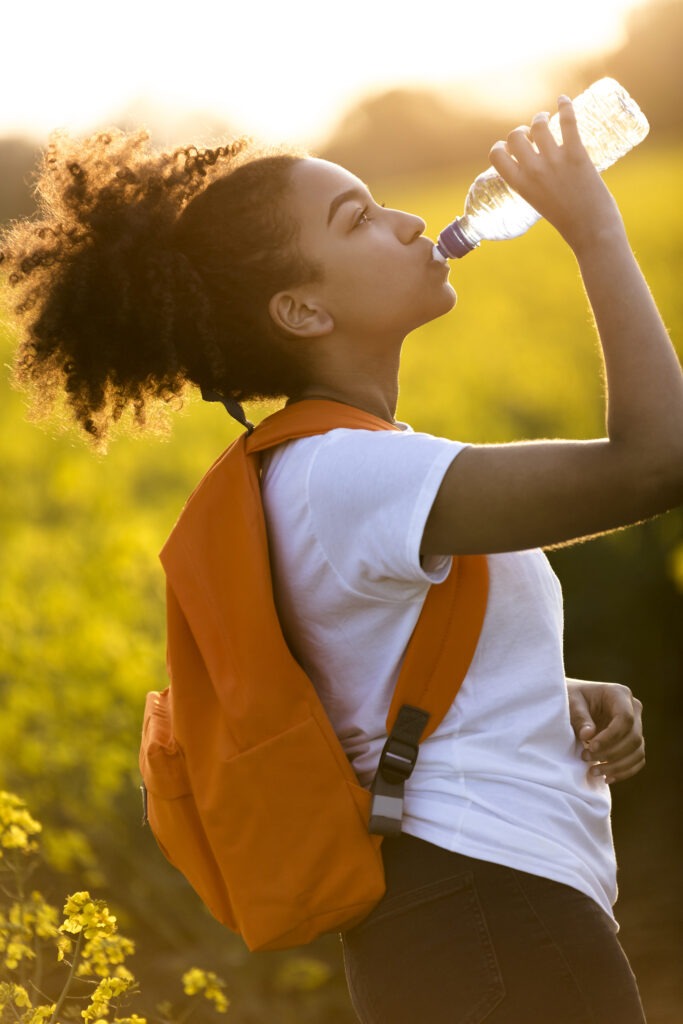
Hydration is one of the most critical factors in preventing altitude sickness and maintaining stamina. At high altitudes, the dry air increases fluid loss through respiration and perspiration. Aim to drink at least 3-4 liters of water daily while hiking, even if you don’t feel thirsty. This may seem like a lot, but dehydration can exacerbate symptoms of altitude sickness, so it’s crucial to stay ahead.

Strategies for Staying Hydrated

To make hydration more manageable, start drinking plenty of water the day before your hike. On the trail, carry a hydration pack or water bottles that are easily accessible so you can sip regularly. Consider adding electrolyte tablets or sports drinks to help replace salts lost through sweat. It’s also beneficial to monitor your urine color—clear or light yellow urine typically indicates good hydration, while dark yellow or amber can be a sign to drink more water.

Tip 2: Allow Time for Acclimatization

Acclimatization is all about giving your body the time it needs to adjust to the lower oxygen levels at higher elevations. Spending a day or two at an elevation of around 8,000 to 10,000 feet before tackling a 14er can help reduce the risk of altitude sickness. During this period, engage in shorter hikes to allow your body to get used to the thinner air.

Acclimatization Techniques

If possible, sleep at a higher elevation in the days leading up to your hike. The concept of “climb high, sleep low” is often recommended for mountaineers, as it allows for exposure to higher altitudes while resting at lower elevations, which helps the body adjust. Another helpful tip is to avoid alcohol and other dehydrating substances during this period, as they can interfere with acclimatization and exacerbate dehydration.

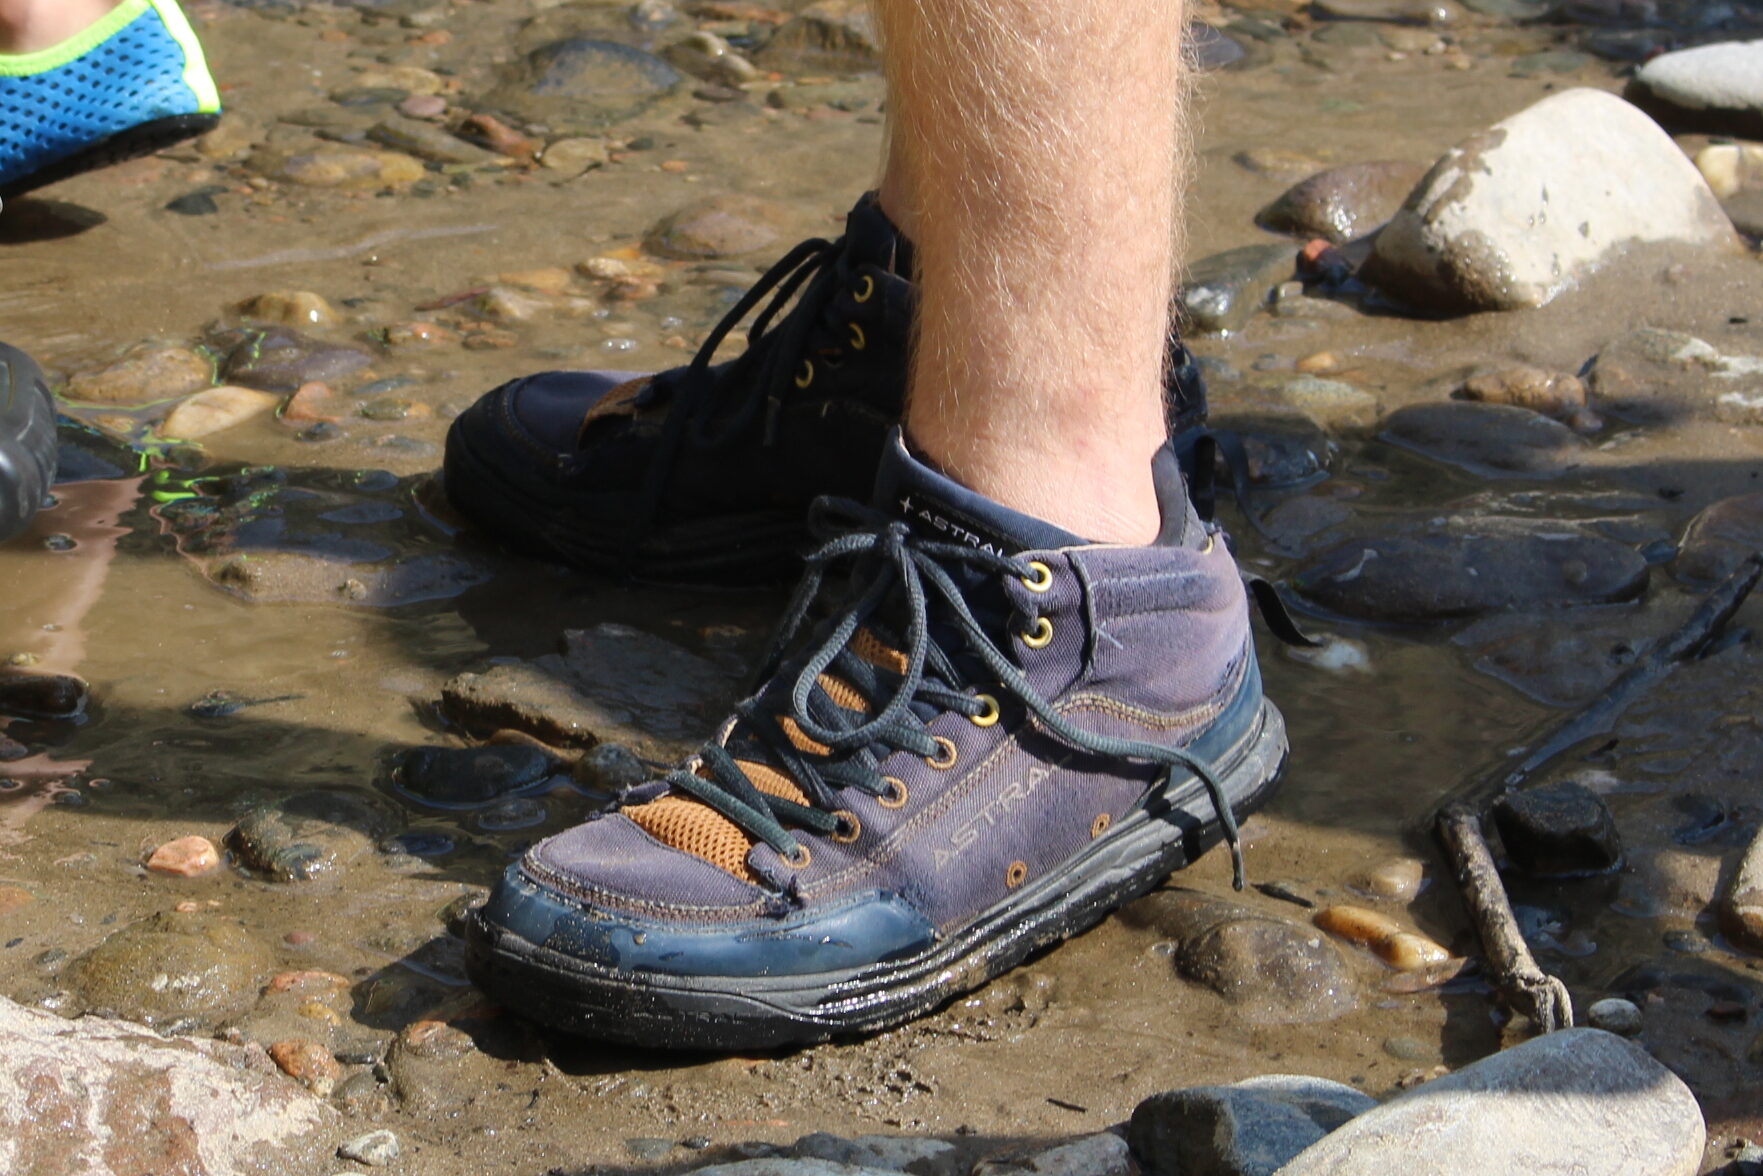
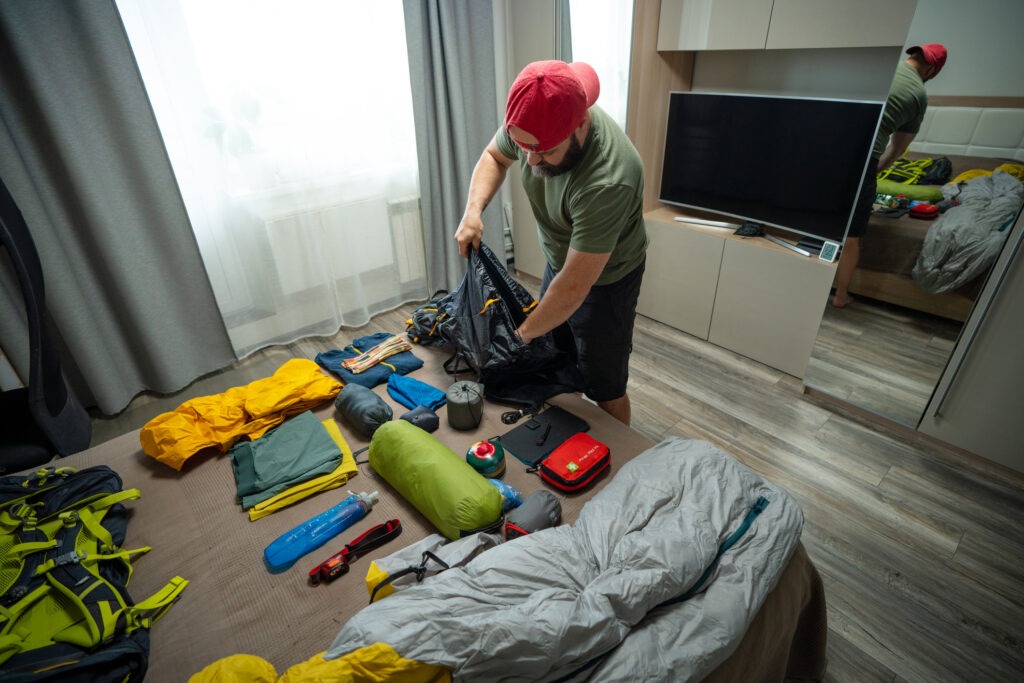
Tip 3: Pack Wisely for the Conditions

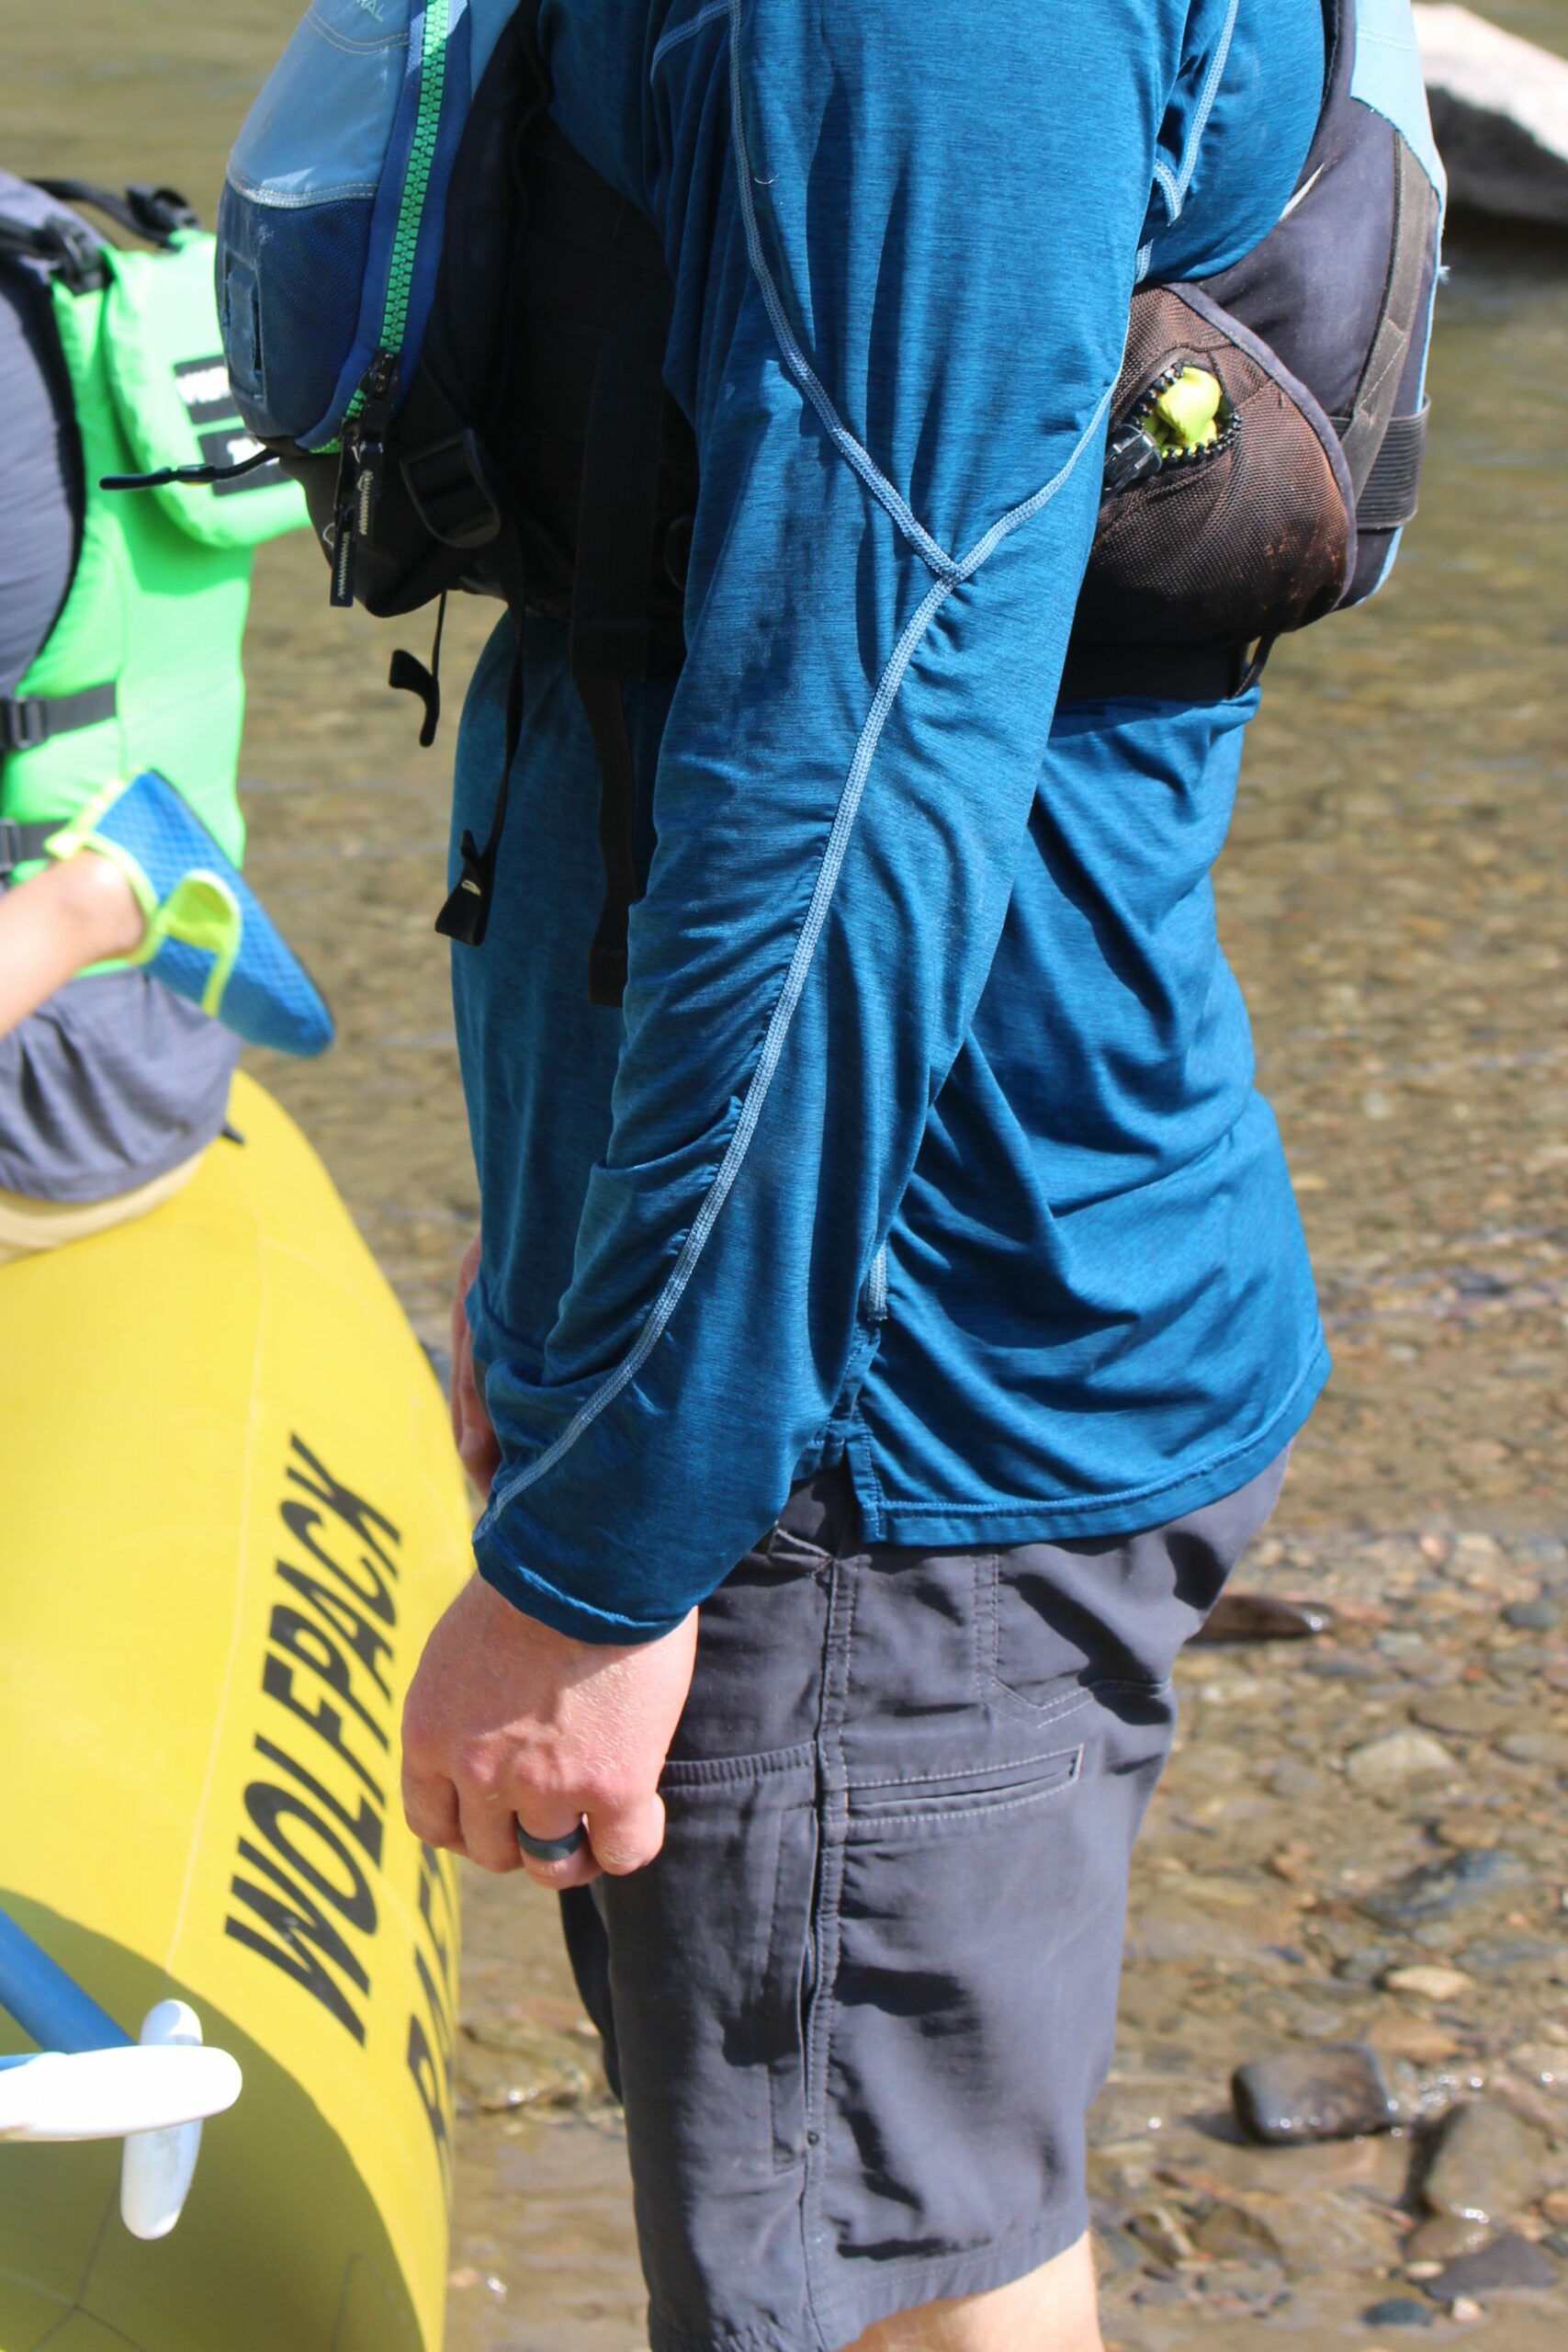
Preparing for a high-altitude hike means packing for every potential condition you might face. Layering is essential, as temperatures can change rapidly with elevation gain. Start with moisture-wicking base layers to keep sweat away from your skin. For insulation, add a fleece or down jacket, and top it off with a waterproof and windproof shell. Remember to bring extra layers, as you may need to adjust throughout the hike.

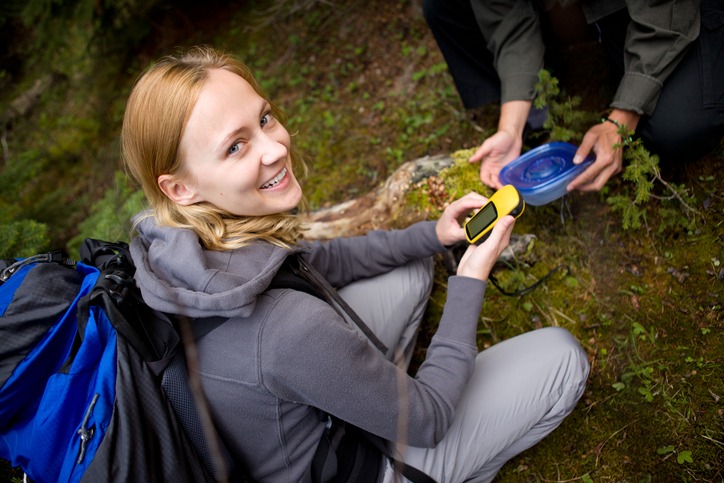
Gear Checklist for High-Altitude Hiking

Navigation Tools – A map, compass, or GPS device ensures you stay on track, especially if the trail is not well marked.

Moisture-Wicking Base Layers – A good base layer keeps you dry by pulling moisture away from your body, which is essential for staying warm.

Insulating Layers – Fleece or down jackets are ideal for trapping heat and can be easily packed when not in use.

Waterproof and Windproof Outer Layer – An outer shell protects against wind and rain, keeping you comfortable in unpredictable weather.

Sun Protection – Sunscreen, sunglasses, and a hat are essential, as UV exposure increases with altitude.

Food and Snacks – High-carb snacks like trail mix, energy bars, and dried fruit provide quick fuel for your body.

Trekking Poles – These can help with balance and reduce strain on your joints, especially on steep inclines and rocky terrain.

Hydration System – A hydration pack or water bottles that are easy to access during the hike.

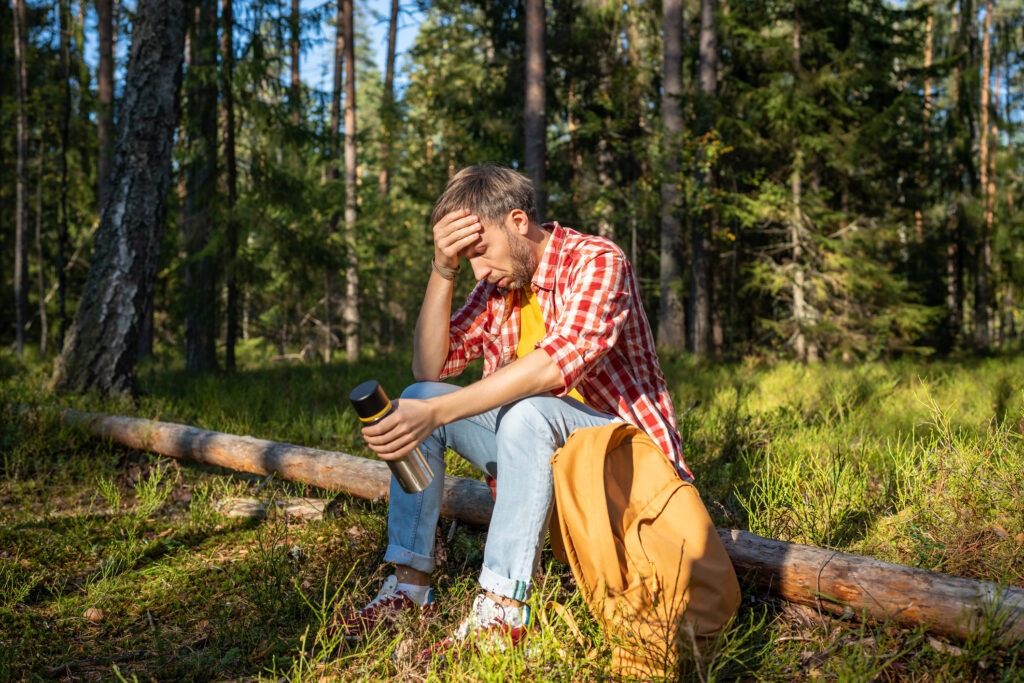
Tip 4: Recognize the Signs of Altitude Sickness

Altitude sickness can be insidious, with symptoms sometimes not appearing until you’ve already made significant elevation gains. Common signs include headaches, nausea, loss of appetite, dizziness, and fatigue. If you or someone in your group experiences these symptoms, stop, rest, and consider descending to a lower elevation. In more severe cases, symptoms can progress to confusion, inability to walk, and shortness of breath even while resting, which require immediate action and descent.

How to Respond to Altitude Sickness

For mild symptoms, descending even a few hundred feet can help alleviate discomfort. Rest, hydrate, and monitor symptoms closely. If symptoms don’t improve or worsen, it’s best to head back to a lower altitude. Over-the-counter medications like ibuprofen can help with headaches, but they are not a cure for altitude sickness. Being aware of how you’re feeling and communicating with your hiking partners is essential.

Tip 5: Take It Slow and Enjoy the Journey

Unlike hikes at lower elevations, high-altitude hiking requires a slower pace. The reduced oxygen levels mean you’ll need to go at a pace where you can still breathe comfortably. Taking regular breaks allows your body to recover, and it gives you the chance to take in the surrounding beauty.

Tips for Maintaining a Steady Pace

Listen to Your Body – If you start feeling dizzy, lightheaded, or overly fatigued, don’t be afraid to stop and rest.

Use the “Rest Step” Technique – A common mountaineering technique, the rest step involves briefly locking your knee with each step, allowing your muscles a moment to rest.

Practice Deep Breathing – Focus on breathing deeply and rhythmically to maximize oxygen intake.

Set Mini Goals – Breaking the hike into smaller sections can make the climb feel more manageable and mentally rewarding.

Additional Considerations for High-Altitude Hiking

Weather Preparedness

High-altitude trails, particularly in Colorado, are known for their unpredictable weather. Check the weather forecast the night before your hike and again in the morning. Have a plan in place for how you’ll respond if conditions change rapidly. Even in summer, temperatures at higher elevations can dip below freezing, especially early in the morning or late in the afternoon.

Emergency Essentials

Always carry a basic first-aid kit, and familiarize yourself with how to treat altitude sickness symptoms and other common hiking ailments like blisters or sprains. A whistle and a small emergency blanket can also be lifesavers in case of unexpected cold weather or an accident.

Preparing for Wildlife Encounters

Wildlife is abundant in Colorado’s mountains, and while most animals will keep their distance, it’s wise to be prepared. Know what to do if you encounter a bear or mountain lion—generally, stay calm, make yourself appear larger, and slowly back away. Also, store food securely to avoid attracting animals to your campsite or rest area.

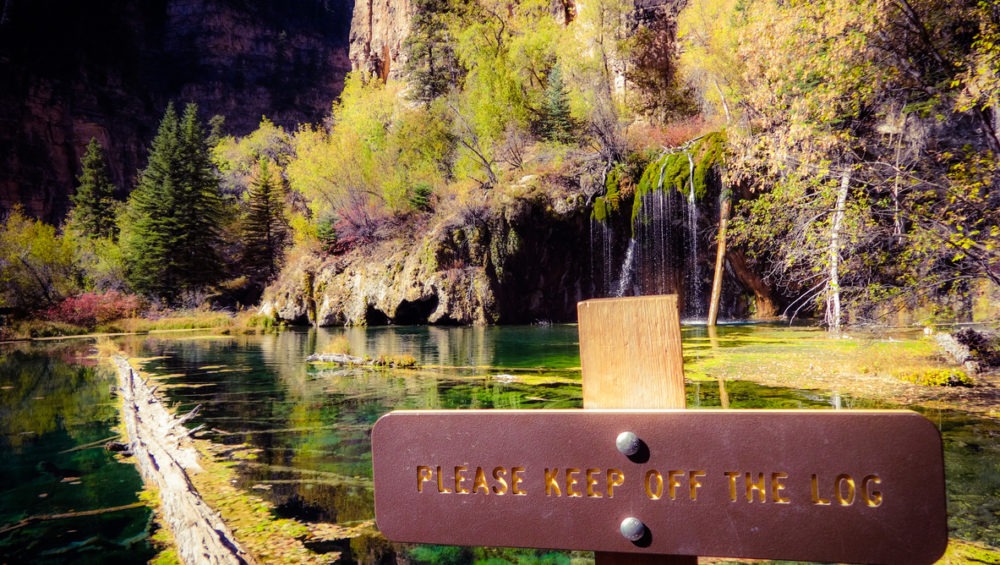
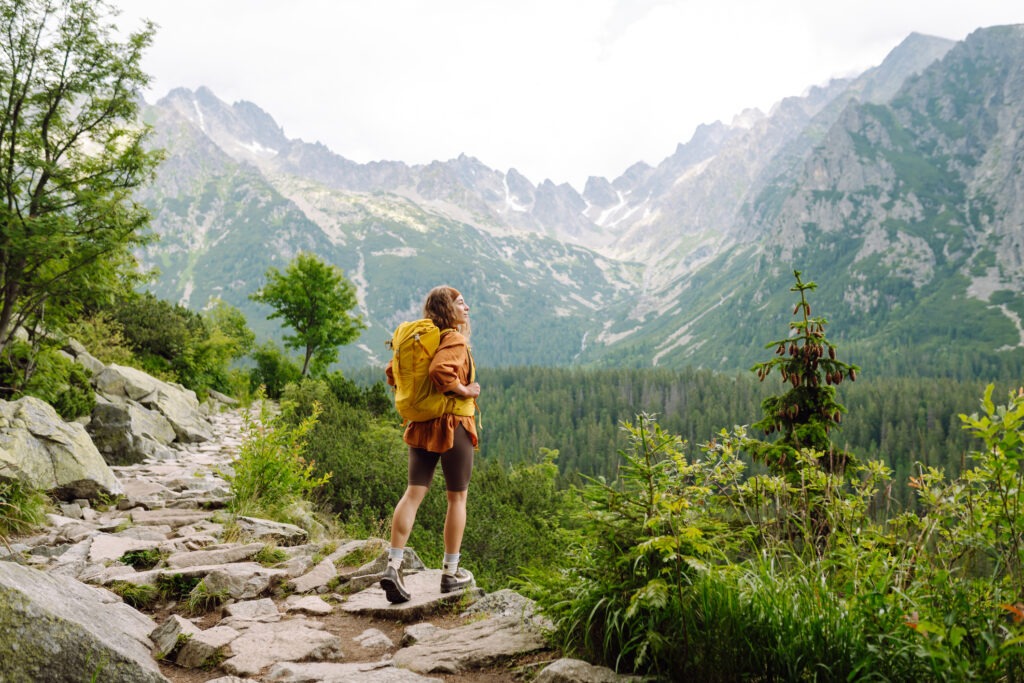
Why Colorado’s High-Altitude Hikes Are Worth the Effort

While the preparation required for high-altitude hikes may seem daunting, the rewards are well worth the effort. The views from Colorado’s peaks are nothing short of spectacular, with sprawling vistas, alpine lakes, and rugged rock formations. Reaching the summit of a 14er is a feeling like no other, as you stand on top of the world and take in the grandeur of the Rocky Mountains.

Moreover, hiking at altitude offers a unique perspective on Colorado’s diverse ecosystem. From hardy alpine wildflowers to marmots and mountain goats, the flora and fauna you’ll encounter at these elevations are specially adapted to thrive in this challenging environment.

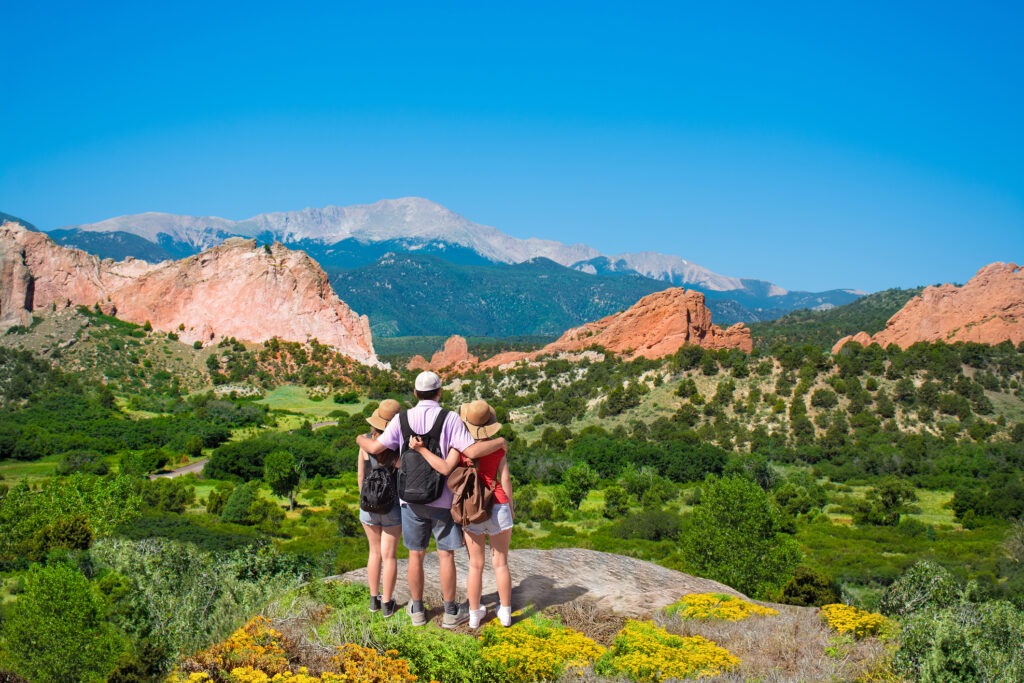
Broadmoor Outfitters: Your Guide to Colorado’s High-Altitude Adventures

If you’re eager to explore Colorado’s high-altitude trails but prefer to hike with the guidance of experienced professionals, consider joining a tour with Broadmoor Outfitters. Our guides are knowledgeable about the local terrain, weather patterns, and safety protocols, providing peace of mind as you take on these formidable peaks. With Broadmoor Outfitters, you can enjoy the beauty of the Rockies while ensuring your adventure is safe, memorable, and tailored to your abilities.

Whether you’re a seasoned hiker or new to high-altitude trekking, our guided tours offer an unparalleled way to experience the majestic peaks of Colorado. So, lace up your boots, grab your gear, and get ready to discover the best of Colorado’s 14ers with Broadmoor Outfitters by your side.

How to Be the Most Prepared Mountain Biker: Essential Gear and Tips for Your Next Ride

Mountain biking in the breathtaking landscapes of Colorado Springs is an exhilarating experience that offers both thrill and connection with nature. Whether you’re a seasoned pro or just starting out, the key to enjoying every ride lies in being well-prepared. Having the right gear not only enhances your comfort but also ensures your safety on the trail. Here’s a comprehensive guide to the eight essentials every mountain biker should have to make the most of their adventure.

1. Wear a Helmet: Safety Starts at the Top!

Your head is one of the most vulnerable parts of your body when you’re mountain biking, making a helmet an absolute must. Choose a helmet that fits snugly and offers adequate ventilation to keep you cool. It’s tempting to go for style, but always prioritize safety features like a sturdy shell and good cushioning. After all, your helmet is your first line of defense against potential accidents on the trail.

A Mountain Biker wearing a helmet and padded bike shorts.

2. Opt for Padded Bike Shorts for Comfort

Long rides can be tough on your body, especially when it comes to comfort. Investing in quality padded bike shorts can make a world of difference. These shorts provide extra cushioning and reduce friction, helping you focus on the ride and not on discomfort. Padded bike shorts are designed to enhance your biking experience by providing the support needed for those intense rides over rocky and uneven terrain.

3. Stay Hydrated and Fueled: Bring Water and Snacks

Mountain biking is a physically demanding activity that can quickly deplete your energy. It’s crucial to stay hydrated and maintain your energy levels throughout your ride. Bring a hydration pack or water bottles and fill them with plenty of water. Pack high-energy snacks like granola bars, nuts, or fresh fruit to keep your stamina up. Keeping hydrated and fueled will prevent fatigue and help you stay alert and safe on the trails.

4. Pack a Multi-tool for On-the-Go Repairs

You never know what might happen on the trail, which is why carrying a multi-tool is essential. A good multi-tool should include Allen wrenches, a chain breaker, and a screwdriver to address common bike issues. Being able to make quick repairs will not only save your ride but also keep you safe from potential breakdowns in remote areas.

Multitool for repair and maintenance of a bicycle

5. Carry a Bike Pump and Spare Tube

Flat tires are one of the most common problems bikers face, but they don’t have to end your ride prematurely. Carrying a compact bike pump and a spare tube allows you to quickly fix flats and continue your journey. Make sure you know how to change a tire before you hit the trail—practice at home so you’re ready for anything.

6. Include a First Aid Kit

Accidents can happen, no matter how experienced you are. A compact first aid kit is essential for treating minor injuries like cuts, scrapes, or blisters. Include items like band-aids, antiseptic wipes, adhesive tape, and any personal medications. Being prepared with a first aid kit ensures you can handle minor emergencies and continue your adventure safely.

7. Know Your Route with a Trail Map

Getting lost on a mountain biking trail can be more than just an inconvenience; it can be dangerous. Always have a plan and know your route. Carry a physical map, download a map to your smartphone, or use a GPS device. Familiarizing yourself with the trail beforehand and having a navigation tool on hand will help you stay on track and make the most of your ride.

Close-up picture of a bicycle’s handlebar with a smartphone

8. Keep Your Bike Tuned Up

Your bike is your partner in adventure. Regular maintenance is key to ensuring it’s ready to handle the challenges of mountain biking. Check your bike before each ride to ensure the brakes are working, the tires are properly inflated, and the chain is lubricated. A well-maintained bike not only performs better but also helps prevent accidents caused by mechanical failure.

Final Thoughts

Being a prepared mountain biker means equipping yourself with the right gear and knowledge to handle whatever the trail throws at you. By following these tips, you’ll not only enhance your biking experience but also ensure your safety and well-being. Whether you’re exploring the rugged terrains of Red Rock Canyon or navigating the trails of North Cheyenne Cañon, these essentials will help you ride with confidence and peace of mind.

Check out some of our other articles like Beginners Guide to Mountain Biking or How to Pack For a Day Hike in Colorado.

Ready to take your mountain biking to the next level? Join us at Broadmoor Outfitters for guided mountain bike tours that offer the best of Colorado Springs’ unique terrain. From the scenic trails of Garden of the Gods to the exhilarating descent down Gold Camp Road, our tours are designed to provide a thrilling and unforgettable outdoor experience. Let’s hit the trails together!


10 Ways to Introduce Your Kids to the Joy of Outdoor Adventures

There’s nothing quite like the joy of seeing your kids discover the wonders of nature. Watching them marvel at a colorful rock or squeal with delight at a gentle breeze is pure magic. If you’re eager to get your little ones outside and help them fall in love with the great outdoors, we’ve got some fun and easy ways to start. Here’s a list of kids outdoor activities that will turn your children into budding nature enthusiasts in no time!

1. Start with Simple Hikes

Kicking off your kids outdoor activities with a simple hike is a great way to introduce them to nature. Look for local trails that are short and manageable, ideally with fun landmarks like waterfalls or rock formations to keep their interest piqued. These hikes don’t have to be strenuous; they’re all about getting your kids comfortable with the idea of being out in nature and exploring.

2. Nature Scavenger Hunts

Make a walk in the park more exciting by turning it into a scavenger hunt. Create a list of items for your kids to find, like a particular type of leaf, a pine cone, or a colorful rock. You can tailor the list to match the location or season, making each scavenger hunt a unique adventure. This activity not only gets them moving but also helps sharpen their observation skills.

Scavenger hunt for girl in the park

3. Camping in the Backyard

You don’t need to head to the wilderness to enjoy camping. Set up a tent in your backyard for a night under the stars. Make it a mini-adventure with sleeping bags, lanterns, and, of course, s’mores! This is a wonderful way to introduce your kids to camping without the logistics of packing up and driving to a campground.

4. Gardening Together

Kids love getting their hands dirty, so why not start a garden together? Whether you plant flowers, veggies, or herbs, gardening is a hands-on way for kids to connect with nature. They’ll love watching their plants grow and learning about the different stages of plant life. Plus, it’s a fantastic way to teach responsibility and patience.

Father and Daughter gardening together

5. Join Scouting America

Organizations like Scouting America (formerly Boy Scouts of America) provide structured, regular outdoor activities that can foster a love for nature and build essential outdoor skills. From camping trips and nature hikes to community service projects, these programs offer many opportunities for kids to learn about the environment, leadership, and teamwork.

6. Explore Local Parks and Nature Reserves

Make it a family goal to explore local parks and nature reserves. These areas often have designated trails, educational signage, and scenic views, making them perfect for family outings. Encourage your kids to lead the way, which will boost their confidence and make them feel like true adventurers.

Biking Excursion

7. Biking Excursions

Take the fun to the trails on two wheels. Biking is an excellent way to explore more ground while keeping things active. Start with short rides around the neighborhood or local parks, then graduate to more scenic trails. It’s a fun way to enjoy the outdoors, get some exercise, and discover new places.

8. Outdoor Art Projects

Let creativity blossom with outdoor art projects. Encourage your kids to use natural materials like leaves, stones, and sticks to create art. Whether they build a sculpture or use paints to capture the landscape, creating art in nature combines creativity and exploration. It’s a great way to make the outdoors even more engaging and meaningful.

Nature Art Project

9. Bird Watching

Bird watching can be a fascinating activity for kids. Equip them with a simple pair of binoculars and a guidebook to help identify the birds they spot. Parks, gardens, and even your backyard can be excellent places to start. It’s a peaceful activity that encourages patience and attention to detail.

10. Geocaching Adventures

Geocaching is like a real-world treasure hunt. Using a smartphone or GPS device, you can search for hidden “caches” in your area. The thrill of the hunt and the reward of finding a hidden object will keep your kids excited and engaged. It’s a fun way to explore new areas and add an element of adventure to your outings.

Conclusion: Start Small and Watch the Passion Grow

These activities are simple yet effective ways to introduce your kids to the joys of outdoor adventures. Start with what feels manageable and gradually expand your horizons. The key is to keep things fun and stress-free, turning each outdoor experience into a cherished memory. Check out our Guide to Hiking with Kids, and remember, for more structured outdoor adventures, Broadmoor Outfitters offers a range of activities designed to immerse your family in the beauty of Colorado Springs. From guided hikes to birds of prey encounters, we’re here to help you and your family explore the outdoors safely and enjoyably.

What to Wear for White Water Rafting: Essential Gear for Your Adventure

What do I wear?

White water rafting is an exhilarating way to connect with nature and experience the thrill of navigating powerful rapids. However, this adventure also comes with its own set of challenges, especially when it comes to staying comfortable and safe. What you wear on the water can make a significant difference in your experience. Whether you’re paddling through calm waters or tackling intense rapids, the right gear ensures that you remain warm, protected, and ready to fully enjoy your adventure. At Wolfpack Rafting and Broadmoor Outfitters, we prioritize your safety and comfort, and this guide will help you prepare for an unforgettable day on the river.

family in proper white water rafting gear standing in front of a river.
Neoprene Wetsuit, Splash Jackets, PFDs, and Helmets on a cool day

Quick-Dry Clothing

When it comes to white water rafting, cotton is not your friend. Cotton fabric tends to absorb and retain water, which means once it gets wet, it stays wet. On a warm day, this can be uncomfortable, but on a cold day, it can become a serious issue. Wet cotton draws heat away from your body, contributing to rapid cooling and increasing your risk of hypothermia. Instead, opt for lightweight, moisture-wicking fabrics that dry quickly. Synthetics like polyester or nylon are ideal because they don’t hold moisture, helping you stay warm and comfortable, even if you get drenched in the rapids.

an example of quick drying shirt and shorts
Quick Dry Clothing

Water Shoes or Sandals

Proper footwear is essential for white water rafting. Choose water shoes or sandals with secure straps that stay on your feet. Avoid flip-flops or anything loose that could easily slip off in the water. Sturdy water shoes protect your feet from sharp rocks and help you keep your footing both in the raft and on shore. At Wolfpack Rafting, we provide neoprene booties for guests who need them. Other companies may have booties for rent. These booties offer additional warmth and protection, making them an excellent choice for colder water conditions or rocky riverbeds.

Example of sturdy shoes appropriate for white water rafting
Sturdy Shoes

Swimsuit

Wearing a swimsuit under your clothes is a no-brainer for white water rafting. You’ll be getting wet—very wet—so having a swimsuit as a base layer keeps you comfortable and ready for all the water action. It’s practical, quick-drying, and allows for easy movement as you paddle. Additionally, wearing a swimsuit makes changing at the end of the day much easier. After your rafting trip, you can quickly remove your wet wetsuit or shirt and change into dry clothes without needing to find a private space, which can be particularly convenient if the changing facilities are limited. At Wolfpack Rafting, there are riverside restrooms that provide a private changing space.

Examples of clothes to wear on a warm white water rafting day.
Appropriate Rafting Clothing

Sun Protection

Sun protection is crucial when you’re out on the water, especially at higher altitudes where UV exposure can be more intense. Even though you’ll be wearing a helmet, it’s important to apply waterproof sunscreen generously to exposed areas like your face, neck, and hands. Don’t forget to wear polarized sunglasses with a retainer strap to protect your eyes from the glare of the sun reflecting off the water. This gear will help protect your skin and eyes from the harsh sun, allowing you to enjoy the day without the worry of sunburn.

Rash Guard or Long-Sleeve Shirt

A rash guard or long-sleeve shirt serves as an additional layer of protection against the sun’s rays and helps keep you warm. Even on sunny days, the combination of water and wind can lead to a chill, so having that extra coverage can be a game-changer. Rash guards are particularly useful for preventing chafing from the life jacket and providing extra insulation on cooler days.

Neoprene Wetsuit

If you’re white water rafting in colder waters or during cooler weather, a neoprene wetsuit is a must. It provides insulation and keeps your core temperature up, ensuring that you stay warm even when you’re splashed or submerged in chilly water. These wetsuits are designed to be snug yet flexible, allowing you to paddle comfortably while maintaining warmth. At Wolfpack Rafting, we provide wetsuits for guests who would like them. Many rafting companies offer wetsuit rental packages, so if you’re rafting elsewhere, be sure to ask about availability when booking your trip.

Splash Jacket

A splash jacket is a lightweight, waterproof layer that helps protect against wind and water splashes. It’s particularly useful on cooler days or when you’re rafting through sections of the river that are particularly splashy. The jacket acts as a windbreaker, keeping you warmer and more comfortable throughout your adventure. Wolfpack Rafting provides splash jackets to guests, ensuring that you have the gear you need to stay warm and dry. With other companies, it’s important to know your comfort level and advocate for the gear you need. If you tend to get cold easily, don’t hesitate to ask for extra layers or the best options available to keep you comfortable.

family at the end of a white water rafting trip wearing the proper gear for a cooler rafting day.

Life Jacket (PFD)

Your life jacket, or personal flotation device (PFD), is your most important piece of safety equipment and is always provided by the rafting company. It’s crucial to ensure that it fits properly before you hit the water. A well-fitted PFD keeps you buoyant in the water and could be a lifesaver in the event of a fall out of the raft.

Helmet

Helmets are another essential safety item provided by the white water rafting company. Always wear a helmet to protect your head from potential impacts with rocks, the raft, or other paddles. Safety is the top priority, and a helmet is your first line of defense in case of an accident.

Final Thoughts

Proper preparation is key to enjoying a safe and thrilling white-water rafting experience. By wearing the right gear, you’ll not only be comfortable but also ready to tackle whatever the river throws your way. Remember, a well-prepared rafter is a happy rafter! So, before you embark on your adventure with Wolfpack Rafting and Broadmoor Outfitters, make sure you’ve checked off all the items on this list and don’t hesitate to give us a call if you have questions.

Gear up, stay safe, and get ready to make some unforgettable memories on the water! Book a white water rafting trip with us here: Book Now!

Taking a rest while hiking in Colorado SPrings

6 THINGS TO REMEMBER WHEN HIKING IN COLORADO

The state of Colorado is a western state with a diverse geographic area. From mountains, plains, ranges, peaks, and western shores, one can find a place to hike in Colorado.

These regions of Colorado also come with some dangers, therefore these six things to remember when hiking will help you potentially avoid them.

1. Fill up the Water Jug. Whether you are hiking a rugged mountain top in the Rocky Mountains or along the Arkansas River’s shores, drinking water is a must. If you do not hydrate well, then altitude sickness could set in. Dehydration is also a concern, especially during those hot, dry summer days. A good rule of thumb is to carry more than you think you will need.

2. Pack the Navigational Tools. Even the best hikers can get lost during an adventure. A compass and a map are great to help you find your way. Should you bring a map, make sure you can read it. To aid in not getting lost, always stay on the marked trails. Marked trails are there for your protection and the environment. Another resource to use is a trail map. This map can be at a district office of the forest ranger or in a state park, at the entrance or visitor center.

3. A Fire Source. Should you, unfortunately, encounter an emergency, you will need to start a fire. In keeping your pack light, throw in a pack of matches or a lighter. Do not forget to keep them in a waterproof container.

4. First Aid Kit. No matter if you are on a day hike or a three-day excursion, you will more than likely need a first aid kit. Hazards such as roots of trees, branches, and rocks will ruin your day when they give you a sprained ankle or cut. Colorado is full of dangers and cannot be avoided.

Some items to keep in your first aid kit are bandages, gauze, pen and paper, blister treatment, and disinfecting ointment. Should you be in a group, everyone needs their own if they get lost from the group.

5. Food. Hiking just an hour with a lightweight bag can burn more calories than you could imagine. One can quickly burn 500 without blinking an eye. Hiking can lower your sodium level quickly. After all, when hiking, you will sweat! Salty foods are great to help curb this when that sick or tired feeling comes on.

High energy bars, candy, and fruit are other sources to help with hunger. Fruit does get heavy, so consider some fruit trail mix or dried fruit.

6. Rain Protection, Sun Protection, and Shelter. Colorado gets afternoon thunderstorms that pop up rather frequently. Having a waterproof raincoat or tent is a great way to help battle the potential hypothermia that may occur should you get wet.

While in the Rockies, the summer thunderstorms are more prevalent, they do occur elsewhere. Being prepared for anything will make your return to the trailhead a pleasant adventure.

Do not forget a hat, sunglasses, and sunscreen. You can get a sunburn from cooler temperatures in high elevations. If there is snow on the ground, your sunglasses will help you. The sun does reflect off of the snow.

Do not forget to factor in frequent breaks and pace yourself during your amazing Colorado hiking adventure. Remember also to respect the environment, wildlife, and beauty surrounding you.


Hiking in Colorado

Why Hike The Regions of Rocky Mountain National Park

Rocky Mountain National Park is between Estes Park and Grand Lake with the Continental Divide’s east and west slopes going directly through the park’s center. With more than 125 hiking trails and trailheads spread across five geographic locations and ranging in easy to extreme, there is something for everyone in Rocky Mountain National Park.

Paved trails, mountain adventures, and backcountry campsites await those seeking a day or overnight experience to one of over a hundred campsites. Many of the trails are only accessible in the summer due to hazardous weather conditions during the winter.

REGION 1

The trails found in this region is where Grand Lake is. This area is also known as the Continental Divide’s West side. Lush green expansive meadows and lots of moose are prevalent here.

Are you a lake lover? Great, put on your best pair of hiking boots and make the seven miles up Bowen Lake. As you start on an even surface, there is a gradual climb that weaves its way through a thick forest.

After experiencing the beauty of Bowen Lake, continue and head through Bowen Pass. Note that this seven-and-a-half-mile hike is also steep. When you reach your destination, you will be in the Arapaho National Forest.

Those that brought their tents and other backcountry supplies will enjoy hiking less than 14 miles across the East Inlet Trail, around Lone Pine Lake, and through a forest to reach Lake Verna. There are two sites here available for camping.

When you love to push things to the extreme, you will find the 30 miles of Continental Divide National Scenic Trail the place to be. This trail traverse’s magnificent scenery, tundra, and views of Rocky Mountain National Park.

Do not worry if you are not a thrill-seeking hiker and are looking for something more relaxing. Adams Falls is less than a half-mile and the most popular stroll that takes you thru river scenery, aspen, pine forest, and rocks of grey and black that jut out along the way.

Wildlife lovers, especially those hunting moose for some outstanding photo shots, will love Coyote Valley. Follow along the Colorado River banks as you enjoy your early morning stroll searching for the best view to snap that million-dollar picture. This one-mile hike is paved, allows strollers, and offers picnic tables for those who wish to come and eat lunch.

REGION 2

The Alpine Region is the name given to Region 2. High elevations and incredible vistas await you here.

Pack up your picnic basket and head to Lake Irene, where eight picnic tables await you and your family. This easy, one-mile trip offers up incredible rolling meadows to venture out and see. Enjoy a couple of hours or the whole day, as you also explore the nearby forest land.

Another excellent walk takes you a little over one mile. Tombstone Ridge is rated easy and comes with some incredible views.

If you have traveled to the Rocky Mountain National Park to view the Continental Divide, the 5.8-mile hike Mount Ida is for you. Break out the camera and snap some pictures of the expansive views that take your breath away. Thunderstorms are frequent on this hike, so pack a raincoat.

REGION 3

The northern part of the Rocky Mountain National Park is a wilderness paradise. Trails in Region 3 range from a charming 0.15 miles up to some intense hiking going 9.5 miles.

Alluvial Fan is the beautiful short hike that will lead you to a river and show you how the Lawn Lake Flood affected it. This easy, 20 feet elevation hike is a paradise for the lovers of water. Bring your lunch to enjoy at one of the picnic tables as you watch the kiddos splashing around in the stream nearby.

Should you decide to venture out in the winter, head up the Chasm Falls trails. The road is closed during this time, so you will need to park at the West Alluvial Fan lot. Bring the kids along, as this is a kid-friendly hike.

REGION 4

Region 4 plays host to Rocky Mountain National Parks most visited and famous trails. Here you will enjoy trails with easy access, superb views, and lakes galore.

Bear Lake Loop is an incredible fast hike that takes you past spectacular peak views to the base of Flattop Mountain and Hallett Peak. Bear Lake Loop is an extremely popular trail in Rocky Mountain National Park. Do not let the 0.6 miles fool you, though, as Bear Lake is not entirely flat, and rocks are throughout the dirt.

If you are seeking out a destination wedding location, then look no more. Bear Lake Loop can host your fabulous day, as it accommodates anywhere from 2-35.

Dream Lake is an excellent place for a family hike. As this is the most photographed lake in Rocky Mountain National Park, you will be kicking yourself if you forget the camera. Capture images of Nymph Lake and Hallett Peak, Glacier Gorge, or Flattop Mountain. If this dreamy location is not enough, hike on over to Emerald Lake, just 0.7 miles away.

REGION 5

The south side of Estes Park is considered Region 5. The iconic fourteener, Longs Peak, is located here. Impressive waterfalls and backcountry areas are also in this Wild Basin area.

Lily Lake is a one-mile trail that offers incredible views of Mount Meeker and Longs Peak. Bring your fishing pole and stop at the fishing pier to try your luck.

CONCLUSION

These are just a few of the incredible trails that one can enjoy either solo or with family in Rocky Mountain National Park. Amazing views, superb vistas, challenging, and easy hikes provide an incredible incentive to hike in this national park.

Should you need some more enticement, do not forget about Trail Ridge Road. Trails along this area bisect Rocky Mountain National Park and supply outstanding views as you go over the top of the Continental Divide.

If you need help planning any Colorado or Colorado Springs family of corporate adventures, don’t hesitate to give the experts at Broadmoor Outfitters a call.

Giraffe feeding is a favorite at the Cheyenne Mountain Zoo

6 Best Stops at the Cheyenne Mountain Zoo

Cheyenne Mountain Zoo is America’s highest zoo, above sea level at the astonishing elevation of 6,800 feet and proudly calls Colorado Springs home. Over 800 animals, with 30 being on the endangered list, reside here. Come for the exquisite line up of exotic species but also some breathtaking Colorado City views.

The zoo is easily reached from downtown Colorado Springs and conveniently located less than ten minutes from The Broadmoor.

WHAT TO DO AT THE ZOO

Visiting a zoo does not have to constitute just walking around, looking at animals in their habitat. When you visit Cheyenne Mountain Zoo, you can immerse yourself and family in some outstanding experiences.

Modern Art

A modern art exhibit at the zoo? Yes, after all, it is the perfect location.  Forty species of reptiles enjoy as close to their natural habits as possible at Scutes Family Gallery.

Giraffe Feeding

Head over to the African Rift Valley exhibit and check out a giraffe as up close as possible. Grab some of their favorite delicacies, hold out your hand, and be mesmerized as they enjoy what they love right out of your hand. More herd of giraffe live at Cheyenne Mountain Zoo than at any other zoo.

After you have finished feeding the stately tall creatures, check out African lions, Grant’s Zebra, and a host of others that call this beautiful exhibit their home.

Carousel Riding

Unlock your inner child and take a ride on the historic Carousel that has been entertaining kids of all ages since 1937.

Mountaineer Sky Ride Experience

Tame your love, or fear, of heights when you climb on the Mountaineer Sky Ride. Keep your eyes open as you zoom above the Amur tigers, grizzly bears, and Rocky Mountain goats.

Will Rogers Shrine of the Sun

Your zoo ticket gives you access to this historical monument that is less than 1.5 miles from the zoo entrance. As you take an incredible family ride up the Russell Tutt Scenic Highway, you will soon be greeted by exquisite architecture. Standing at an elevation of 8,136, the top deck of the shrine, which is dedicated to Will Rogers, provides spectacular views of the Pikes Peak Region and Colorado Springs, so do not forget the camera!

 SHOP THE ZOO

While nothing can replace a photo of you or your loved one snuggled up to the glass barrier as a grizzly bear swims in front of you, having a plush version of this mighty creature, or a tiger comes close.

Explore the gift shop located inside the entrance of the zoo for some incredible finds. T-shirts, toys, water bottles, and a plush animal collection that one would die for awaits your visit. Grab a baby giraffe, hug a flamingo, squeeze a moose, slither around with an Anaconda snake, or touch them all. Plush animals are an excellent way to remember your Cheyenne Mountain Zoo experience.

Are you looking for something more unique for the kiddos, then pick up an Aussie hat and let them feel like they are head zookeeper? To accompany this role, do not forget the Monocular.

CONCLUSION

These are just a few of the remarkable experiences that Cheyenne Mountain Zoo has to offer. Some other incredible experiences are a custom animal experience, celebrate your birthday with a zoo animal birthday party, and so much more. Whether you come for an hour to relax on your lunch break or explore all day, there is something here for everyone.

EXPLORING THE BROADMOOR SOARING ADVENTURE

EXPLORING THE BROADMOOR SOARING ADVENTURE

Seven Falls is home to the best Colorado Springs Zip Line Tours. This is where the fun begins for guests visiting Colorado Springs, The Garden of the Gods, USAFA and The Broadmoor who are looking for a little heart-racing fun. Imagine adventures high above the ground and cruising across The Grandest Mile of Scenery in Colorado. Zip-lining has never been more fun than in the South Cheyenne Canyon. Seclusion is what you get when you book The Broadmoor Soaring Adventure.

BROADMOOR SOARING ADVENTURE AT SEVEN FALLS

Ten zip-lines spread across two different courses ranging from 300 feet to an impressive 1,800 feet give you a fantastic view of waterfalls and South Cheyenne Canyon. Also included here are hiking trails that are moderately challenging, rope bridges, and a sizeable 180-foot rappel controlled, of course.

It is perfectly fine if you do not have any experience with zip-lines. After a cool 15-minute ground school, Broadmoor Soaring Adventure expert guides will have you set up with the appropriate harness, gloves, the correct helmet, and instructional guidelines on how to navigate the courses carefully and safely.  In no time, you will be soaring above magnificent views as you come across suspension bridges that make you feel like you are in an Indiana Jones film.

Ensuring that there is no environmental impact to the spectacular Seven Falls, Broadmoor Outfitters and The Broadmoor entrusted the expertise of Bonsai Design to create remarkable adventures in the air.

THE COURSES

Woods Course

The Woods Course will give guests astonishing views of pine trees, winding creeks, Midnight Falls, a natural granite arch, and hiking trails that venture down to the falls. Guides will ensure that you have a memory building outing from when you start going up the mountain to the time you set off for your heart-stopping adventurous moment.

Fins Course

The Fins Course provides guests an opportunity to ease into enjoying their adventure. Five zip-lines become progressively longer as you fly high above the impressive steep drops, jagged cliffs, and rock formations that are unique in their own sense. Other incredible features of this course include numerous custom-built suspension bridges and being able to rappel down to the canyon floor when you end.

COURSE INFORMATION

The Broadmoor Soaring Adventure is a hot outdoor recreational adventure for guests visiting Colorado Springs, The Garden of the Gods, USAFA and The Broadmoor; therefore, reservations made in advance are required. For full excitement, book the four-hour option. If you are not sure about soaring through the air for that long, consider booking The Woods course or Finns course separately.

As you are booking your sensational outdoor adventure, remember that tax and gratuity are not included in the course fee, but the Seven Falls park entry fee is. Also, weight restrictions for any of the courses are 90 and 250 pounds. Children that are between the ages of eight and fourteen are welcome as long as an adult comes along.

CONCLUSION

The Broadmoor Soaring Adventure is a thrilling outdoor recreational adventure that offers The Broadmoor guests a once in a lifetime experience. Ten zip-lines, rope bridges, hiking, and rappelling opportunities will have you planning your next trip with friends, family, or your next office retreat.

Colorado Springs Team Building

Take Your Corporate Tour to the Next Level with Broadmoor Outfitters

Take Your Corporate Tour to the Next Level with Broadmoor Outfitters With companies across the world affected by COVID-19, now may be the perfect time to wrangle your team together in order to refocus and regroup. Colorado Springs and the sprawling natural beauty that surrounds it make for the ultimate backdrop for corporate tours, outings, and team trainings. Broadmoor Outfitters offers a variety of specially-designed tours to help businesses get the most out of their time in Colorado Springs. Our corporate tours are expertly crafted to provide a once-in-a-lifetime experience your team will never forget. Here are a few ways Broadmoor Outfitters can assist teams hoping to enjoy some outdoor adventure. Colorado Springs Corporate Tours With over 27 years of experience dealing with high-level clients and guests across all industries, we know a thing or two about engaging a group. First, our team works closely with yours to determine your goals. Whether your it’s improving trust among your team, boosting morale, or strengthening your team dynamic, we’ll use your goals to craft a 5-star event that sees your team embark on a day of adventure. Activities are designed to drive cooperation and teamwork each step of the way, and with activities suitable for all fitness levels, no member of your team is ever left behind. Carefully Crafted Experiences Trust in your tour guide is important. Our Colorado Springs outdoor tours are guided by a team of professional facilitators with years of experience in planning adventures for groups of all sizes. Whether you are set on an action-packed day that challenges your team, or a calming, serene escape that focuses on improving mental health, our team at Broadmoor Outfitters is dedicated to delivering an experience that captures the essence of Colorado Springs and the great outdoors. Colorado Springs Outdoor Team Building Activities There’s no shortage of adventure when you’re visiting Colorado Springs. At Broadmoor Outfitters, we specialize in crafting thrilling experiences, and we do this with careful consideration for our guests’ comfort and safety. Groups that book with Broadmoor Outfitters can select from exciting outdoor activities like zip-lining, rock climbing, or even falconry. Each of these encourages cooperation, trust, and teamwork to help you make the most of your team-building trip. The Famous Broadmoor Hunt  Scavenger hunts are a great way to bring your entire team together for a common goal. Our version, the Broadmoor Hunt, is a modern twist on the classic. Gather your team for a heart-pumping day of scouring around Colorado Springs in search of adventure. This app-based activity is both challenging and fun for participants, with a great sense of accomplishment after completion. Other team activities, such as The Amazing Race, FireQuest, and Battle of the Bridges, are a sure way to keep guests engaged for hours. Are you ready to take your next corporate event or team-building day to the next level? Call us to start planning your next day in Colorado Springs.
Geocaching with Broadmoor Outfitters in Colorado Springs

Geocaching: A Family Adventure or Solo Fun in the Colorado Springs Area

Are you looking for an outdoor recreational activity in the Colorado Springs area that could be a family adventure or solo fun? Then look no further than geocaching. Getting started is simple; all you need is your mobile device, GPS receiver, or some other navigational tool to look up the coordinates.

What is a Geocache

For the normal geocache, first, a geocacher places a logbook (including pen or pencil), items to trade in a container, and records the coordinates of that cache. Next, the coordinates and location become shared on a listing site. Those that geocache then finds the coordinates on the site take their GPS devices and go hunting. Once they find the location and item, enter the entries into the logbook and online.


In the world of geocaching, treasures, or swag, are items that do not have a substantial monetary value. They may, though, be personal to those who hide the loot. Typical swag includes books, little toys, coins, hat pins, and different types of buttons.


Do not forget to return the cache to where you found it so that others may find it. The item, except the logbook, pen, or pencil, may be taken if you have something to leave in its place.


Some caches that move from one place to another. Hitchhikers, as referred to, usually have detailed goals assigned to their items. Some examples include placing the cache xx amount of distance from home.


Travel Bugs and Geocoins are specific caches that have websites for people to log and follow where they have been online.


Almost anything is as a cache except for food, drugs, andanything illegal. Refer to the rules of the listing site.


Some great places to geocache in and around Colorado Springs include the Fallen Firefighter Memorial or the Nature Center at Garden of the Gods.


Types of Geocache


Challenge Cache

This type of geocache requires the geocacher to complete individual geocaching goals before they can record that they found the cache. Possible tasks would include finding five caches in a particular category or locating a cache every day for 30 days.


Geocaching.com classifies this type of cache part of the Mystery cache. Other listing sites may consider the challenge cache a standalone class.


Mystery Cache

Solve a puzzle or locate specific information, and you will be participating in a mystery cache to find precisely where your cache is.


Night Cache

You guessed it! Break out the flashlights, see where the reflectors take you and find that prize location! Some listing sites may classify this as a type of mystery cache.


Multi-Cache

The Multi-cache occurs in one or more steps. Locate one, gather the coordinates, move to the next, again recording coordinates, and finally finding the container with the logbook.


Traveling Cache

After you have obtained the coordinates from the listing site, head out, find the cache, and then take it somewhere else. You would record the coordinates of where you placed the item so that the next geocacher can continue the cycle.


Location Cache

Location caches are close to a scavenger hunt. The geocacher has a description of what to locate. The item you are searching for could be a yellow fire hydrant, brown door, red and black boat, or pink flamingo. After finding the article, use your GPS device and record the location. A picture of both the object and device occurs as well. No one else can use this location as a find.


Traditional Cache

Traditional caches are widespread and common. A container with a logbook is standard, as are exact coordinates for locating the cache.


Conclusion

Geocaching is an excellent outdoor recreational activity to do with family or solo in the Colorado Springs area. Broadmoor Outfitters  can help you get going. Whatever site listing you decide on utilizing your observation and detective skills will be put to the test looking for those containers.

Geocaching is a great way to social distance exercise at the same time. So, gather up the family or lace up your tennis shoes and have some fun. Contact Broadmoor Outfitters  for more information and how to get going.