Reasons to Hike with a Guide in the Winter

If you are looking for a fun way to experience the outdoors this winter, Colorado Springs is the perfect place to be. There are so many exciting activities available all year round in our beautiful state, and winter hiking is one particularly wonderful way to experience the beauty of Mother Nature up close and personal.

The Wonders of Winter Hiking 

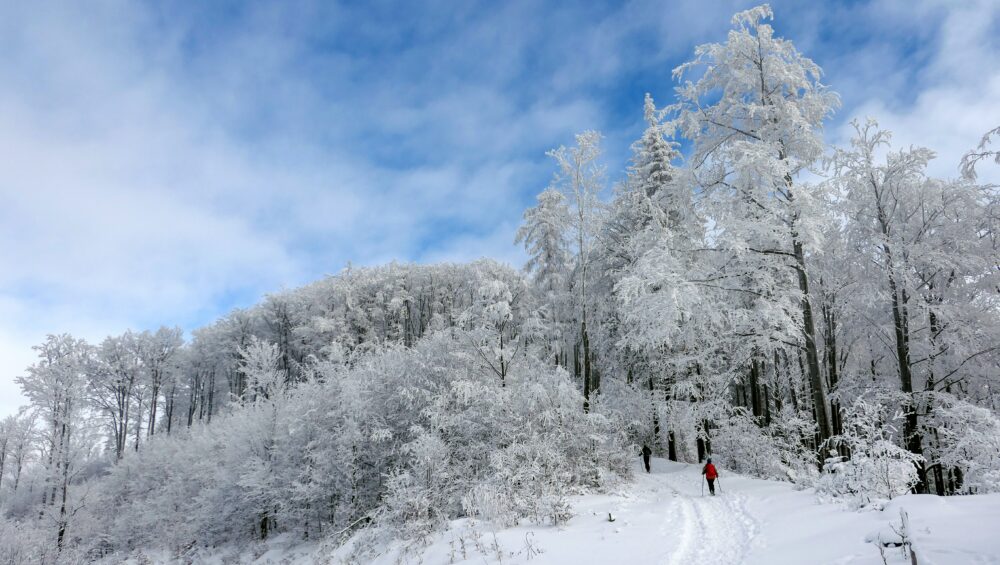
If you have never gone hiking in the snow before, there are a myriad of reasons, both aesthetic and healthful, to lace up your boots. Hiking in the snow is quite a workout, burning extra calories as your body works to stay warm. It also provides a needed boost of sunlight in those darker months, as the snow reflects those happy rays back up to you. Finally, with mosquitos or other pesky insects hiding from the cold, you can enjoy the hike free from bites and other annoyances. 

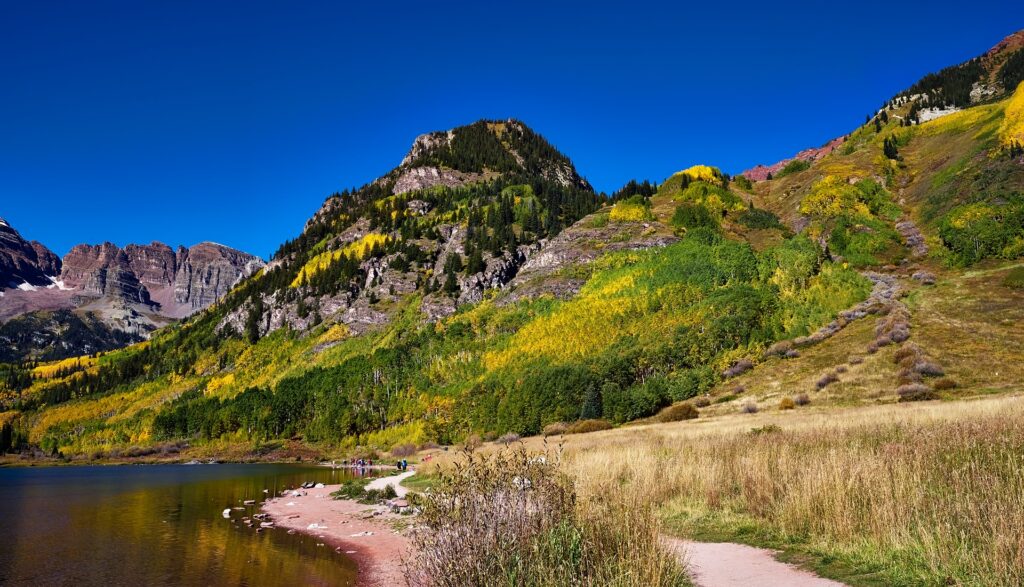
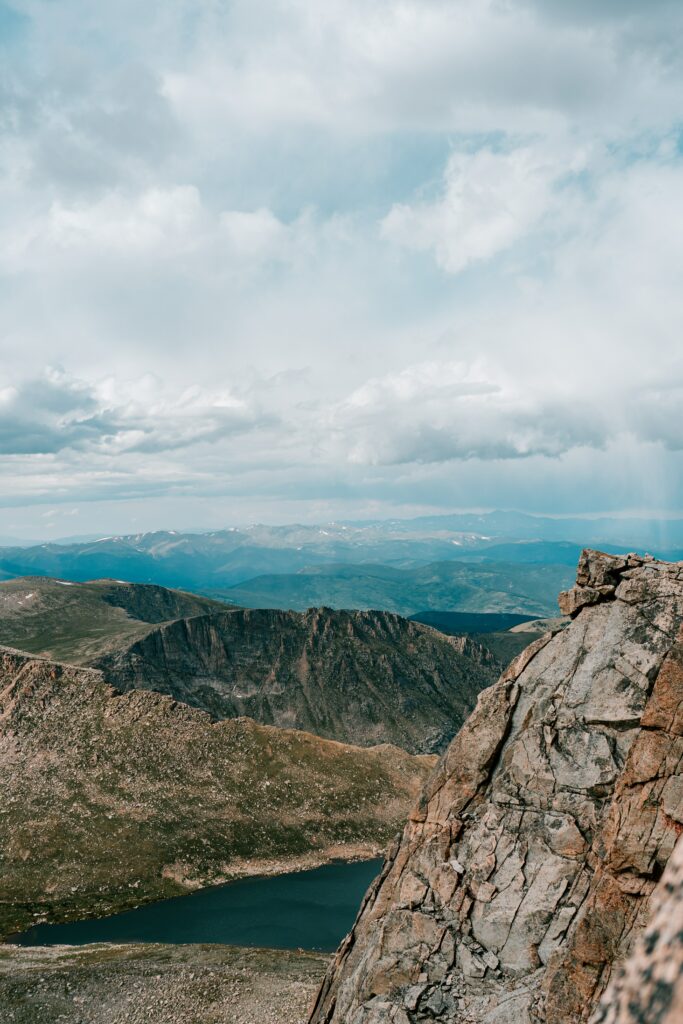
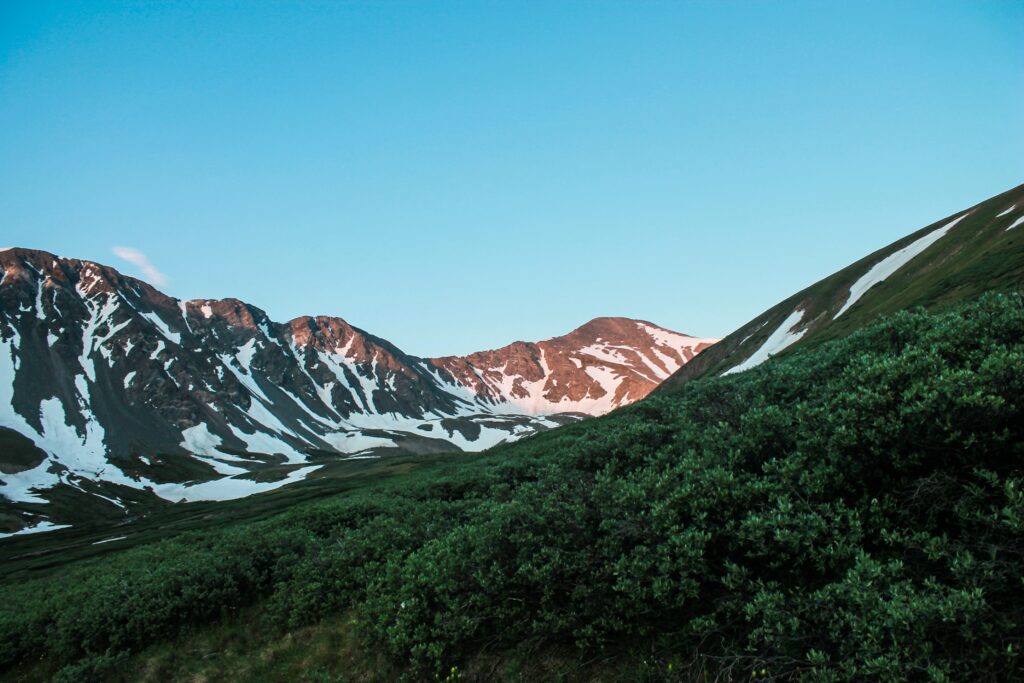
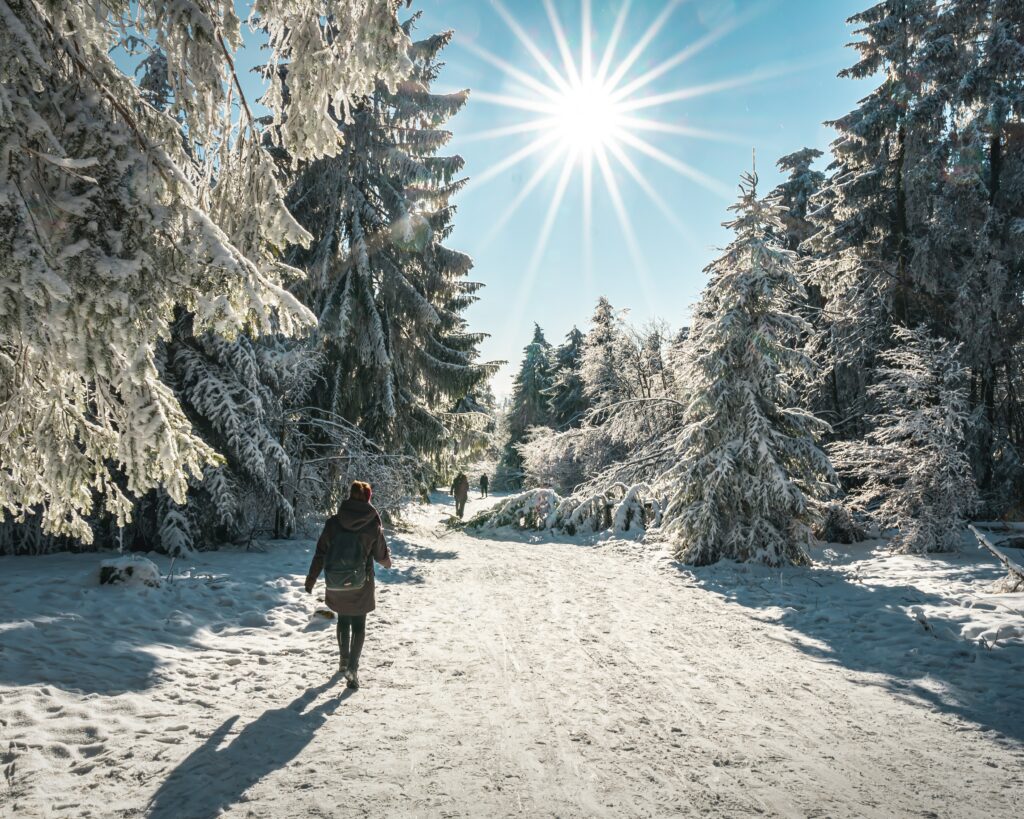
Aesthetically speaking, winter is a gorgeous time to enjoy the beauty of Colorado Springs. The is snow hanging from our pine and spruce trees. There’s soft powder crunching under your feet, and the feeling of crisp winter air in your chest. Winter hiking is a wonderful way to get outdoors and enjoy the snow and scenery. 

Photo by Raja Sen on Unsplash

Benefits of Hiking with a Guide in the Winter

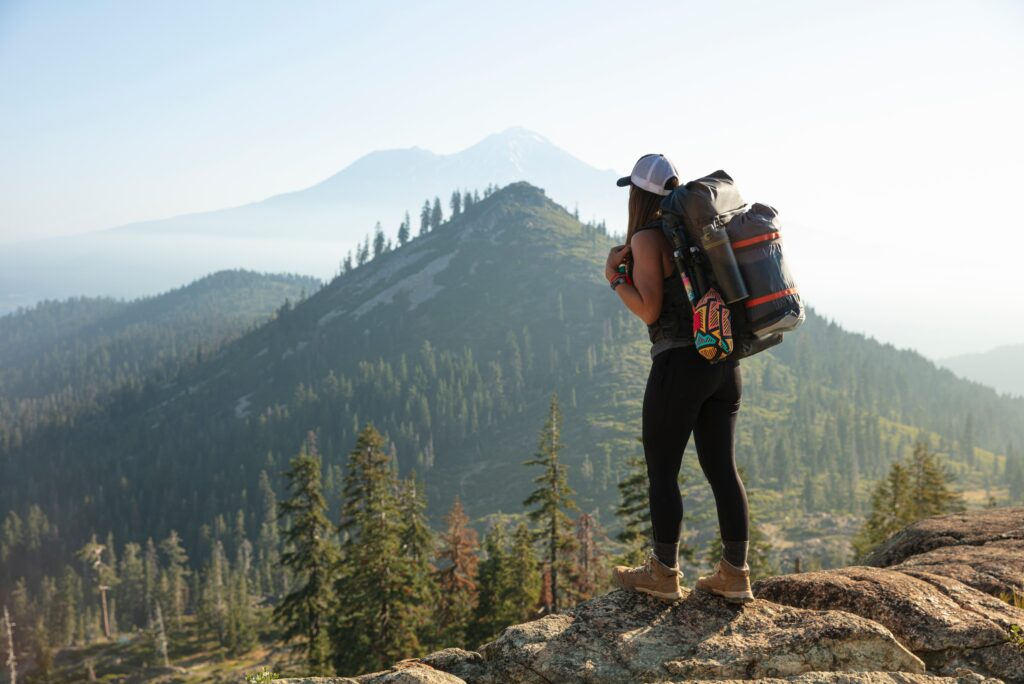
Before you hit the trails, one thing you should consider is starting with a guided hike. Whether you are an adventurous type who does not let the snow stop them or a tentative reader desperate to get out of the house, all hikers should start with guided hiking in Colorado Springs. There are a lot of benefits of hiking with a professional guide. Both for your safety and your overall enjoyment of the trip.

Winter Weather Conditions Can Be Unpredictably Dangerous

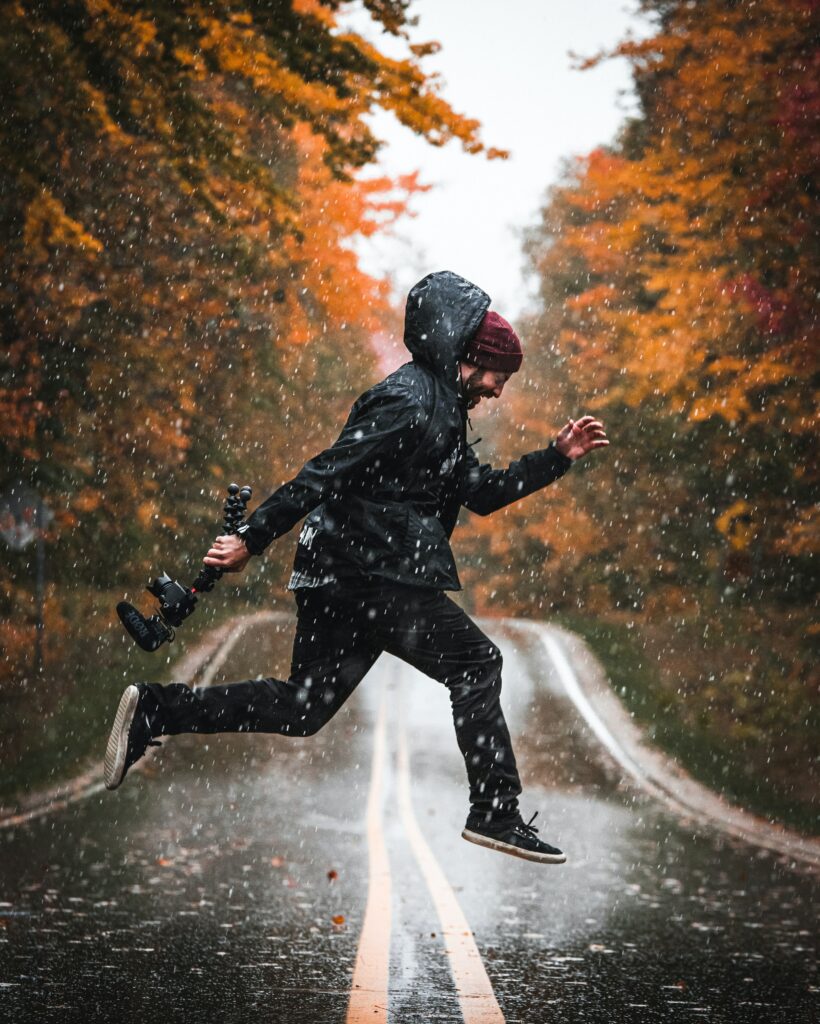
Especially in a mountainous region like Colorado Springs, weather conditions can change quickly and without warning. Not only can you get stuck in an unanticipated flurry or white-out, but you could be contending with temperature drops. Hiking with a guide is a great way to ensure that you time your trip for the best weather possible and that you are well prepared for the unexpected.

Hiking in the Winter Happens on a Different Schedule

Another aspect of a winter hike that beginners are not used to is the proper pace and timeline to keep. Unlike a trail adventure in warmer conditions, winter hikers should snack while walking or take only short breaks. It is very easy to rest for too long while eating and bring your body temperature down a dangerous amount. With all the calories it takes to heat up again, you could actually end up burning more calories than you took in with your snack! A guide can provide the proper timekeeping to help make sure that you stay warm and safe on the trail. These and other helpful winter hiking safety tips will ensure that you and your family have a safe guided hike.

Proper Clothing Will Keep You Warm and Happy on a Winter Hike

On a related note, dressing for a winter hike can be sort of counterintuitive. This is because you should start a hike slightly cold, as your body will warm up faster. You also need to dress wisely to avoid sweating, as this would make you colder. If you don’t know how to dress on a winter hike, having a guide’s instruction can be the difference between a cold, dangerous trip and a pleasant one.

Photo by Bernard Hermant on Unsplash

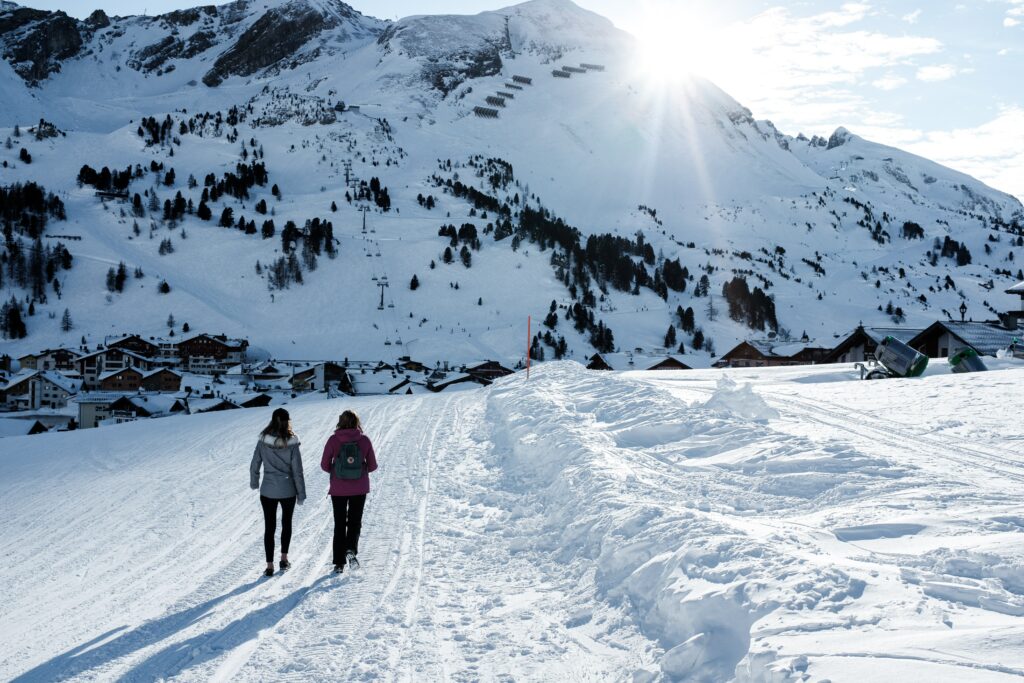
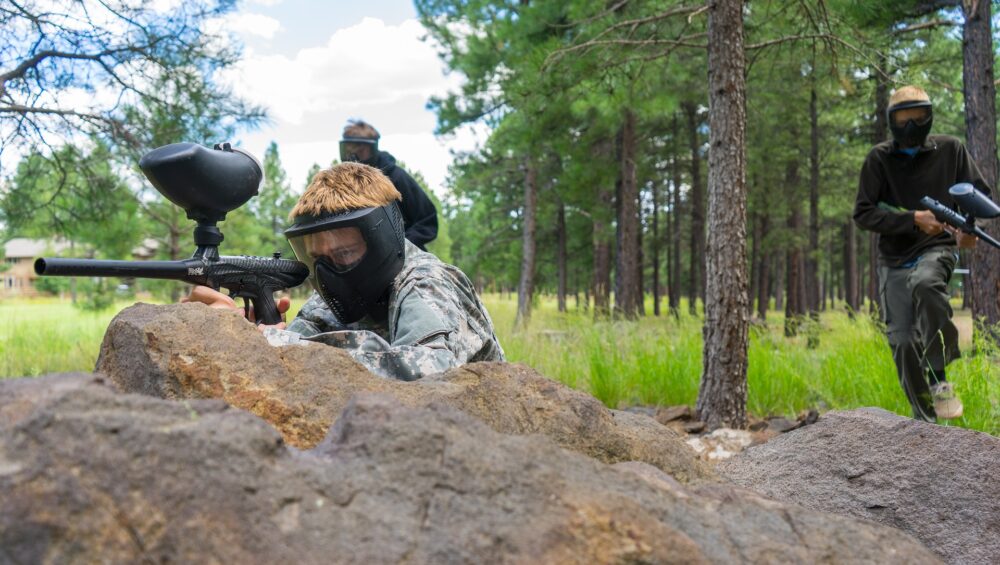
A Guided Hike is a Great Family Activity

If you have children, a guided hike is just one winter activity for the whole family to consider. While you may let your kids run around and explore in other seasons, it is especially important to have a guide in the winter. Your guided hike will be tailored to your family member’s ages and skill levels. You can rest assured that your kids are in safe hands while you enjoy some quality bonding in nature.

Guided Hiking Can Be a Great Opportunity for Experiential Education 

Maybe you are just looking to get out of the house and enjoy some quiet time with your own thoughts. Then again, maybe you just have yet to experience the amazing breadth of knowledge that naturalists and other outdoors people have. A winter hike in beautiful Colorado Springs can be a great time to see elk, deer, and other non-hibernating animals. Professional guides can also teach about local ecosystems, identify trees, and the history of Colorado Springs’ awe-inspiring geological formations. If you have yet to go on a guided hike of the area, this winter is the perfect time to get a Wikipedia-level lesson on all the interesting things our natural environment has to offer. 

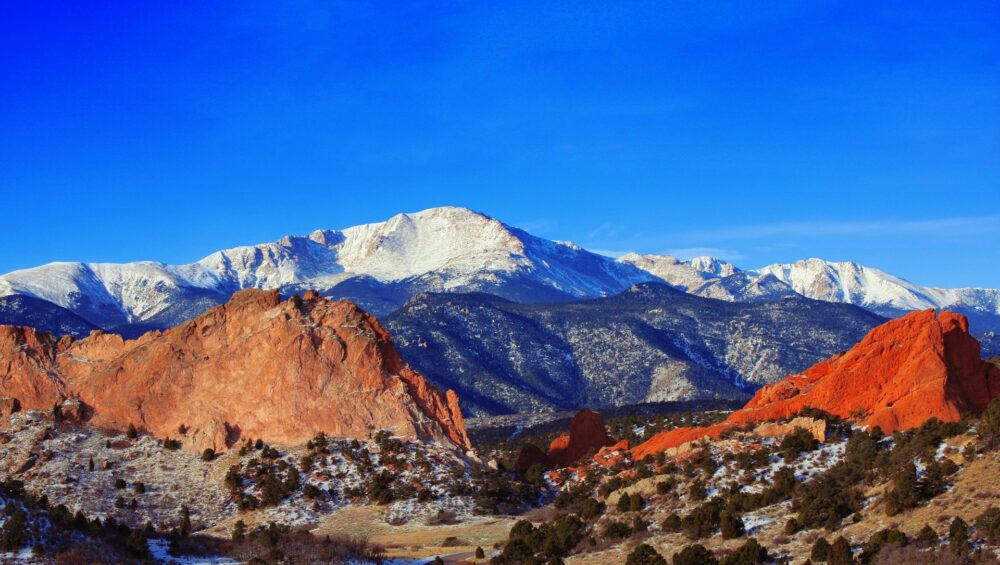
Winter hiking in Colorado Springs provides so many breathtaking vistas to behold. As if Garden of the Gods is not already stunning enough, don’t miss it with that layer of pure-white snow. North Cheyenne Cañon Park similarly turns into a winter wonderland with unlimited picture-perfect views. Hello, family portrait for next year’s holiday cards!


A winter hike has so many benefits for your mind and body, your relationship with our planet, and your social media feed. When you are ready to head up the trail, be sure to reserve your spot on a guided hike. Having a professional with you will keep everyone safe and leave you with a rejuvenated appreciation for the world around you. There really is no better way to experience wintertime in Colorado Springs!

How to Layer for Fall Hiking in Colorado

If you are a big hiker or nature enthusiast, you know that fall is arguably the best season for hiking. The energizing nip of crisp air on your face, the colorful foliage as nature buckles down for winter – personally, it’s my favorite time of year. If you are hoping to enjoy fall hiking here in Colorado, you certainly need to know how to layer for hiking. These tips on proper layering techniques will help ensure you are prepared for the weather you might encounter on a fall hike in the beautiful Rocky Mountains.

The Principles of Layering for Colorado’s Fall Weather

The first thing to know is that the term ‘layering’ doesn’t mean just wearing more and more clothes. In order to brave the elements and stay comfortable and safe, you need to wear the proper clothes in the proper order. First, the base layer serves to keep you dry when you sweat. Next, the middle layer is insulating to help retain body heat in Colorado’s colder weather. Finally, the outer layer protects against the harsher conditions you may experience on a fall hike.

We’ll start at the base layer and work our way out, so you understand what fabrics are best for each layer. We’ll also learn how to layer for the specifics of fall weather in Colorado and the hikes you are planning. As you likely know, fall in Colorado can range from warm to very cold. The weather can change quickly, and conditions can worsen with no warning. Especially if you are hiking to a higher elevation, say summiting one of the state’s many fourteeners, you will find temperatures and precipitation requiring a much different outfit than what you had on in the parking lot. It’s important to dress and pack well, as you will learn.

Image by David Mark from Pixabay

The Wicking Base Layer 

You can think of the base layer as the clothing that touches your skin. This is more than just a t-shirt and shorts or a long-sleeved shirt and long underwear. Remember that the base layer also includes underwear (boxers, briefs, bras, and more) and socks.

The main goal of the base layer is to wick away moisture and keep your skin dry. As you know, sweat cools you down, stealing your body heat much faster than a cold breeze. In the hot summer, you may not mind a cotton shirt absorbing and holding your sweat. In the fall and winter, though, cotton is at the top of the “Absolutely Not” list. Seriously, it’s one of the most important hiking safety tips of all time.

Photo by Stephen Leonardi on Unsplash

The Best Base Layer Materials

The best synthetic fabrics for base layers are polyester and nylon. You likely have these in your closet as your running or exercise clothes. You can go by personal preference, as long as it is ‘moisture-wicking,’ ‘dry-fit,’ or the like. Again, make sure your bras and boxers meet these criteria, too. A great natural fabric, especially for socks, is wool, as it wicks moisture and provides great heat retention. Wool is good for clothing, too, if you are in colder temperatures or hiking Colorado’s many mountains. It will keep you warm without being too heavy, but it also is more expensive than synthetic fabrics.

There are a few different options in terms of the weights of base layers, and you can decide based on the time of year and anticipated weather. No matter what you choose, your base layer should always be moisture-wicking. This layer should also fit snugly against your skin. You don’t want gaps between your skin and the material as it won’t be able to wick sweat away as effectively. A tight but comfortable base layer will keep your skin dry, which in turn will keep you warm and prevent skin irritation, like chafing and blisters.

Base Layering Tips for Colorado’s Fall Weather

Base layers are organized by weight; lightweight or ultra-lightweight for hotter weather and midweight or heavyweight for the colder months. This might mean shorts and a t-shirt in early fall when Colorado temperatures are in the 50s or 60s, and long johns and long-sleeved shirts in late fall when it’ll be in the 30s and 40s on average. Because the weather can change quickly here, especially in the mountains, I prefer to keep my base layer light and carry a heavier middle layer in my day pack.

Remember, the goal of this layer is moisture-wicking, where warmth is the job of the middle layer. That’s why lighter base layers make sense in Colorado’s fall conditions. You can always add more clothes later if the temperature drops up the mountain. The one exception to this is socks. My feet always run cold, so I highly recommend a thick wool sock for fall hikes, ones that cover your ankles! As long as your hiking boots are breathable, your feet will be happily dry and warm.

The Insulating Middle Layer

Next up, it is the job of the middle layer to retain body heat and keep you warm in colder temperatures. Where base layers tend to be stretchy and thin, you’ll recognize your middle layer pieces by their soft and puffy qualities. When shopping, you may see middle layer options listed as ‘soft shells.’ Depending on the weather, you can choose a lighter or heavier option, so it’s a good idea to have multiple middle layer pieces if you are planning on frequent fall hikes in Colorado. 

Photo by lucas Favre on Unsplash

Middle Layer Options for Fall in Colorado

For lighter wear, you might go with a microfleece pullover or hoodie. Fleece is nice because it dries quickly and stays warm. It is also breathable so that you won’t overheat. This is a great option for the early fall in Colorado. However, if it’s windy, you will definitely need an outer shell, or you’ll find the breathability a weakness.

For the colder days, a down jacket is the best middle layer. I am partial to synthetic down, both for the animals and the water resistance. Down insulated jackets don’t hold up well when wet, but they compress better than synthetic down if you need to save space in your pack. If a softshell is all you plan on wearing, I’d recommend one with a hood, so your neck stays warm. In this case, though, you will definitely need to pack a waterproof outer shell, as the fall in Colorado sees rain or snow regularly.

The Defending Outer Layer

Once you’ve got the dry and warm inner layers set, the last part of knowing how to layer for hiking is protecting against the elements. Fall in Colorado can be all over the map in terms of weather conditions, and this outer shell is key for making sure the wind, rain, and snow don’t penetrate and leave you cold and miserable.

Photo by Daniel Lincoln on Unsplash

The Best Outer Layers for Colorado’s Fall Season

For both jackets and pants, you will want waterproof outerwear. Trust me when I say that “water-resistant” is not good enough! If you get caught in a downpour, a water-resistant layer is going to soak and leave you shivering. Also, be sure it has a hood. Rain dripping down your neck and back is truly an uncomfortable and dangerous way to spend a hike.

In addition to water- and wind-proof material, your outer layer should also be breathable. These pieces are more expensive, but if you plan on exploring Colorado’s fall hikes, this feature is a must. Breathable jackets, ones with zippers in the armpits and such, are key for longer hikes because they keep you dry while you work hard. If the inner layers are wicking away moisture, but your outer layer isn’t breathable, the moisture will condense against it and soak your middle layer. You need breathability to allow fresh air to move through and clear out the humidity. 

One final feature of a good outer layer is durability. Since this layer has to brave the elements, you want something that will stand up to a bit of a beating, especially for pants that you’ll sit on, trek through the brush, and more. If your outer layer gets torn, you’ll have leaks when it rains. And with the expensive nature of these clothes, you want to make sure to buy something that is a good investment.

Packing for a Fall Hike in the Rockies

Now that you know the options for layering clothes, let’s talk about how to pack for day hiking in Colorado. Seasoned hikers are always carrying day packs, and it’s not just for the granola bars. 

When you start at the trailhead, you might be in your base layer and outer shell. Mid-fall in Colorado is comfortable, and you might reason that it’ll only be a few hours. But as you hike up the mountain, the weather changes. It will get colder and windier the higher you go, with less protection from surrounding trees. You may even get an unexpected shower or snow flurry. 

Before you leave, always check the weather to know what to expect. Then, pack that insulating middle layer anyway. A light fleece or down jacket won’t take up much room or add much weight, and you will be glad you have it when you need it. Wearing appropriate clothing and knowing how to layer for hiking will keep you comfortable and protected during your hike so you can enjoy mother nature, no matter what weather she brings.

What is the Easiest 14er to Hike in Colorado?

Did you know that Colorado has 58 peaks above 14,000’ elevation?

Commonly known as the ‘fourteeners,’ these mountains are popular bucket list items for serious hikers. If you are just getting started on your mountaineering journey, you’ll be glad to know that there are a handful of beginner 14er hikes with lesser mileage and elevation gain.

Best Colorado 14ers for Beginners

Check out this list of routes, and enjoy the beauty of our state’s mountainous terrain!

Pikes Peak

  • Location: Parking available at the Devil’s Playground Trailhead
  • Starting Elevation: 12,932’
  • Summit Elevation: 14,115’
  • Elevation Gain: 1,200’
  • Round Trip Mileage: 5.5 miles
  • Class: 1
  • Standard Route: East Slopes route starts at Devil’s Playground

First on this list is the well-trodden Pikes Peak. This popular destination is a super-accessible twelve miles west of Colorado Springs! The wildflower-adorned trail is used for all sorts of activities including mountain biking and horseback riding. Your pup will be glad to know that dogs are allowed on this trail. 


The trail has loads of picnic spots and observation points along the way, so it’s also great for a leisurely hike that’s not focused on summiting. Pikes Peak is arguably the easiest 14er in Colorado, but if you are looking for a little more help on your first mountaineering trip, be sure to check out our Pikes Peak guided hiking tour.

Handies Peak

  • Location: American Basin parking lot
  • Starting Elevation: 11,619’
  • Summit Elevation: 14,058’
  • Elevation Gain: 2,430’
  • Round Trip Mileage: 5.3 miles
  • Class: 1
  • Standard Route: Western route along the American Basin Trail

Located in the San Juan Mountain Range, Handies Peak is one of the easiest 14ers to hike. There aren’t many options with fewer miles or less elevation gain. Handies Peak isn’t just known for its relative ease, though. The San Juan Range is a beautiful place to spend time, and it is more underrated (aka less busy!) than the Colorado 14ers further north and easier for Denverites to visit.

Closest to Silverton, CO, this trail is accessible for vehicles with four-wheel drive and decent clearance. Otherwise, two-wheel drives are advised to park in the first lot and hike the mile to the trailhead. 

Mount Sherman

  • Location: 9700 4 Mile Creek Rd, Fairplay, CO 80440 
  • Starting Elevation: 12,009’
  • Summit Elevation: 14,035’
  • Elevation Gain: 2,020’
  • Round Trip Mileage: 5.2 miles
  • Class: 2
  • Standard Route: Southwest Ridge along Four Mile Creek Road

Part of the Mosquito Range, Mount Sherman is one of the best fourteeners in the Colorado Springs area. The most commonly traveled Southwest Ridge route is a direct ascent, and views from the top are amazing. You’ll have a gorgeous vista of two of Colorado’s highest peaks, Mount Elbert and Mount Massive. 

Other cool sites along the way include mining ruins, mill structures, and prospecting caves. This is an excellent beginner 14er hike for budding mountaineers and amateur geologists alike!

Mount Evans

  • Location: start at Summit Lake Park 
  • Starting Elevation: 12,850’
  • Summit Elevation: 14,265’
  • Elevation Gain: 1,400’
  • Round Trip Mileage: 5.5 miles
  • Class: 2
  • Standard Route: Northwest route, summiting Mount Spalding (13,842’) along the way

The 12th highest summit in the state, Mount Evans is part of the Rockies’ Front Range. Accessible from Idaho Springs, this peak is about a two-hour drive from Colorado Springs. Mount Evans is a very popular destination, in part due to its relatively tame elevation gain. 

This hike has a lot of cool bonuses, namely the beautiful Summit Lake and the population of local mountain goats. There are also a number of other trails you can take to summit Mount Evans, including a short walk from your car because, yes, there is a parking lot at the top.

Mount Bierstadt

  • Location: Parking available at the Bierstadt Trailhead 
  • Starting Elevation: 11,633’ (trail first descends to 11,470’)
  • Summit Elevation: 14,065’
  • Elevation Gain: 2,600’
  • Round Trip Mileage: 7.8 miles
  • Class: 2
  • Standard Route: Western route via the Bierstadt Trail

The western (and slightly smaller) neighbor of Mount Evans, Mount Bierstadt is known as one of the most iconic of the 14ers. Being an hour’s drive from Denver, the hike is quite popular and often crowded. Aim for a visit during the week or off-peak season in order to get a little space to yourself on the trail.

Quandary Peak

  • Location: Quandary Peak Trailhead parking by reservation only 
  • Starting Elevation: 10,930’ 
  • Summit Elevation: 14,265’
  • Elevation Gain: 3,340’
  • Round Trip Mileage: 6.6 miles
  • Class: 1
  • Standard Route: East Ridge route, Quandary Peak Trail

Regarded as the least technical peak, Quandary is one of the most accessible, easiest 14ers in Colorado. The standard East Ridge route is a straight shot to the top where you’ll have outstanding views of Breckenridge and other peaks. 

This peak is part of the Tenmile Range, and one of the more robust elevation gains on this list. Still, it is a Class 1 hike and boasts a short-ish round-trip mileage. That might explain why it is often the most traveled, seeing 50,000 visitors last year! If you’re in the Colorado Springs area, you’ll definitely want to check out Quandary Peak. 

Grays and Torreys Peaks

  • Location: Grays Peak Trail 
  • Starting Elevation: 11,280’
  • Summit Elevation: 14,278’ (Grays) & 14,275’ (Torreys)
  • Elevation Gain: 3,600
  • Round Trip Mileage: 8.6 miles (for both summits)
  • Class: 2
  • Standard Route: Northeast Route forks off to both summits

Grays and Torreys Peaks are decidedly not the easiest on this list. However, they are quite popular and for good reason. First, located in the Front Range, these peaks are just past Mount Evans and around ninety minutes from Denver.

More importantly, the two peaks have a saddle ridge between them, meaning it’s very doable to summit both peaks in one day. It only adds a mile and a half to the hike! If you are new to mountaineering and looking to cross some of Colorado’s 14ers off your list quickly, these make a great two-in-one opportunity.

Other popular beginner 14er hikes in Colorado include Mount Antero (14,275’) in the Sawatch Range and Mount Elbert (14,439’) which is the highest summit in the Rocky Mountains.

With 58 fourteeners in the state, you have a long list to choose from. Be sure to do your research, including double-checking parking reservations, learning the signs of altitude sickness, and planning around weather forecasts. No matter where you choose to hike, these Colorado peaks are sure to provide exciting trails and outstanding views.

Are E-Bikes Worth It?

Electric mountain bikes are taking the trail riding world by storm. These popular bikes provide incredible power and speed and allow longer rides, harder workouts, and greener commutes.

However, the high cost compared to analog bikes has many riders wondering if electric mountain bikes are really worth it.

Here are the pros and cons of electric bikes so you can decide for yourself.

Advantages of e-bikes

For Speed Lovers

The most obvious advantage of an electric mountain bike is the power that doesn’t come from your legs. Unlike analog mountain bikes, e-bikes boost your riding to give you more speed. This can reduce the time it takes to get uphill and increase your speed on the trail. If you are an adrenaline junkie or love trying tricks, this extra speed can be a game-changer. 

Explore New Trails

The other benefit of more speed is that you can go further. With less work for more range, you can enjoy a longer ride to places you couldn’t previously visit. The added power will also help you through tough sections that used to require a dismount. If you want to unlock more trails and explore new territory, an e-bike is a great way to get there.

A Sturdy Ride

The power output of the electric mountain bike is also helpful for stability and capability. With added weight from batteries and more, e-bikes are significantly heavier than standard mountain bikes. This weight is located near the bottom of the bike’s frame, creating a low center of gravity that you’ll love. With added stability, you can enjoy easier and more predictable handling from your bike. This can bring a sense of safety for newer riders, which will give you more confidence to explore and enjoy the ride.

In addition to feeling more comfortable on the bike, you can also expect to be more capable on the trail. There are certain obstacles and maneuvers that not even the best mountain bikers can manage. With an electric mountain bike, though, you can have more power to clear some of those tough technical problems. It still might be hard, but at least an e-bike can keep you on the pedals. On the other hand, the heavier the bike, the tougher sharp turns will be. However, this isn’t necessarily a downside because there are lightweight e-bikes you should check out if you want to stay flexible on the trail.

An Endurance Workout

If you are afraid that you’ll get a worse workout from an electric bike, remember that you’ll go further. Yes, if you were to do the same route and use an e-bike, you would be working out less. But that’s not a fair comparison. With an e-bike, you’ll bike further, climb higher, and go faster. The result is that you will need less strength and more endurance. This provides a different workout, one that you can mix into your current routine. Plus, if you still want that leg burn, you can always minimize the power assist from the e-bike. 

A Better Commute

One of the biggest advantages of e-bikes is how versatile they are. The bike’s assistance can make a ten-mile ride feel like five. This means that the bike commute to work you could never manage is suddenly within reach. If you’ve been looking to ditch your car for errands and local trips, an electric bike is a perfect way to do so.

Not only are they easier to park, but e-bikes take less than a dollar a day to charge. That’s substantially cheaper than gas and better for the planet, too. When you consider the cost of an e-bike, you have to factor in this amazing versatility. It is more expensive than an analog bike but so much cheaper than a car. Using an e-bike for your commute will keep you active and help save the planet.

Potential downsides of e-bikes

You may find that you enjoy the difficulty of mountain biking and the effort required to get uphill. E-bikes are a great way to minimize the uphill effort and get you to the fun parts faster. But if you love that struggle, you may not find electric mountain bikes worth it. 

There is an additional cost to going electric, both because e-bikes are more expensive upfront and because their maintenance is more expensive than analog mountain bikes. More parts mean more opportunity for something to break or get damaged on the trail. You also need to charge the bike, but these costs are very low.

If you think you might use your e-bike for commuting or enjoying longer rides, these costs are definitely worth it. The initial expense will be mitigated by what you will save on gas money, and you will get extra hours of entertainment compared to riding your old mountain bike.

The Best Ways to Test Ride

If you’re not sure if an electric mountain bike is right for you, the best thing to do is try one out in real life. Rentals and tours are great ways to accomplish this. With a day rental, you can explore on your own, visit trails you know and love, and have the opportunity to try an e-bike before you buy one.

For those of you who need a little more guidance, a tour is the perfect way to discover if an electric mountain bike is right for you. An e-bike tour allows you to learn from professionals, get advice on your technique, and build confidence in your riding ability. You’ll understand how e-bikes differ from standard mountain bikes and how to best take advantage of their power. Look no further than Colorado Springs e-bike tours for your chance to check out an e-bike while enjoying the beauty of The Springs!

So, Is It Worth It?

Whether an e-bike is worth the cost depends on your values. If you particularly enjoy the challenge of biking uphill, an e-bike might not appeal to you. For the rest of us, electric mountain bikes are exciting additions to the world of trail riding. E-bikes offer riders more speed, more power, and more adventure. Plus, people looking for an eco-friendly daily commute can certainly enjoy the investment of an e-bike. Check one out for yourself on a tour and experience the thrill of electric mountain biking!

Paintballing Safety Tips

Paintball is a fun and exciting team sport. It requires strategy and cooperation, and it certainly gets players physically active. However, it can also be dangerous, and that’s why it’s important to learn and follow basic safety rules. In this guide, we’ll go over the key paintball safety tips you need to know before getting on the field. Once you’ve read through this list, you’ll be ready to enjoy the best paintball Colorado Springs has to offer.

1: Always Wear Eye Protection

Safety goggles are an absolute must when paintballing. Getting hit with a paintball on your skin can be a little painful, but it won’t cause a severe injury. Especially if you are wearing padding, you’ll just end up with a little bump or red area. A paintball to the eye, however, can cause very serious injury. This is why safety goggles are the number one paintball safety tip. A full-face shield, which includes protection for your eyes and breathing holes for your nose and mouth, is even better. But either way, the primary paintball safety rule is to keep them on at all times.

If you need to adjust your eye protection, you will have to exit the field of play or go to a designated “safe zone” if there is one. Do not take your goggles off anywhere else, even if you think you are hidden. 

If you have your own goggles, be aware that the lenses need to be replaced according to the manufacturer’s guidelines, and you should never play with cracked or old lenses. Also, be sure only to use dedicated goggles cleaner, as other products could be corrosive to the lenses and wear them down.

Image by Evan Cornman from Pixabay

2: Look Where You Shoot & Do Not Hit Anyone Without Eye Protection

It is very important to make sure that you are not “firing blind.” Beginner paintballers tend to close their eyes when shooting. This is totally natural! However, you will be allowed to practice firing at a marker before the competition starts so you can get used to the feeling. 

You always need to look where your marker is aiming before you shoot. First, make sure that you are within the field of play. Then be sure that the person you are aiming at, and everyone else around, is wearing proper protective equipment. Next, check that the person you are aiming at does not have their hands up. (As you will read below, this means that they are already out and exiting the playing field.) Finally, make sure you are aiming at the person’s torso, not their face.

If anyone does not have goggles on, your marker should be pointed down at the ground! Do not shoot even if the person without eye protection is on the side and not where you are aiming. Paintball markers are not the most precise shots, and someone could easily run in front of your target at the last second. This is why if you see someone without goggles on, you need to lower your paintball marker until they exit the field of play.

3. Give a Player the Opportunity to Surrender & Be a Good Sport

One common paintball safety practice is the idea of surrendering. If a player is close to you, within twenty feet when outdoors, you should give them the chance to surrender before shooting them. Getting hit by a paintball at such close range can be quite painful, so it is sportsmanlike to announce yourself and not actually shoot the person. You can yell “Surrender” or “You’re out” to tell the person that you got them, even though you aren’t firing your marker.

On this same note, if someone has snuck up on you and lets you surrender, do it. It would be poor sportsmanship to run away and say you are still in the game because you didn’t get hit. Trust us when we say that you do not want to get hit at such close range. When someone lets you surrender, put your hands up and exit the field.

4. Do Not Shoot Anything but Your Target

If you need to practice shooting, you will have access to a practice range and targets. Otherwise, you should only shoot at other players or targets in the field of play. Do not shoot at any wildlife, passing cars, or structures outside of the playing area. 

For one thing, it may be illegal, but it is also dangerous. You could hurt someone, and the paint in paintballs can leave behind a stain. Shooting when you are not supposed to is an easy way to end your day early by getting kicked out. Be respectful of your surroundings and only shoot at designated targets.

Photo by Pengyi zhang on Unsplash

5. Always Use a Barrel Sock and the Safety

There are two features of a marker that both make for essential paintball safety tips. First, a barrel sock is exactly what it sounds like: a sock that goes over the head of your marker’s barrel. This blocks paintballs from exiting the barrel if the marker accidentally discharges. Leave the barrel sock on until play is about to begin, and put it back on the barrel immediately once you exit the field.

The second is the safety, which you toggle on or off to be able to shoot. Anytime you are not on an active playing field, your safety should be in the ‘on’ position. This will make it impossible to pull the trigger, thus preventing you from accidentally discharging the marker.

6. Exit with Your Hands Up

When you are ready to exit the playing field (because you were hit, surrendered, or just need a break), you must announce yourself. To make it clear to other players that you are leaving, you should yell “out” and raise your hands and your paintball marker above your head. 

Be sure to walk off the field of play quickly and directly. If you are looking around at other players or zigzagging through obstacles, other players might mistakenly shoot you. Keep your hands up the whole time and keep your goggles on. 

Once you are out of the playing zone, you should first turn the marker’s safety on and put the barrel sock back on. Once your marker is protected, then you can take your goggles off, relax, and watch the rest of the game.

Photo by Vince Fleming on Unsplash

7. Take Cover to Rest and Reload

The best way to avoid getting hit is to ensure you don’t spend too much time in the open. Here are a couple key paintball tips for finding good positions on the field. First, if you can see in all directions, it means you are visible in all directions. And second, just because you can’t see someone doesn’t mean they can’t see you. It just means they are better hidden than you are. 

You want to keep yourself hidden, but not overly so. After all, if you stay in one spot all day, you’ll never hit anyone. Moving among protected areas is actually safer, too, as your opponents are doing the same to find you. You should run between trees or shelters, also called bunkers, and rest only when you are in a protected spot.

When you need to reload, find a safe spot, get low, and keep your back to a wall. You may be tempted to fire a shot to make sure your marker works, but be warned that the sound will give away your position!

8. Do Not Attempt to Fix a Paintball Marker Yourself

If your marker is jammed or having an issue, do not try to make any modifications on your own. You should bring it to staff or experts to fix it for you. Attempting any maintenance can be very dangerous for you and other players.

For one thing, markers may still have a charge after the CO2 canister has been removed. The proper way to take off a CO2 canister is to fire the marker (with no paintballs in it) as you remove the tank in order to release built-up air as you go. However, if you are renting a marker for the day, this is not even something you will have to worry about. You should leave the canister alone completely and tell staff if something is wrong.

Similarly, a paintball marker that you rent will come ready with proper settings. For outdoor challenges, markers should be set to around 300 feet per second (fps). Some ranges might require a slightly lower velocity, like 285 fps. Whatever it is, do not make any modifications to the marker.

Image by Christoph Schütz from Pixabay

9. Stretch & Drink Lots of Water

Paintballing requires a lot of physical activity. With all that running around, it’s important to stretch beforehand like you would for any other sport. Make sure you stay hydrated and listen to your body if you get too hot or tired. A paintball competition could last for a couple of hours, depending on the type of play and the number of players. Take a break when you need it so you can head back on the field strong and ready.

10: Have Fun!

Paintballing is an awesome outdoor activity to enjoy with a group of friends. With just a little preparation and practice, you can start an invigorating new sport that lasts for hours at a time. These tips will help ensure your paintball challenge is fun, safe, and injury-free. Now get out there and enjoy the game!

How to Start Mountain Biking

Are you looking to add some excitement to your cycling? Mountain biking is an awesome exercise, adventure, and challenge all in one. The trail can be intimidating to beginners, but you’ve come to the right place to learn how to start mountain biking. If you know how to ride a bike, you’ve got all the fundamentals you need.

In this beginner’s guide to mountain biking, we’ve got everything else you should know before hitting the trail.

Photo by Joanne Reed from Pexels

What is Mountain Biking?

First and foremost, you should know some fundamental differences between road cycling and mountain biking. This is because mountain biking involves biking over uneven terrain, like rocks and tree roots, creating a need for a very different type of bike than those used for road cycling.

Unlike road bikes, mountain bikes have wider tires with improved grip and suspension frames to provide a smoother ride over bumpy terrain. You can imagine how a rigid frame wouldn’t fare well on a mountain biking trail, so the suspension is key to a comfortable ride. Mountain biking frames also allow riders to sit taller to have better visibility of the trail. 

Finally, it’s best to use platform pedals on a mountain bike, which means you don’t clip in. Most important for beginners, you should be prepared to fall or jump off the bike at any time when going down a trail for the first time as you can pick up speed incredibly fast. Strapping into your pedals can actually be more dangerous on a mountain bike.

Gear Needed for Mountain Biking

The Essentials

Obviously, you’ll need a mountain bike. As noted above, you should make sure your bike has partial or full suspension for the most comfortable ride. Some mountain bikers use rigid bikes, as they use less energy for climbing the mountain. However, this beginner’s guide to mountain biking recommends at least partial suspension to absorb some of those bumps on the trail. This will keep you safer and more comfortable as you get used to the difference between road cycling and mountain biking.

The other essential items for getting started mountain biking are protective equipment. As a beginner, you should expect to fall, and protecting yourself will save you from a rough descent that ends early and in pain. A helmet is an absolute must while mountain biking, as there are plenty of hazards, you could hit your head on if you fall. Unlike road biking, mountain biking helmets are full face, with visors to protect your eyes from tree branches and debris. Elbow and knee pads are other important pieces of gear to keep you safe on the trail.

What to Wear on a Mountain Biking Trail

Dress according to the weather to stay comfortable and safe on the trail. It’s best to wear a dry-fit shirt that will wick away moisture and keep you dry. Mountain biking shorts with chamois padding (aka butt pads) are key for absorbing some bumps and reducing saddle fatigue.

Similarly, gloves are essential for keeping your hands and wrists comfortable all day long. Mountain biking with bare hands can cause blisters, and when you fall, you could cut yourself. Gloves will protect your palms and offer a little padding and warmth. 

Finally, a comfortable pair of light boots are the best alternative to mountain biking shoes if you’re learning how to start mountain biking. You want something with a stiff sole for stronger pedaling, breathable material to keep your feet dry, and a grippy textured bottom for good contact with the pedals. Another alternative is skate shoes, though these tend to be less breathable. High-rise shoes are also helpful to protect your feet and ankles in the event of a fall.

Packing Smart for a Mountain Biking Trip

There are many things you should pack on a mountain biking trip, and this is where there is a big difference between mountain bike rentals vs tours for beginners. When you rent a bike, you’ll just get a mountain bike and a helmet. On a mountain biking tour for beginners, you’ll have a guide who will pack all the essential gear and help ensure you have a great day.

The most important bit of gear is a map! If you’re heading out without a guide, please don’t forget a hard copy of your directions. It’s important to not rely on electronics on the trail: there likely won’t be cell service, your battery could die on an unexpectedly long day, or a hard fall could break your phone. Know the trail and the day’s plan before heading out, and always bring emergency gear in case you get lost. 

Next, a small first aid kit is essential for a beginner mountain biking trip since we all fall when we’re learning. As far as getting your bike back in shape after a crash, there are a few things you’ll need. You should always carry a spare tube or two and a bike pump. Unlike biking on the road, potential tire busters are all around on a mountain biking trail. Knowing how to replace a tire and having the gear you need will keep you prepared and safe on the trail.

A bike multi-tool is another must, especially for longer rides. Even with suspension frames, mountain biking is a bumpy ride, and it’s normal to need to make small adjustments or fixes over the course of the day. A bike multi-tool with the right size hex wrenches for your bike will make a huge difference in your trip’s success.

Finally, when you pack food and water for your day on the trail, go ahead and pack extra. It’s easy to get a little lost or delayed due to a mechanical issue. Expect a mountain biking trip to last longer than an equivalent road cycling trip, and pack accordingly. If you have one, a hydration pack is a great way to make sure you’ve got enough water for a long day. We promise: it’s worth the extra weight to have the energy and hydration needed to finish strong.

Photo by Chris Henry on Unsplash

Mountain Biking Tips and Techniques

Get a guide

Finding a tour that specifically offers mountain biking for beginners is a great first step. You’ll get in-person professional advice on how to start mountain biking, and you’ll start down an easier trail that is suitable for beginners.

Stretch Well and Don’t Tense Up

When going over obstacles on the trail, it’s important to stay loose and let the bike ride free. Hover your butt over the seat, so you don’t feel every bump, and keep your elbows high and your knees out so you can go with the flow.

Stay Balanced 

A big difference between road and mountain biking is the need to shift your weight around to stay on the bike. On a flat road, you can pretty much sit back and relax. On a mountain bike, you need to make constant small adjustments – side to side and front to back – to maintain your center of gravity and not tip over. It’s sort of like riding a bull, hopefully with less bucking.

Keep a Steady Pace

One thing that will help you manage rough terrain is maintaining an even speed with your brakes and gears. Big obstacles are frightening, and it makes sense that you’ll want to slam on the brakes sometimes. But that’s a good way to go over the handlebars (via the front brakes) or fishtail and skid out (on the back brake). 

Gentle use of the brakes will help you keep an even speed and give your bike the momentum it needs to get over bumps without too much work on your part. You can also move between gears in response to terrain changes that you see down the line. Paying attention and shifting early will make your life easier and help you keep your momentum. 

Chin Up, Eyes Down

Paying attention while on the trail is key. Road cycling offers consistent, smooth terrain, and you have time to look around, enjoy the scenery, and even change the song on your phone. As a beginner mountain biker, you need to stay vigilant by watching the trail in front of you. Look past obstacles and focus your eyes on where you want the bike to go. This will help you naturally bike around danger without needing to think too much about it. 

Proper biking posture will also keep you focused and safe. Mountain bike frames keep riders in a more upward stance for a reason. You want to keep your head up, looking down the trail at future terrain. This will give you time to prepare and react to potential obstacles. Just like driving, focus your attention a few seconds down the trail and use both your central and peripheral vision. This way, you can see the whole trail, including problem areas and safer alternate routes.

Have Fun!

Now that you know what to wear and pack and how to start mountain biking, you’re ready for your first trail experience. We hope you are feeling confident and excited to explore this rugged alternative to road biking. Thanks for checking out this beginner’s guide to mountain biking.

Have a safe and amazing time on a mountain biking for beginners guided tour!

Beginners Guide to Stand Up Paddleboarding

Beginners Guide to Stand Up Paddleboarding

If you’ve ever watched people gracefully paddling on water and wondered how to stand up paddleboard, you’ve come to the right place. Stand up paddleboarding is a fun way to enjoy the outdoors, and it’s easy for beginners to learn. Check out our stand up paddleboarding tips below, and when you’re ready to join us, book your spot in our Stand Up Paddleboard Tour in Colorado Springs.

What Is Stand Up Paddleboarding

Stand up paddleboarding involves standing on a paddleboard, which is not unlike a surfboard, and using a paddle to propel yourself across the water. Unlike surfing, however, these boards are wide and stable, so it’s easier to stay upright. Beginner paddleboards are usually 10’6” long and 31” wide. They are easy to maneuver and don’t require as much balance as you might think. Plus, the benefits of learning how to stand up paddleboard are totally worth the potential of falling off in front of your kids.

Image by ivabalk from Pixabay

There are plenty of benefits to this fun watersport. First, stand up paddleboarding is an excellent full-body workout, using core muscles for balance and paddling. Second, it’s a great way to enjoy the beauty that Colorado Springs has to offer. You can paddleboard on a river, ocean, or – as we do here – a lake. Since you are standing, you can easily take in the sights while relaxing on the water. Finally, it’s a fun social activity for friends and families. This is an excellent adventure for older kids to tackle alone, and little ones can stand on a board with a parent.

Gear Needed for Stand Up Paddleboarding

Your Paddleboard 

There are three required pieces of equipment for learning how to stand up paddleboard, and we provide them all on our tours. The first is a paddleboard, and we use only high-quality and reliable boards. These solid boards with slip-proof coating are ideal stand up paddleboards for beginners to learn on. All boards come with a velcro leash to secure around your ankle. This prevents the board from drifting away if (and when) you tackle a tumble into the water. 

The Paddle 

The second is a paddle, and our lightweight paddles are comfortable to use. The paddles are adjustable and should be nine or ten inches taller than you. One simple trick for sizing your paddle is to raise your hand straight up above your head and put the paddle handle in your palm. When you can comfortably grip the paddle from this position, that’s the perfect height for you. It’s easy to learn how to use the paddle to navigate through the water, and our Stand Up Paddleboarding Tour in Colorado Springs covers this and other techniques. 

Personal Flotation Device (PFD)

The third piece of gear is a personal flotation device (PFD), which is essential while paddleboarding. A PFD allows you to stay safe while paddleboarding over deeper waters, and it also makes it easier to remount the paddleboard from the water. PFDs come in multiple sizes for adults and children, so be sure to get one that fits snugly without being restrictive. 

Finally, let’s talk about clothing. If it’s cold, you may want a wet suit or rash guard. You can also wear water shoes to keep your feet warm while paddleboarding. Make sure to pick shoes that will stay on (flip flops are sure to get lost) and won’t slip on wet surfaces. In warmer weather, don’t forget to lather up with sunscreen before hitting the water.

Image by Dimitris Vetsikas from Pixabay

Stand Up Paddleboarding Tips and Techniques 

When you first get on the water, you’ll do so from a kneeling position. Having your center of gravity a little lower keeps you more balanced and prevents falling in shallow waters. You can stay kneeling or sitting the whole time, but then you wouldn’t be stand up paddleboarding. What’s the fun in that? So the first thing you need to learn about how to stand up paddleboard is, well, standing up!

Standing Up on Your Paddleboard

The key to standing up on a paddleboard is to go slowly from kneeling, to squatting, to standing. When you stand from a kneeling position on solid ground, you move all your body weight to one foot and then the other. If you tried this on a paddleboard, you would tip over and end up in the water. This is an easy enough mistake to make, but it’s also avoidable if you know the proper technique!

Photo by Elise Bunting from Pexels

To maintain your balance, first move into a low squat to keep your center of gravity closer to the paddleboard. It’s easiest to put down your paddle first – across the paddleboard in front of you. Then, place a hand (or both) on the board while you move into a squat. Place your foot in the same place your knee just left to ensure balance and stability in your stance. 

Once you’ve made it to a low squat, you can stand straight up. Don’t forget to bring the paddle with you! Now standing, make sure your feet are hip-width apart with your toes facing forward. Keep your knees bent and engage your core for balance. This is especially important while paddling, which is next on the list.

How to Paddle a Stand Up Paddleboard

First, let’s go over the proper technique for holding a paddle. If the paddle is to the right of your board, your left hand should be on top, holding the T-grip in your fist. Place your right hand a few feet down the shaft. To keep the paddleboard moving straight, switch sides every few strokes. When you do this, also change your hand positions so the opposite hand is always on top. 

The Forward Stroke 

Let’s start moving with a forward stroke. Both of your arms should be fully extended, with your top arm parallel to the board and your bottom arm at a forty-five-degree angle. The angle of the paddle blade should point away from you. Bury the whole blade in the water to get maximum power with each stroke. Be sure to pull your paddle back as far as you can; try to get your body past the paddle before you take it out of the water for the next stroke.

Image by thelester from Pixabay

Reverse Stroke 

Once you’ve got the forward stroke down, you can also do a reverse stroke. As the name implies, it’s just the forward stroke backward with the paddle starting next to or slightly behind you. Make sure to bend your knees and engage your core! Doing so provides stability and power as well as protecting your back from injury in this twisted position. You’ll most often use the reverse stroke for stopping or slowing down.

The Sweep Stroke – For Turning 

The last aspect to paddling a stand up paddleboard for beginners is the sweep stroke. This stroke allows you to turn quickly, even when your board is standing still. Start by placing the paddle near the nose of your board with the blade perpendicular to the paddleboard. Then, using your legs and hips for power, sweep the paddle in a semicircle backward towards the tail of your board. This motion will cause you to turn away from the paddle. If you do a reverse stroke, starting at the tail and sweeping toward the nose, you will turn toward the paddle. 

This technique gives you a couple of options for turning in the water. If you want to turn to the right, for example, you can do a sweep stroke on the left side of the board or a reverse sweep on the right.

How to Get Back on a Stand Up Paddleboard from the Water

The last of our stand up paddleboard tips, especially important for beginners, is how to get back onto a board after you’ve fallen in the water. The first step is to locate your paddle and place it across the nose of your paddleboard. If it has drifted too far away, you’ll need to get back on your stand up paddleboard first (since you’re connected via leash) and paddle with your hands to retrieve it.

Join an intro to paddleboarding class today!